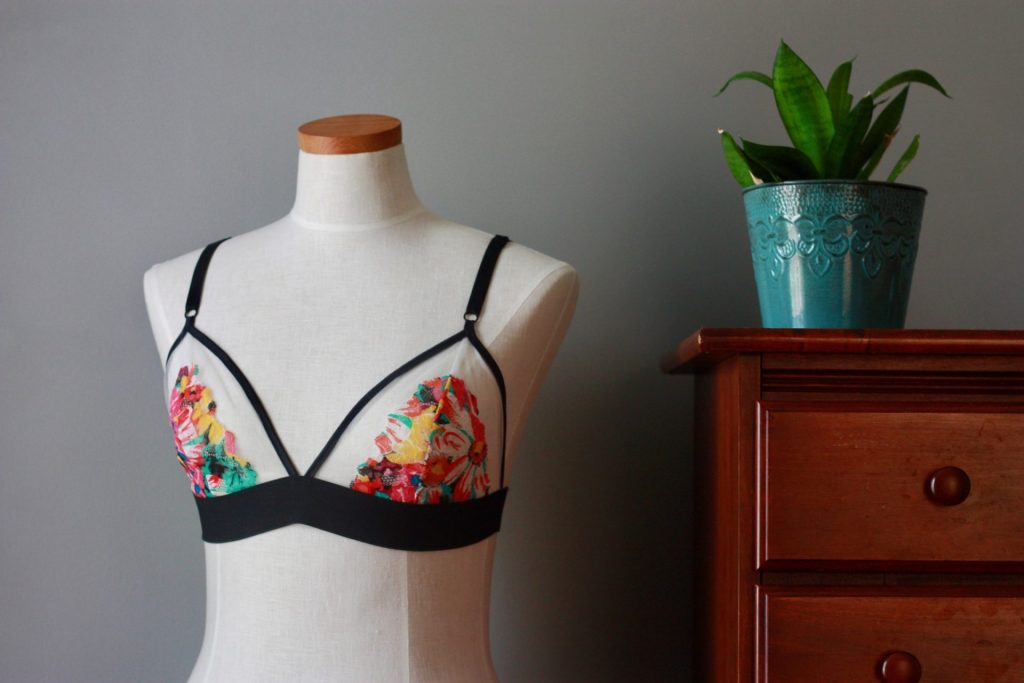
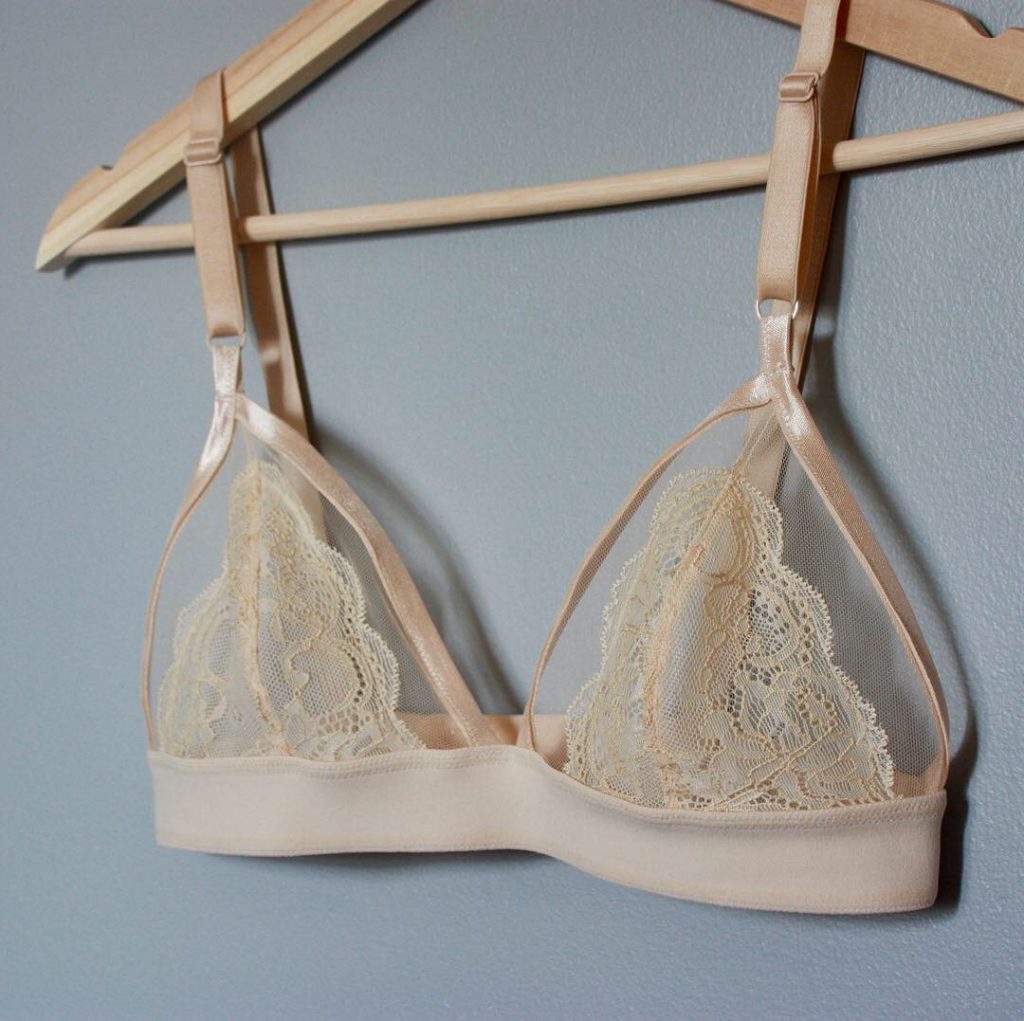
This sweet tulle and lace Jordy Bralette bra came together over a few quiet sessions of hand sewing while staying at home during quarantine. I finally finished the elastic pieces on my sewing machine and now the final bra is such a delicate and special make. It’s honestly one of the prettiest things I’ve ever made. I added a couple of extra touches to the Jordy Bralette to give it a nice finish and hopefully help it to last a really long time. Read on to see how I doubled up on tulle, and encased all the raw edges of the seams so it’s super comfy!
The Details
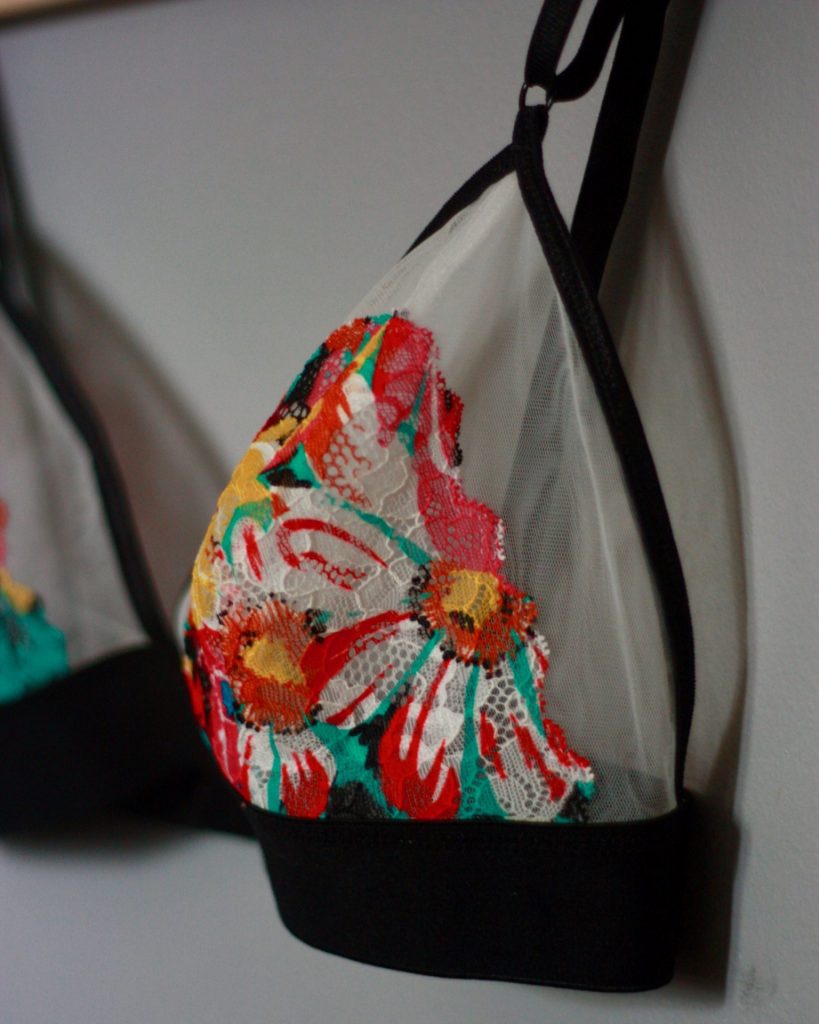
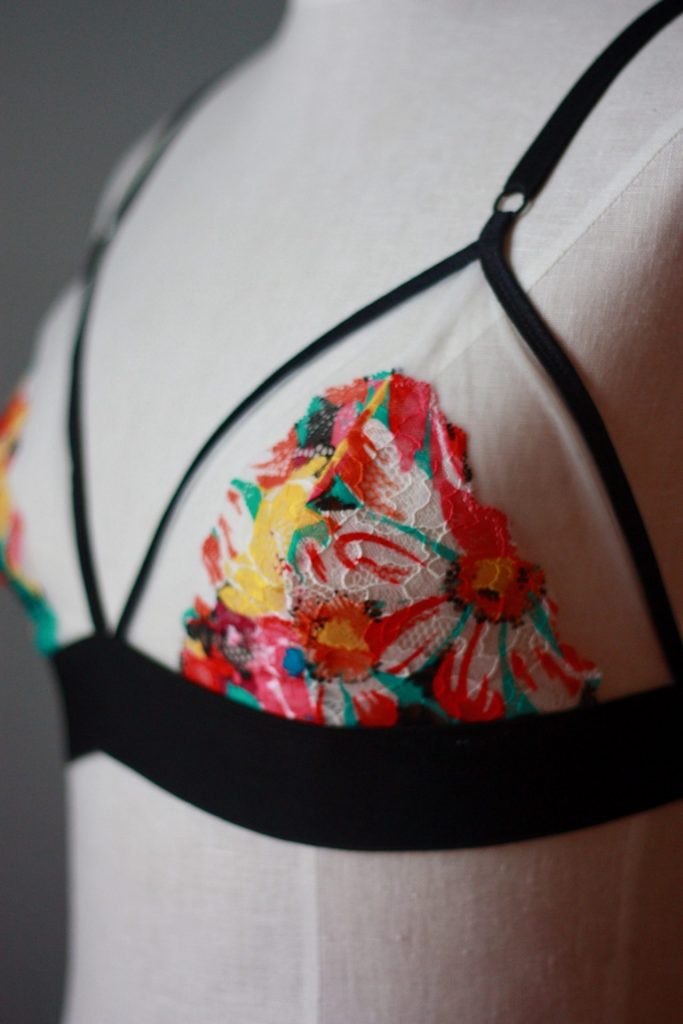
- Pattern is the Jordy Bralette by Emerald Erin
- Tulle and lace from Lace to Love while traveling in Riga, Latvia
- Elastics: fold-over elastic for cups, bra elastic for straps, 1.5″ soft band elastic for the band, cream picot elastic for the inner band
- I sewed a 32D following the size chart for the pattern
- My under bust measurement is 31″, and my full bust is 36″
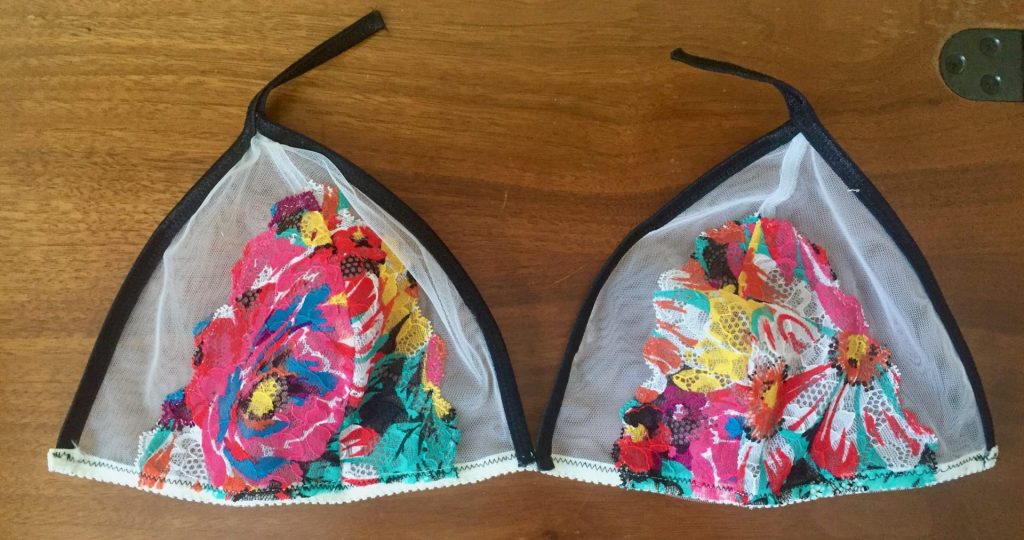
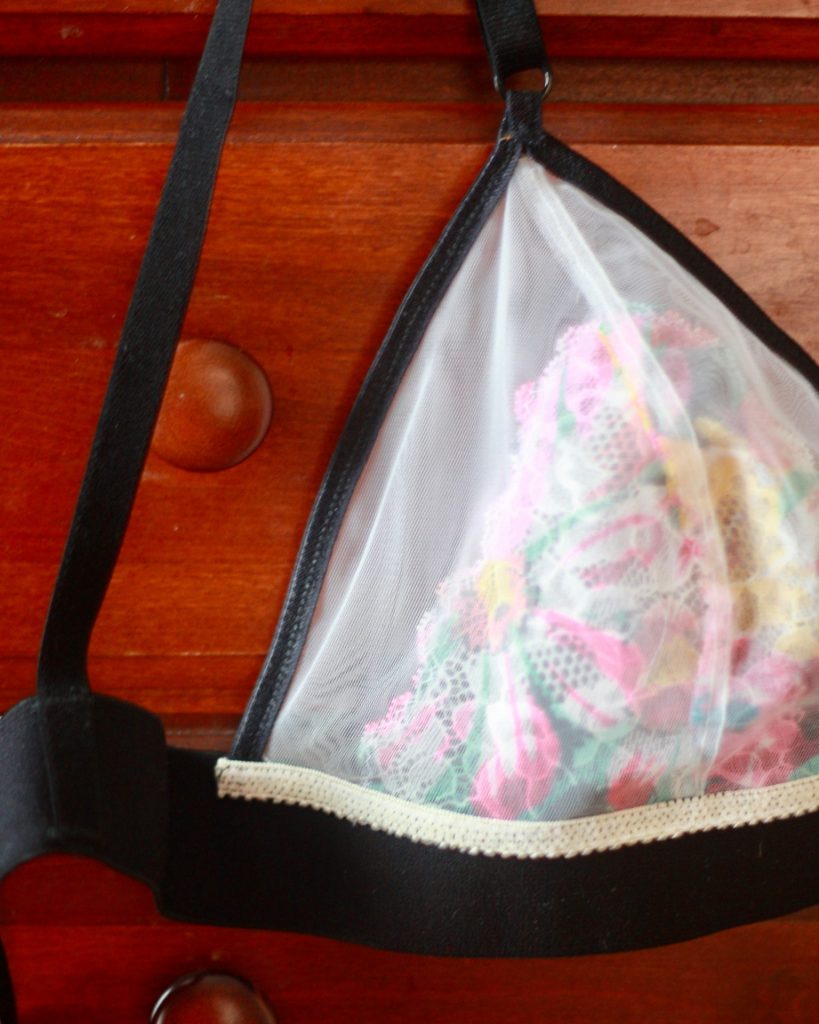
- Modifications: double tulle layer for a finished inner cup, and soft picot elastic to cover the raw edges of the cups on the under bust band.
Gorgeous Lace and Tulle from Latvia
I took a fun girls’ trip to Riga last winter and visited the loveliest little shop called Lace to Love. Riga is a great place to visit and it was such a treat to bring home some goodies. The staff there were really helpful, and I’ve never seen someone measure and cut fabric with so much gentle care. According to their site, they also ship around the world.
Finding Joy and Calm in Hand Sewing
I started working on this right around the start of the pandemic. Everyone has been having their own experience, and I’m not going to dig deeper into the anxiety and sadness I was feeling during those weeks, but slowing down to sew with my hands was just my perfect pace. I don’t know if this was the right kind of stitch, or even what it’s called, because I was really just winging it.
I mean, look at the photo below on the left. This screams to me exactly what I was feeling at the time: “What the hell am I even doing? None of this seems right. It’s definitely going to fall apart.” Then, I flip it over and thought, “Ok, this isn’t so bad. Slow down; it’ll be ok.” Life thoughts. Big feelings. Rinse and repeat.
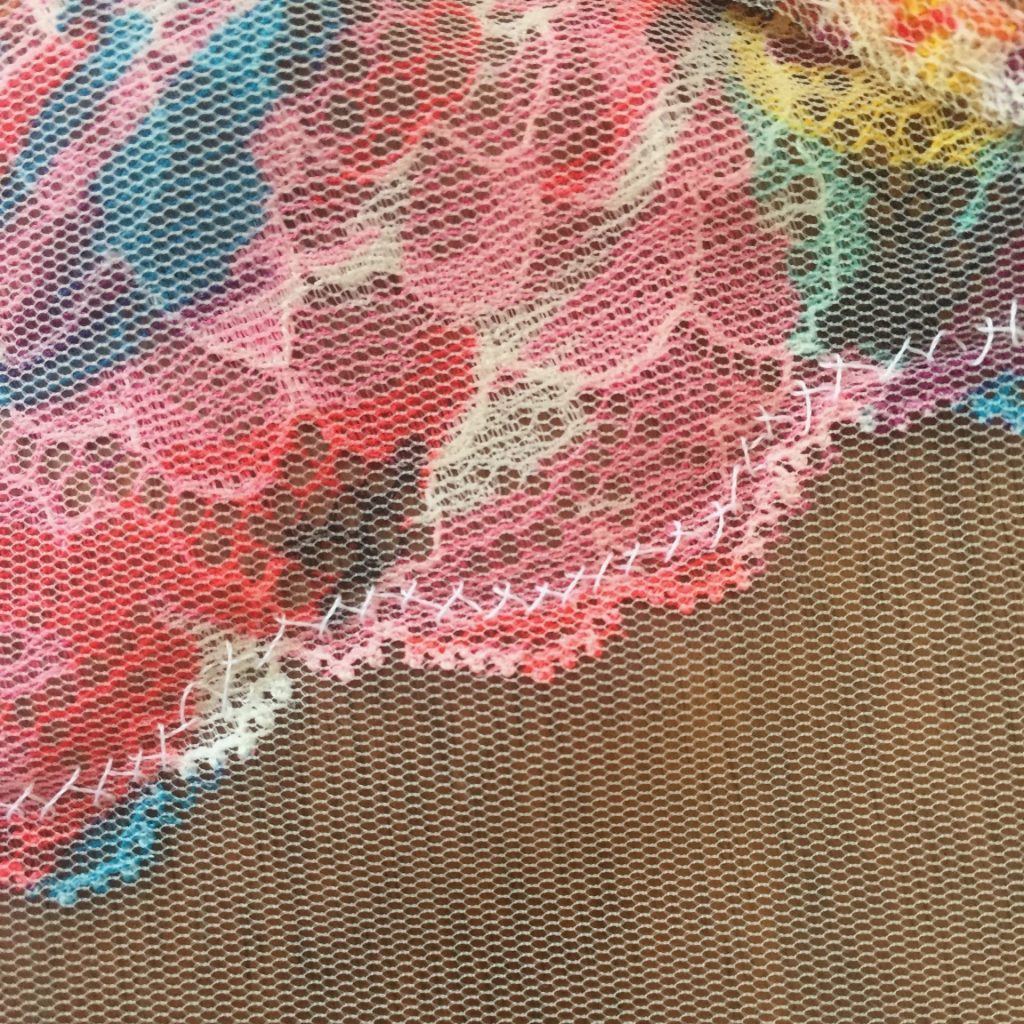
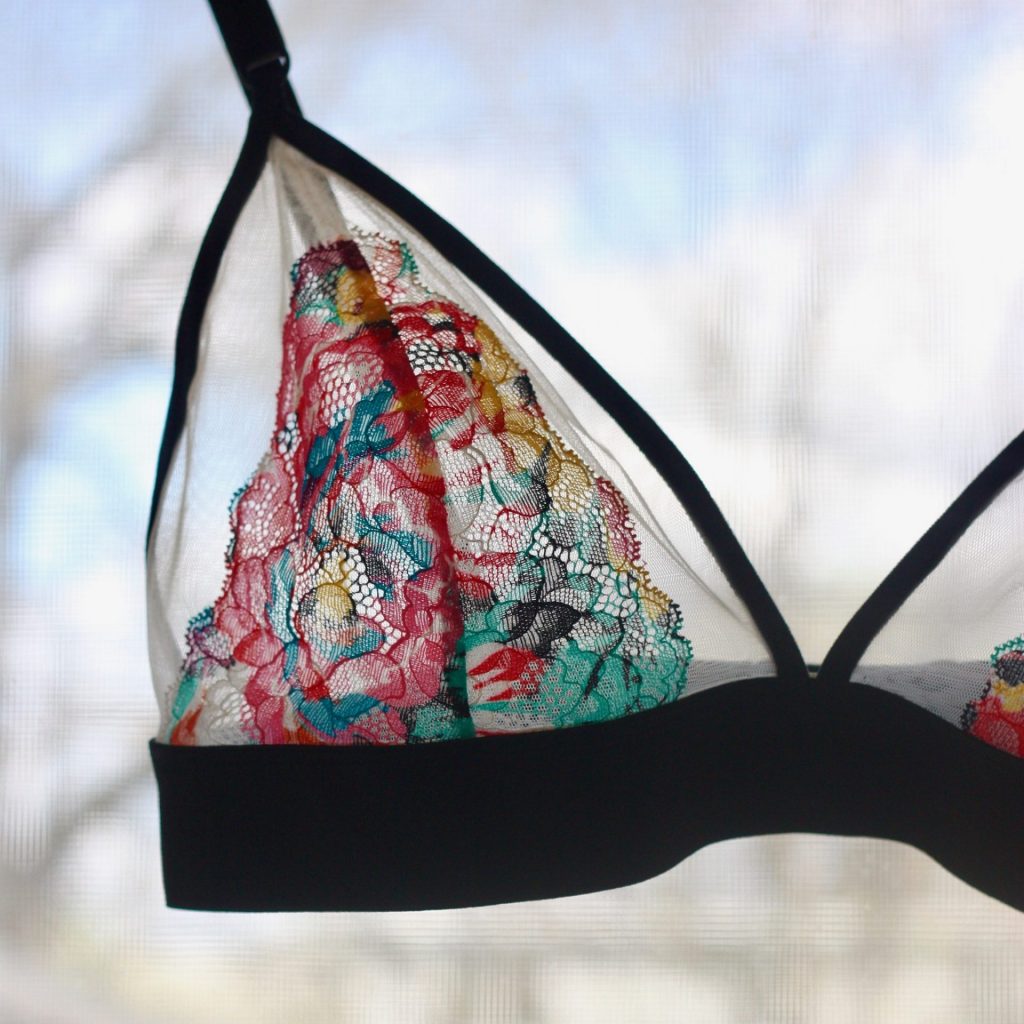
Hand stitched lace to tulle 
Right side of the lace
I love how the lace just floats over the tulle, and this wouldn’t have been possible using a sewing machine. In fact, I tried, and my machine happily ate the lace up with every other stitch.
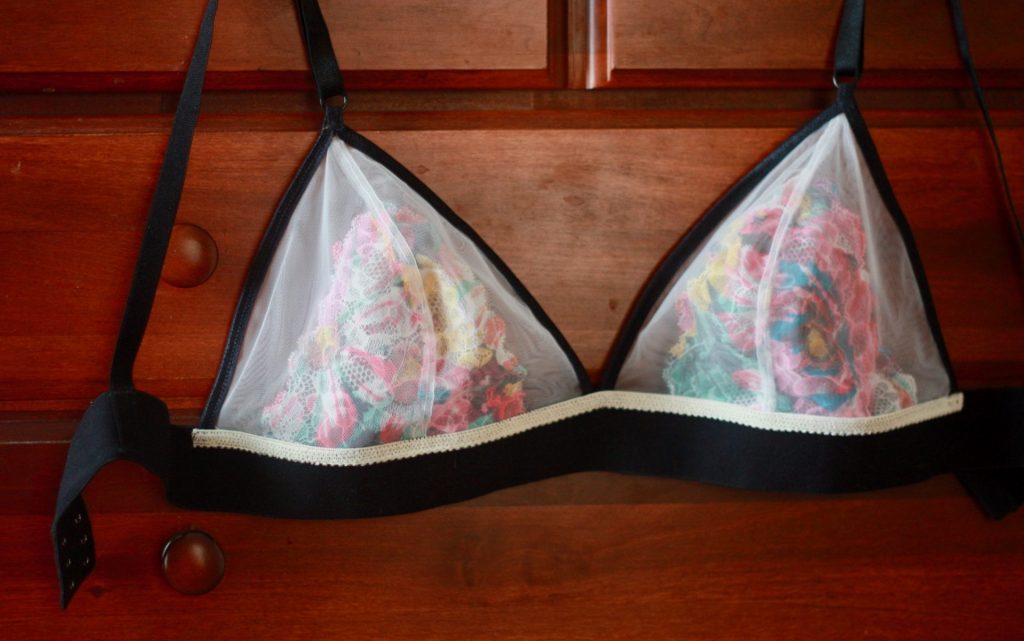
Double Tulle For Comfort
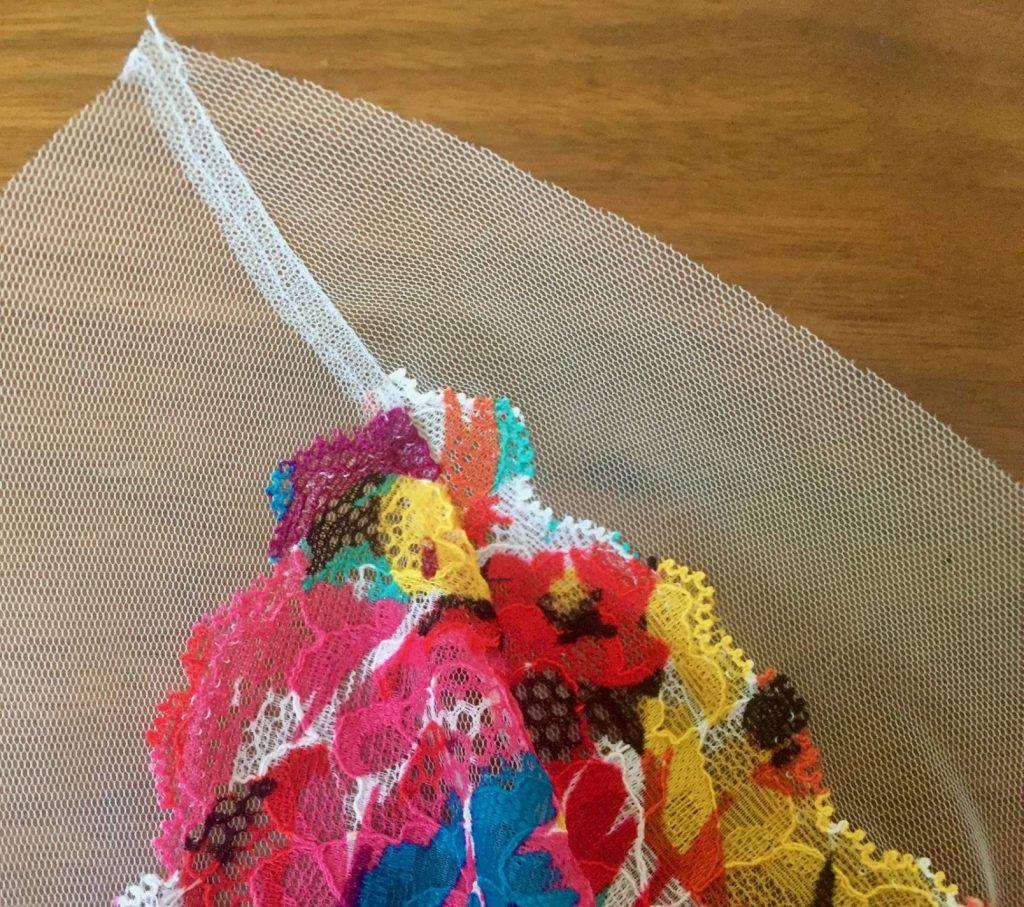
I’ve made the Jordy Bralette before, and while I love love love it, I knew I could make it a bit comfier. The original bra has the raw edge of the cup seam resting against the skin. Might be just in my head, or it might be a little itchy. If it’s touching my nips, it better be smooth. If that’s your slogan too, double up on the tulle. Cut double of the inner and outer cups, so you’ll be cutting four of each piece.
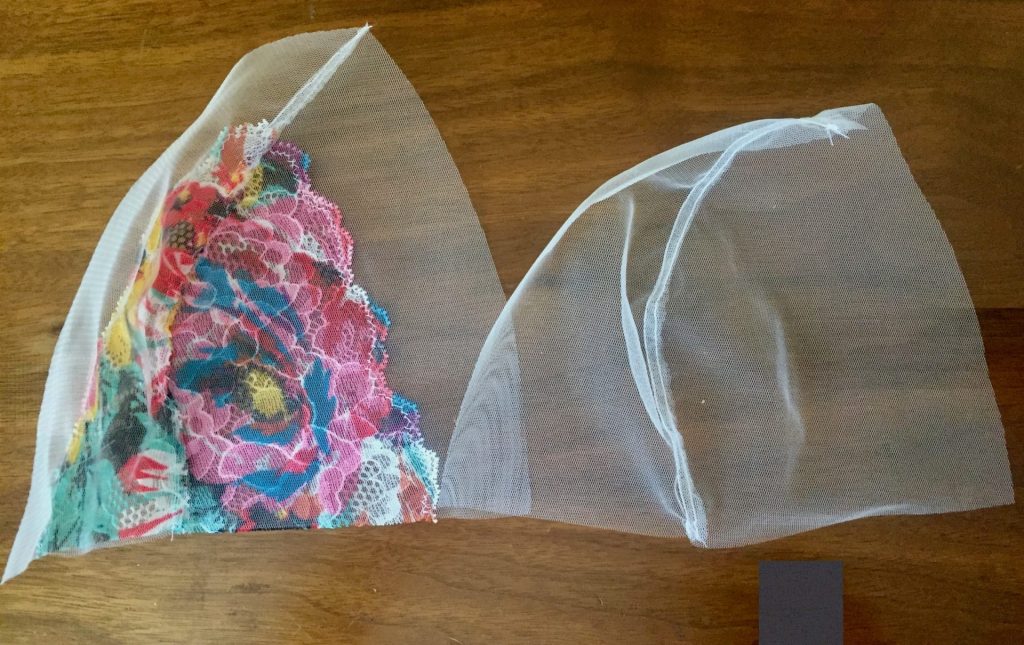
Sew the lace on to one set of cups, and then make an extra set up cups in just tulle. As the directions indicate, sew the inner and outer cups together and top stitch the seam allowance down. Shown above are both cups that will end up on the right breast. I put the wrong side of the tulle cup against the wrong side of the lace cup and lined up the seam and edges and pin together. So when worn, the smooth side of the tulle will be against the skin. Win!
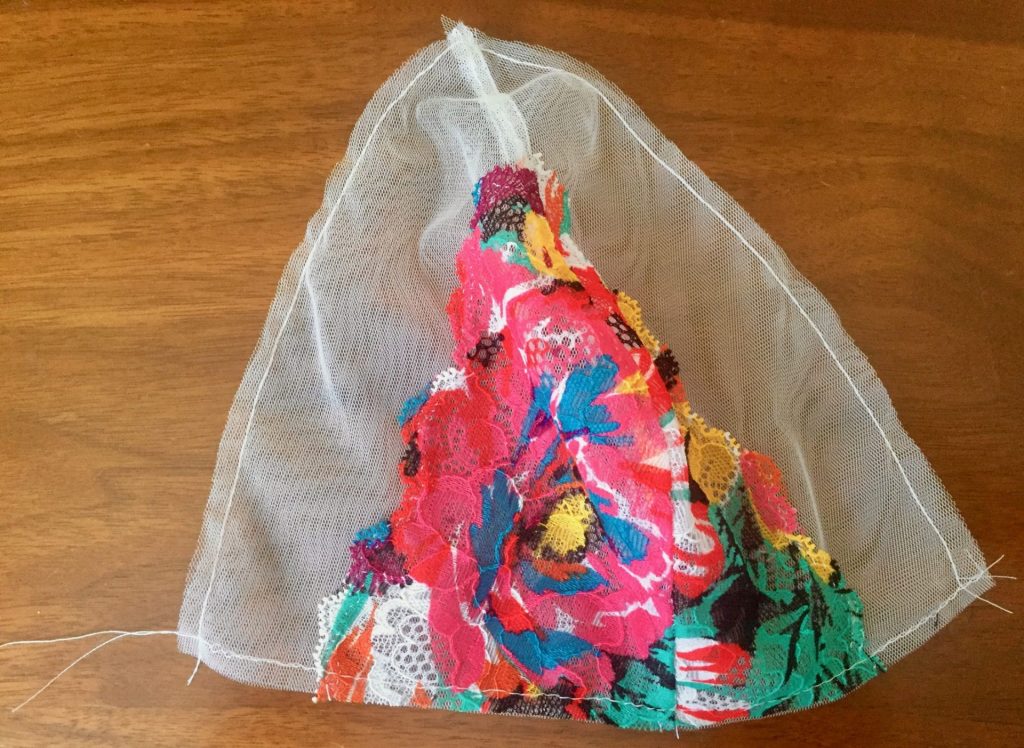
Baste the edges within the 1/4″ seam allowance. I was able to do this carefully on my machine. Continue following instructions for the fold over elastic on the cups.
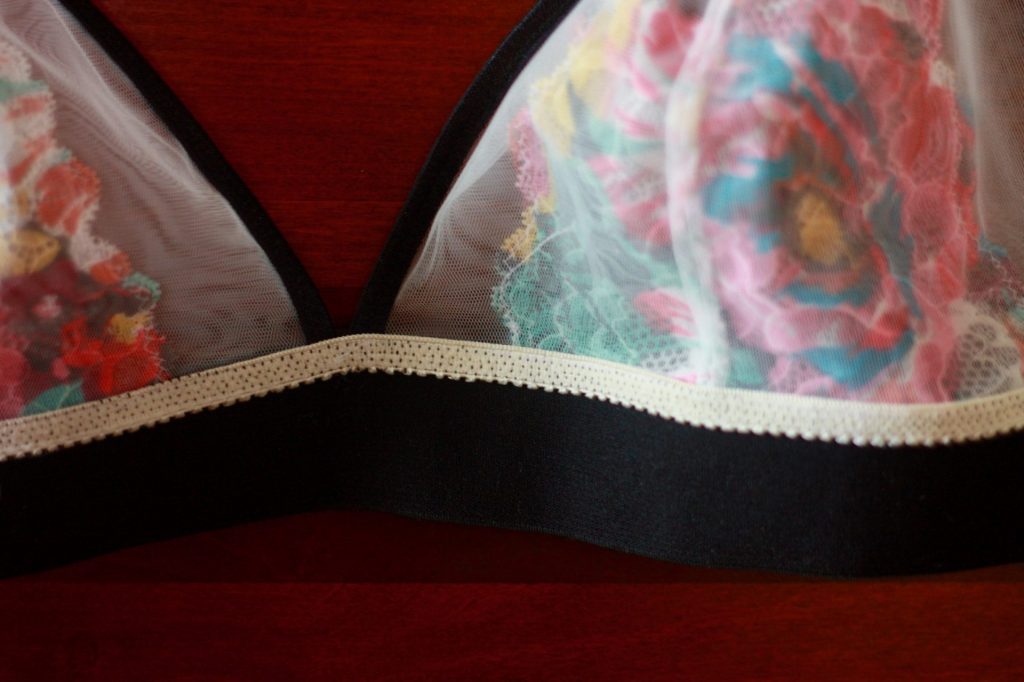
Picot Elastic for Softness
As I mentioned earlier, I added the extra tulle to avoid the raw edge of the seam resting against my skin. I’m adding cream picot elastic to the bottom of the cups for the same reason. The pattern has you stitch the cups to the thick band, but that may leave a little bit of raw tulle against your skin. Picot elastic is perfect for this since it has a nice soft side to it.
Before the step to attach the cups to the under band, I sewed the cups to a length of picot elastic, and trimmed the edges with about 1/4″ extra on each end. In the photo above, the soft side of the picot is facing down, touching the table, and the doubled up tulle cups are resting on top. Zig zag stitch – you can see my black top thread, but the bobbin thread is cream, matching the elastic.
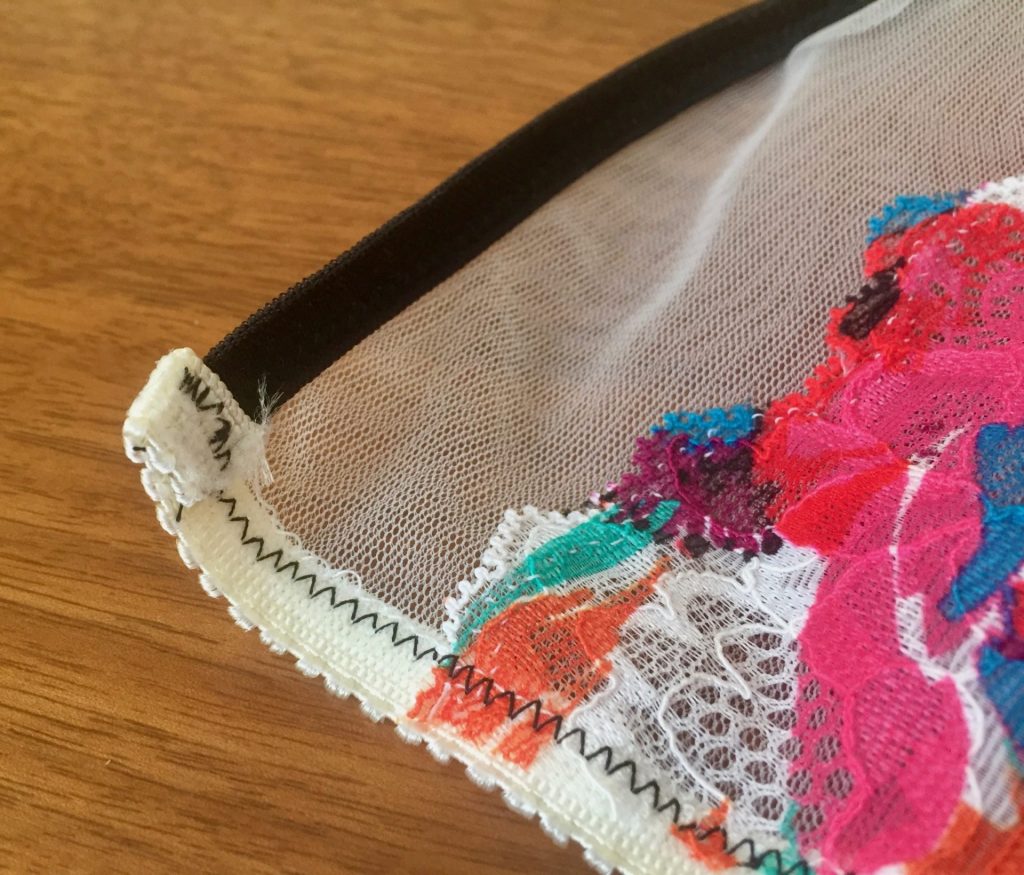
Fold over the excess picot and tack down. The stitches aren’t perfect here and they don’t have to be! This will all be hidden under the big band elastic, and it will be reinforced there anyway.
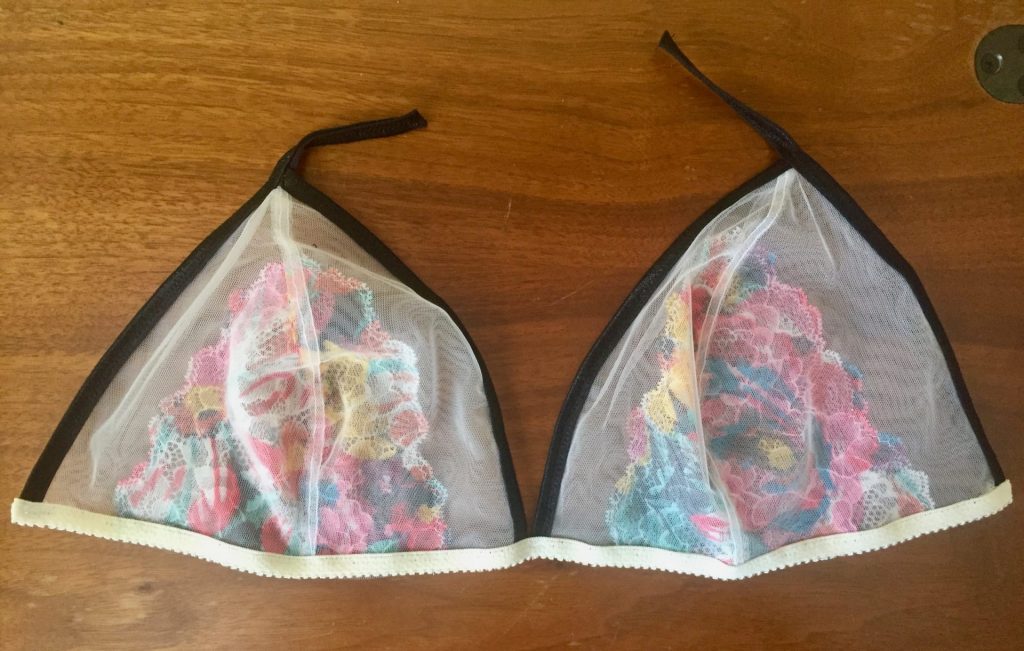
See how soft and inviting that looks now? Ready for the under band and straps!
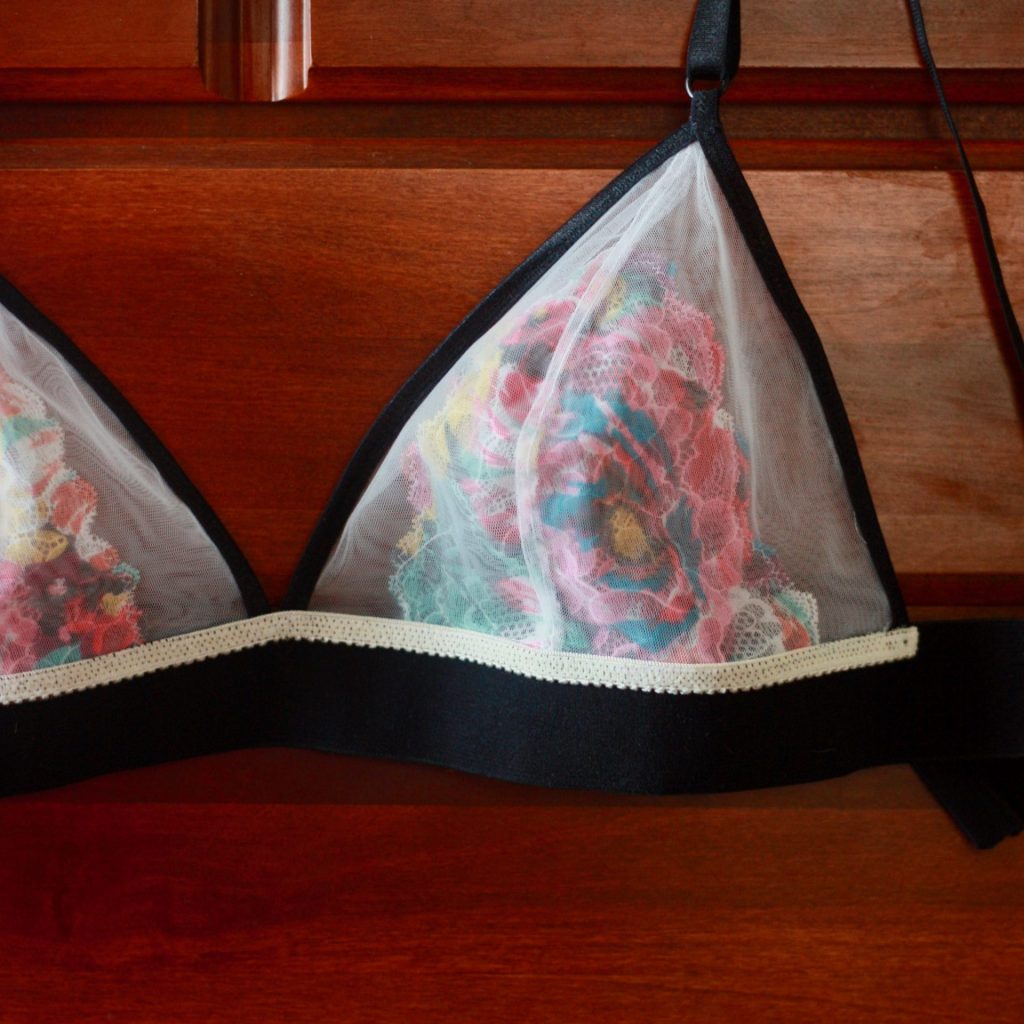
I sewed the black under band to the picot elastic with two rows of zig zag stitching, as the pattern directs. You can see traces of the black top thread on the cream elastic because my thread tension wasn’t perfect, but I don’t mind it at all. Check out the delicate details in the photos below. I hope this was helpful!

Final Thoughts
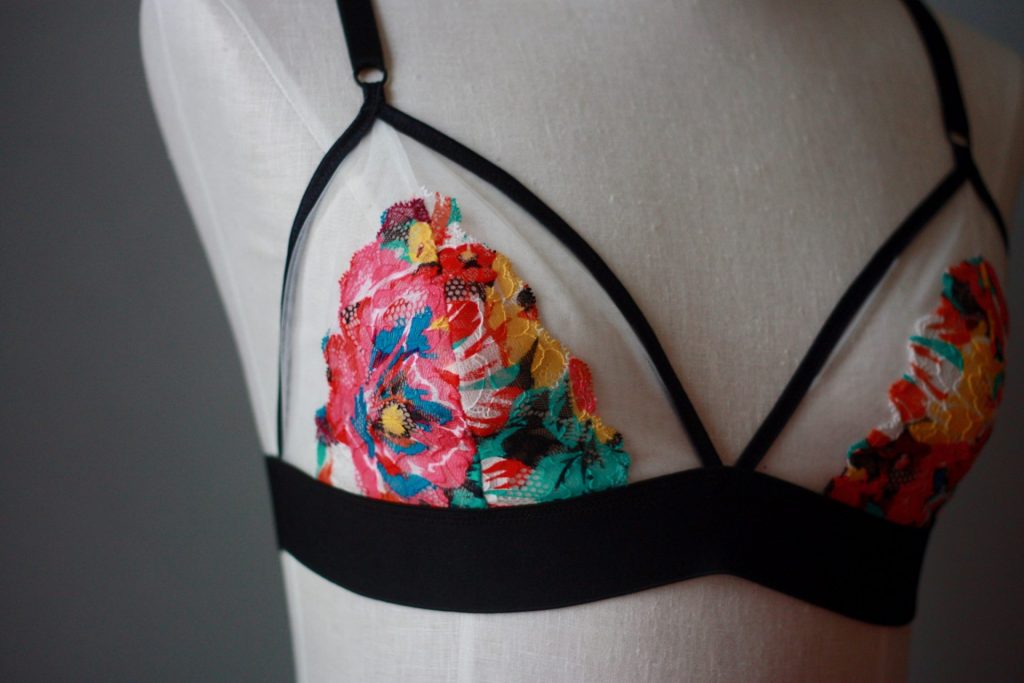
I love the Jordy Bralette and for the tulle/lace versions I make in the future, I will keep doing this technique for a nice and comfy finish. I may even go back and add another layer of tulle and picot to my first version too. That first version is pictured above. This first bralette made an appearance in my Me Made May adventure last year. I also have a blog post on another lingerie sewing project here. Enjoy!
Such a pretty bralette. So delicate and gorgeous! The tips to uograde for a smoother, non-itchy finish are great! Definitely some things to keep in mind!
Handstitching is absolutely one of my favourite types of “therapy”.
Oh wow, this is the prettiest bra I’ve ever seen (and I’ve seen many).