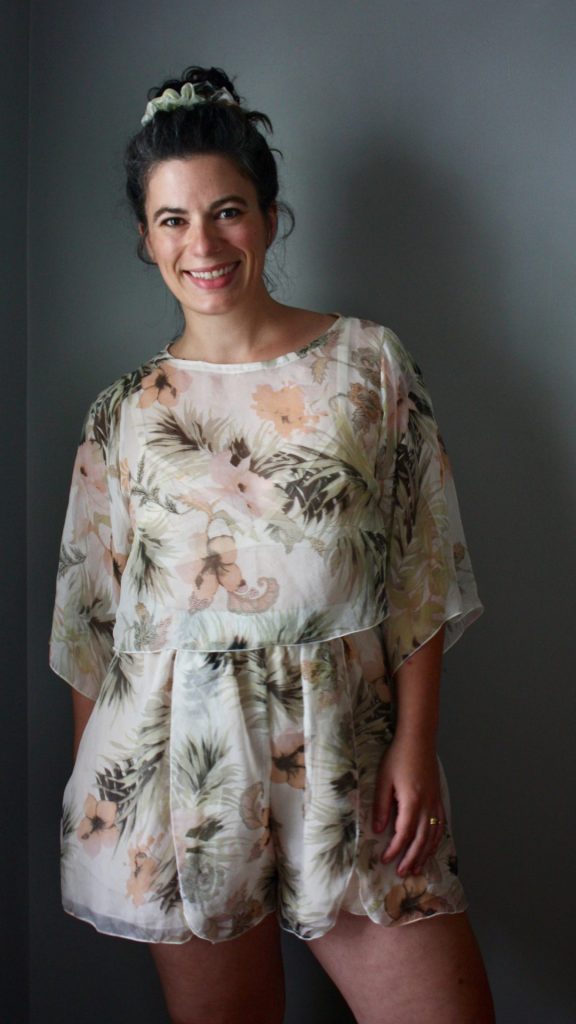
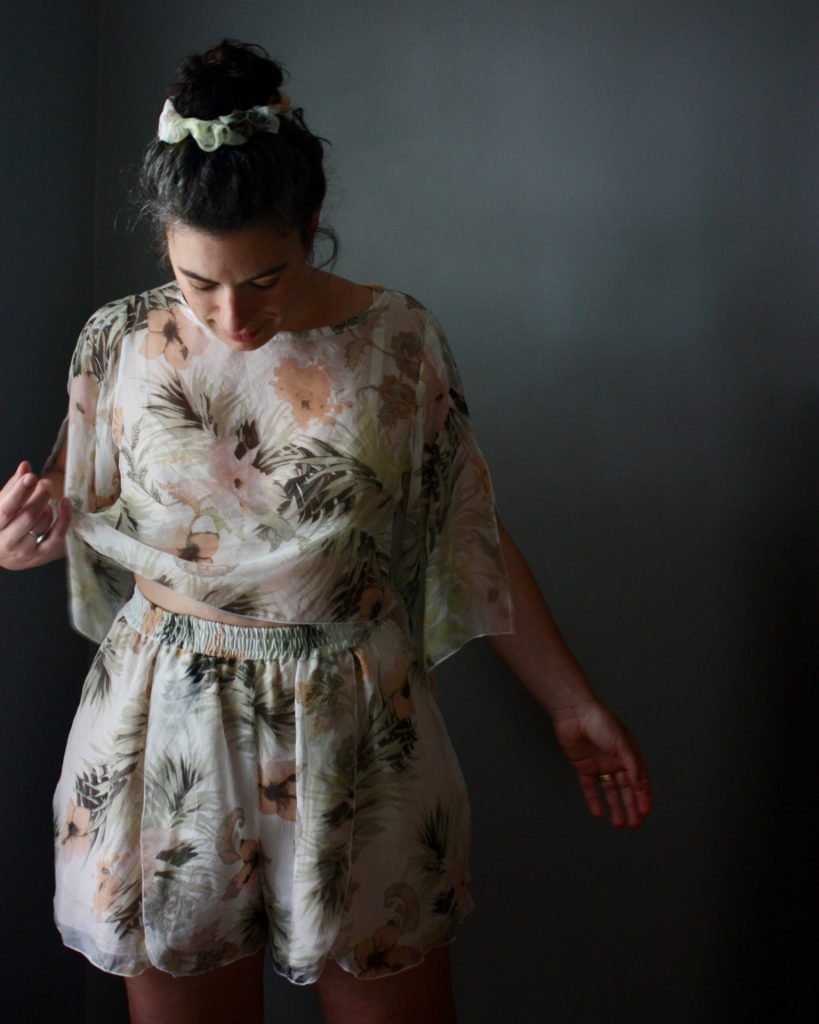
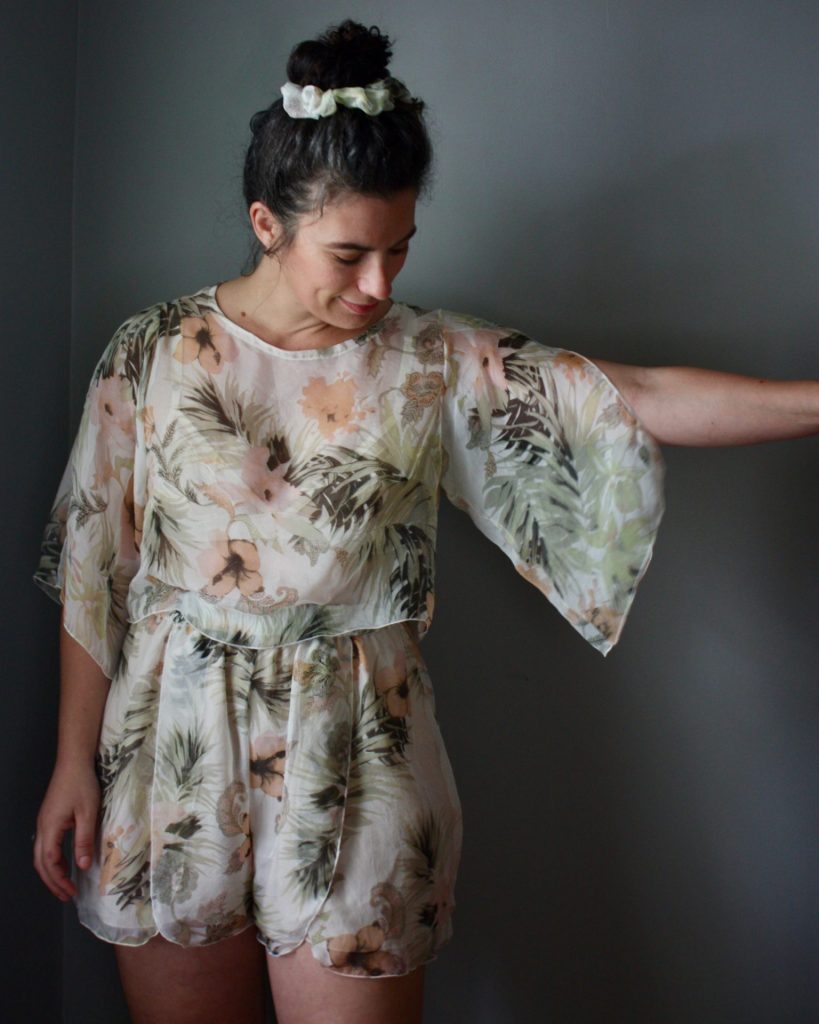
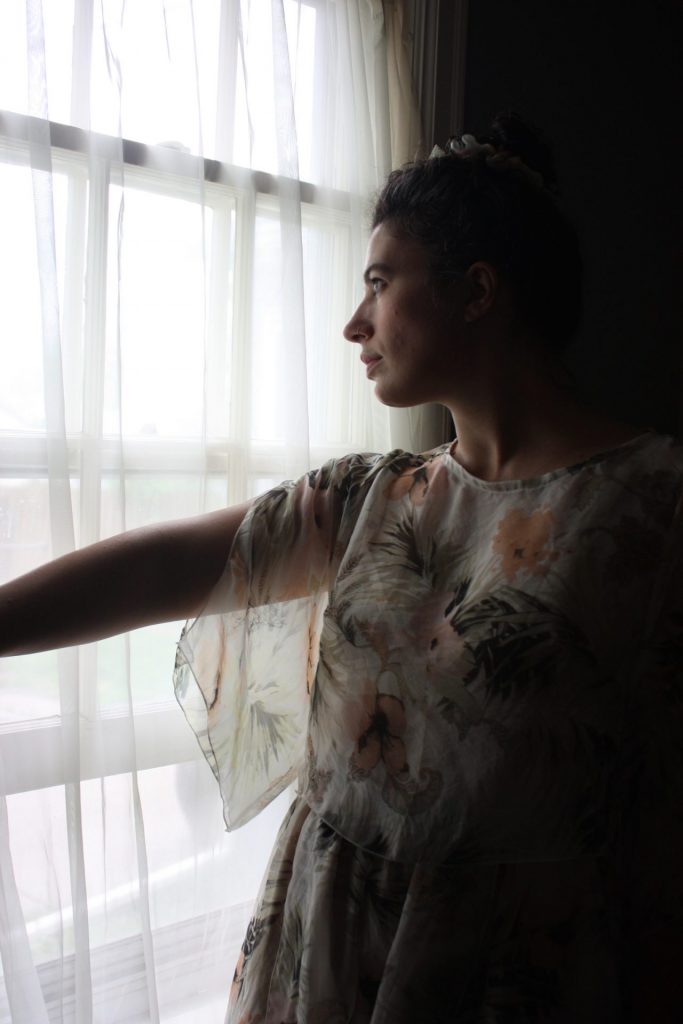
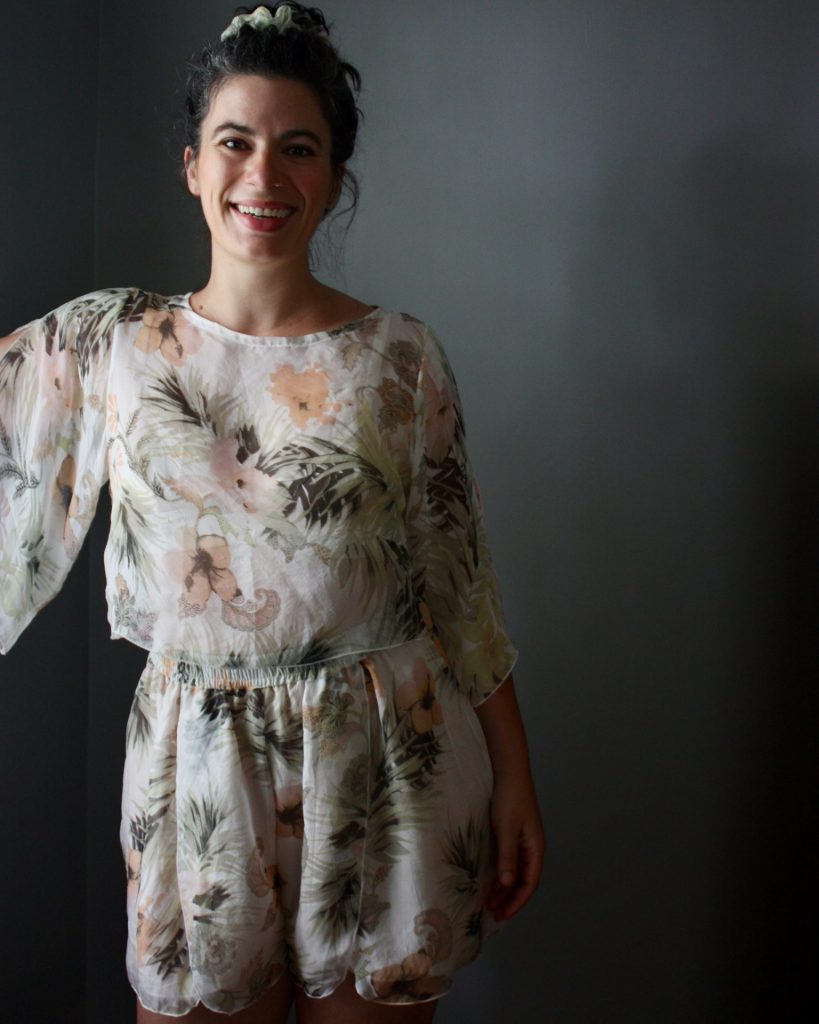
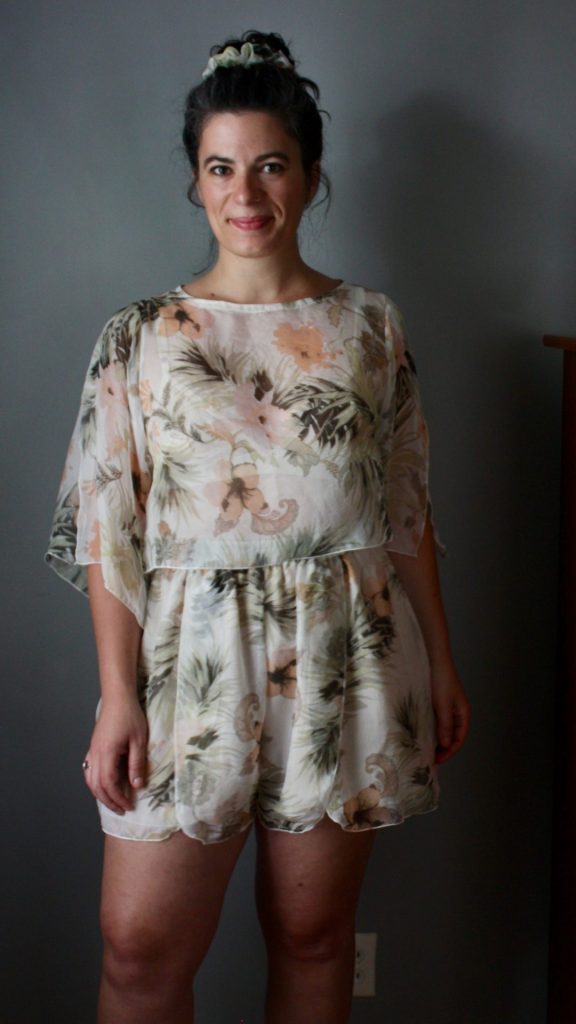
I’ve been curious what it feels like to wear the fabric equivalent of straight cash-money, and now I don’t have to wonder (and I didn’t have to spend a load of cash, either). I got inspired while shopping my fabric stash and found some leftover silk from previous robe projects. I imagined the floatiest silk sleepwear / loungewear / pajama / pyjama set and found just the right styles from the Breaking the Pattern Book from Named Clothing. Check out how I made the Rae pants into airy shorts and the Sade tunic hacked into a cropped shirt. Also check out how I did beautiful rolled hems using my Juki serger!
The Details
- Patterns are Sade Tunic and Rae Pants from Breaking the Pattern Book by Named
- Fabric is 100% silk leftover in my stash, both originally from SR Harris (local outlet)
- Size 4 Sade Tunic, my bust/waist measurement is 36/30″
- Size 8 Rae Pants, my waist/hip measurement is 30/46″
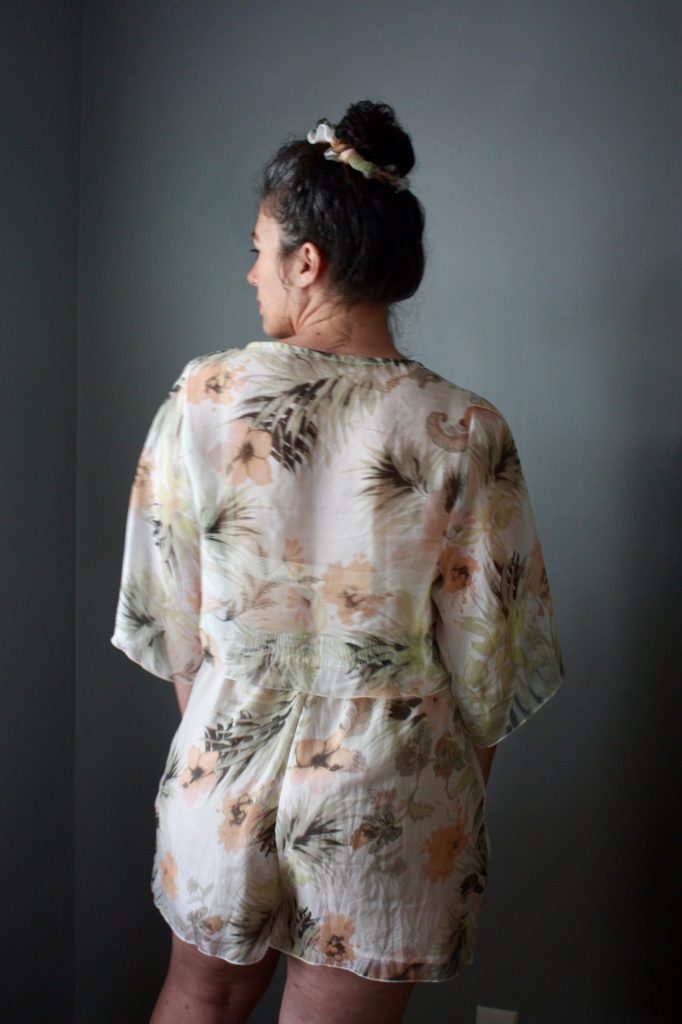
- Sade mods: cropped the tunic to just below the waistline, flip shoulder overlap (front sleeve on top), rolled hems
- Rae mods: shorts length, omit pleats and front leg seams, rolled hems
- Roll hem feature on my Juki MO-654DE serger


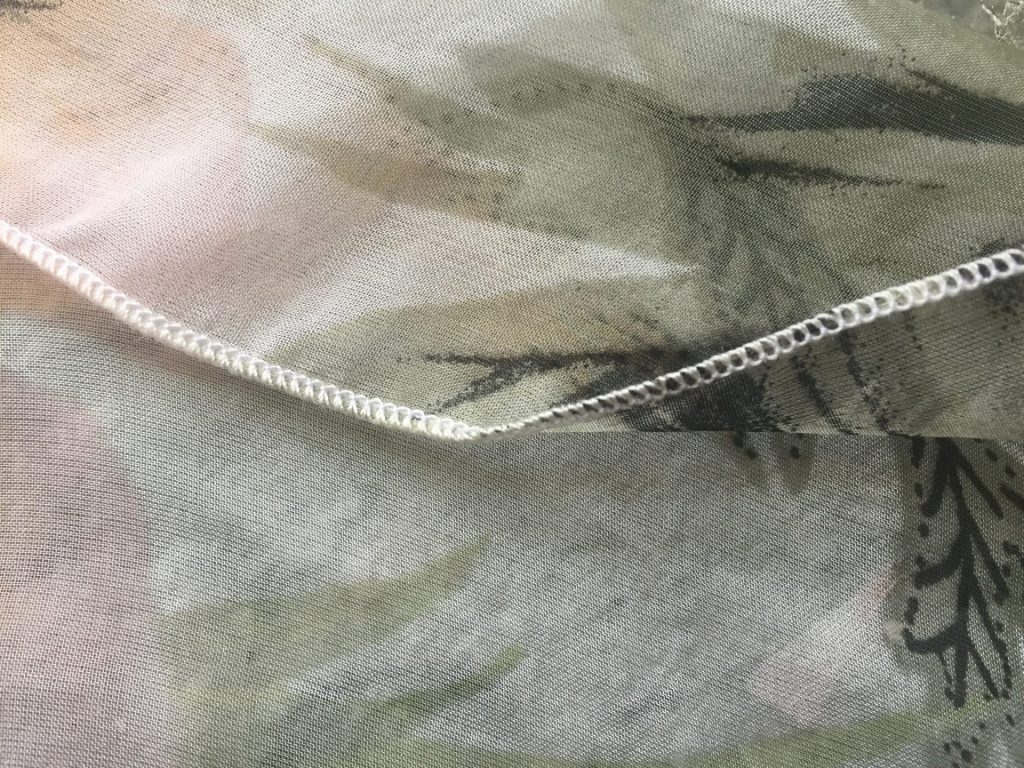
Rolled Hem on a Serger
Rolled hems (and rolled hems for finishing raw edges) is soooo perfect for ultra-light fabrics. I learned how to use this feature on my Juki serger this last week, and I am so disappointed in myself that I waited nearly two years to give this a go. It’s very easy! I didn’t think I could love my serger more than I already do. It’s the popular Juki MO654DE.
Here’s How:
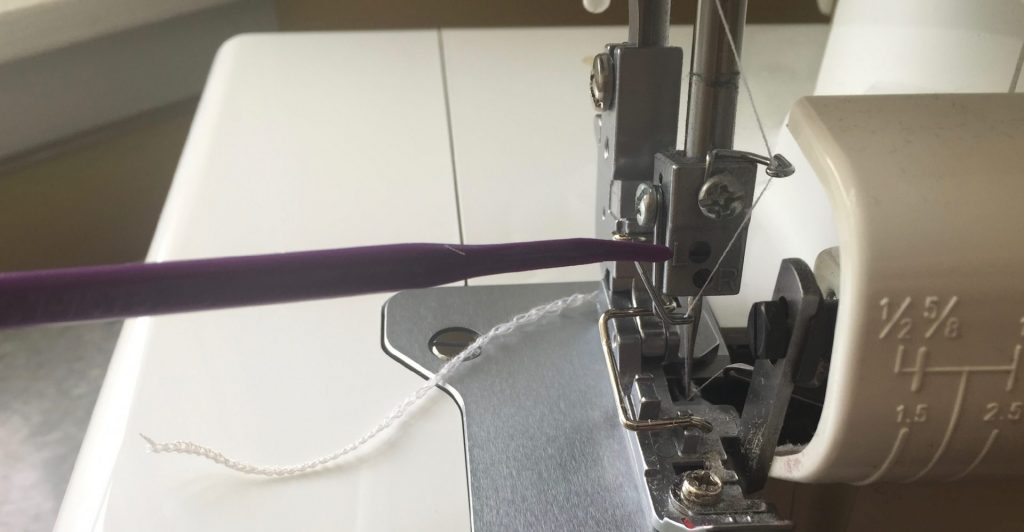
Remove left needle 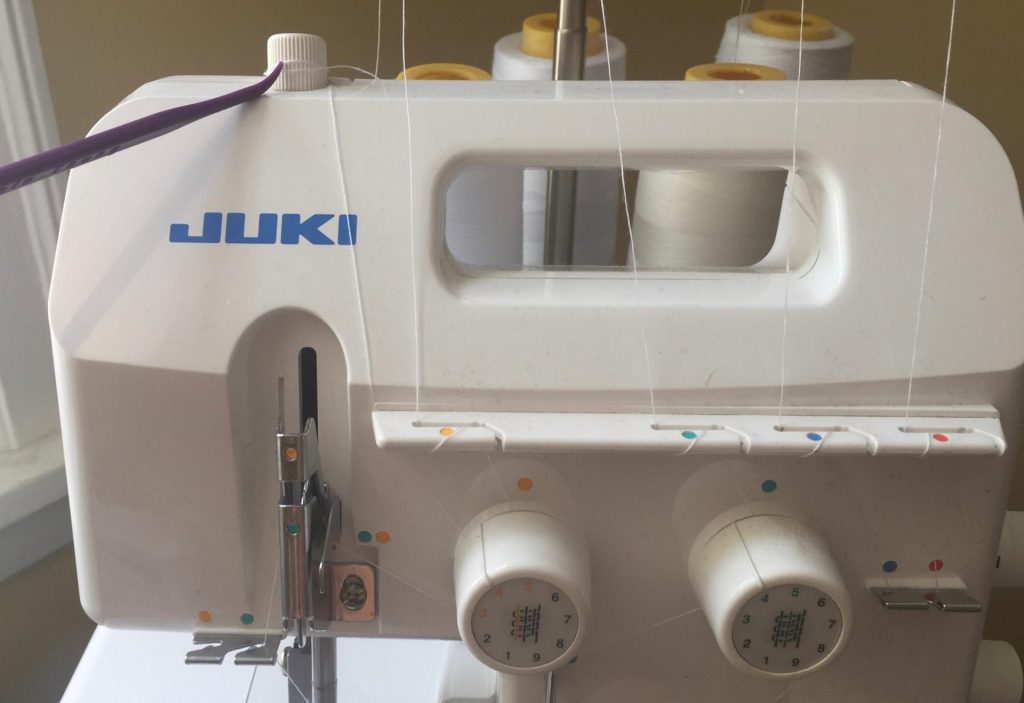
Wrap thread out of the way. 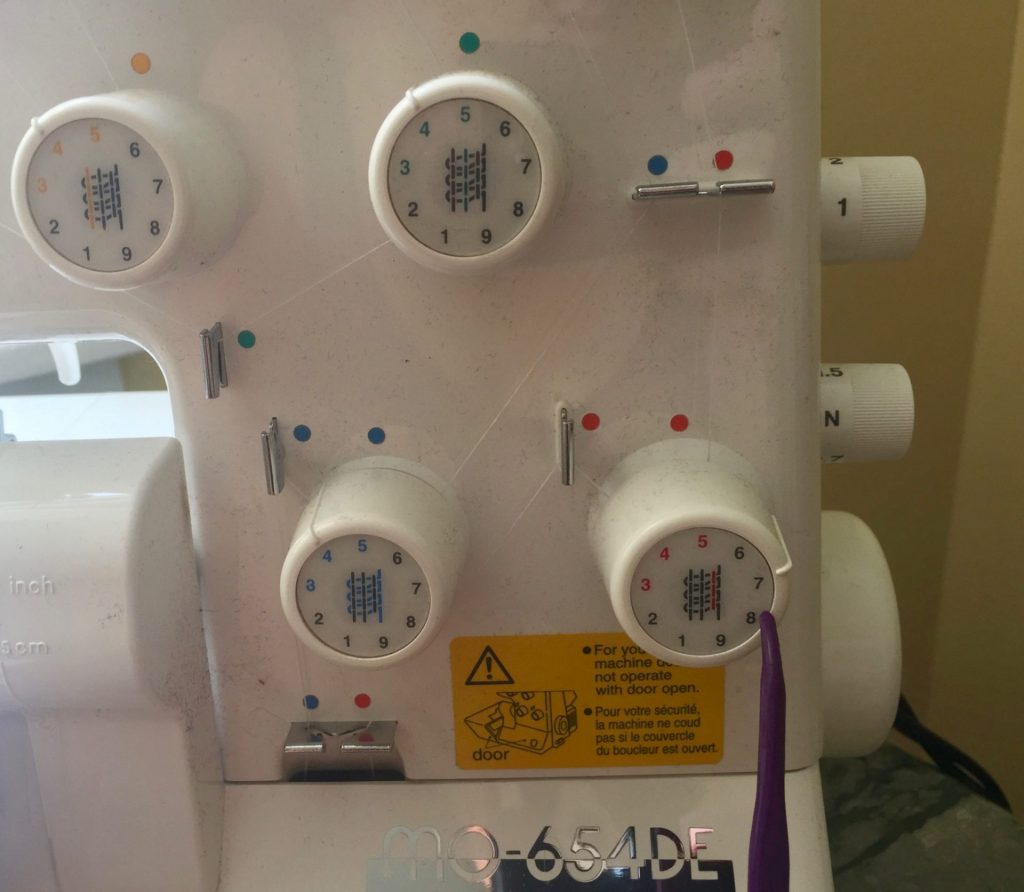
Tension dial settings (4, 4, 7) 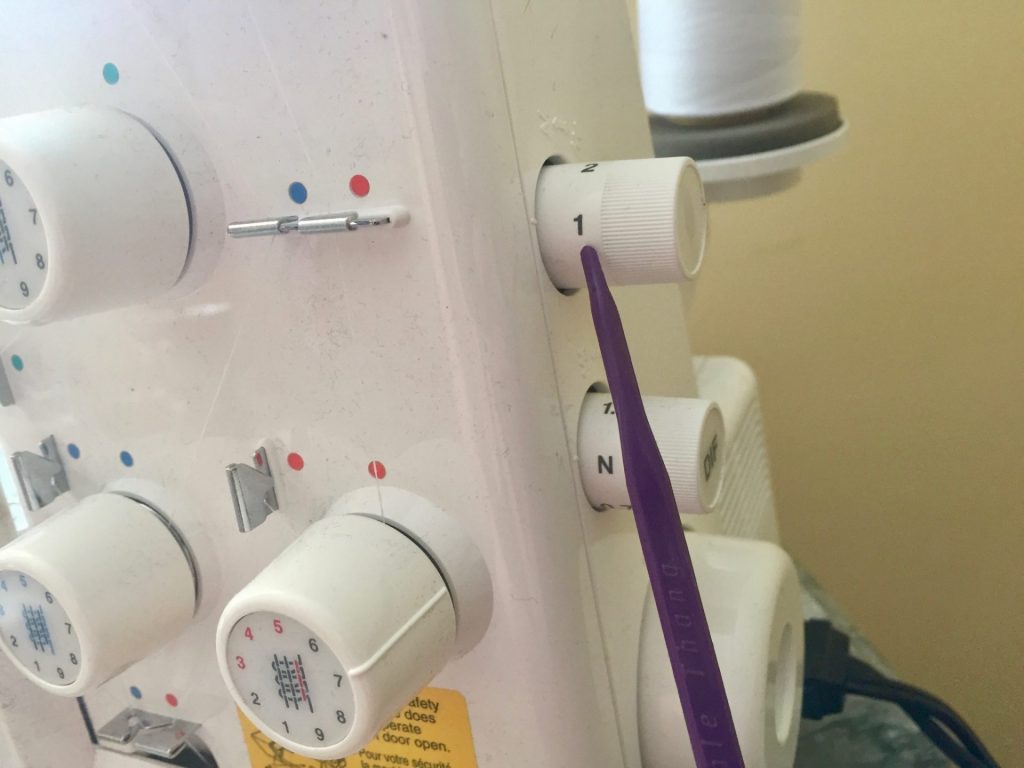
Stitch length: shortest 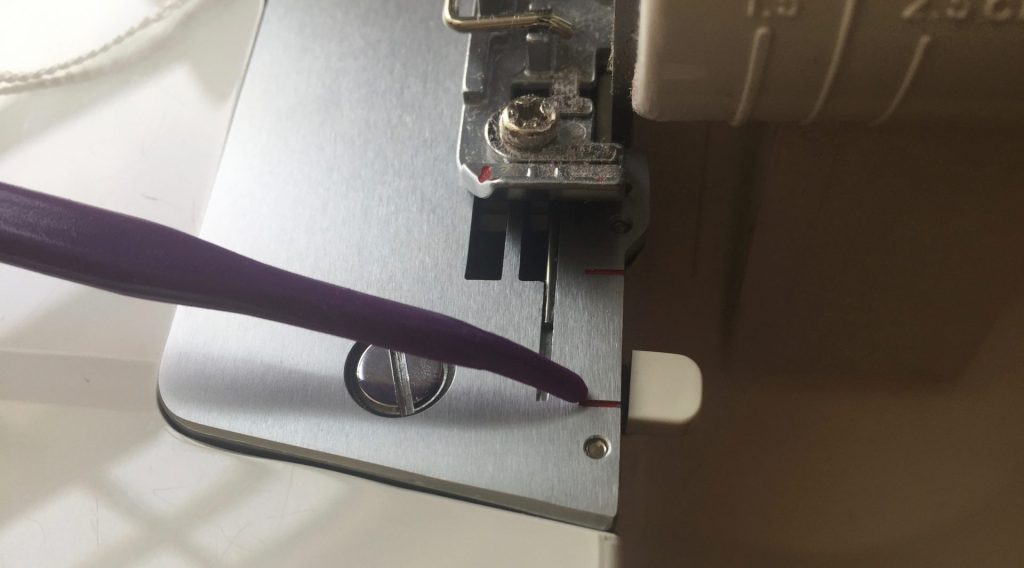
Flip the switch
As shown above, remove the left needle using the cute tiny screwdriver from your kit. Wrap the left needle thread out of the way; I set it around the presser foot dial at the top. The tension for the green and blue dials are at the normal 4, while the red dial is up to a 7. If you have a different serger, check your manual as you may require different settings or an additional presser foot. Stitch length is at the shortest setting (1), and the differential is at the normal setting (N). Flip that little white switch near the presser foot towards you. I never knew what that little thing was for until now!
Also good to note: the knife is still engaged and works as usual. I don’t need a special presser foot for this feature. It worked beautifully on my first try of test fabric.
I even used it to finish the raw edges of construction seams. (I also used the rolled hem to be the construction seams a couple of times!) This should be ok for such loose fitting garments, but I’m not sure about doing that for seams that would take some tension during wear.

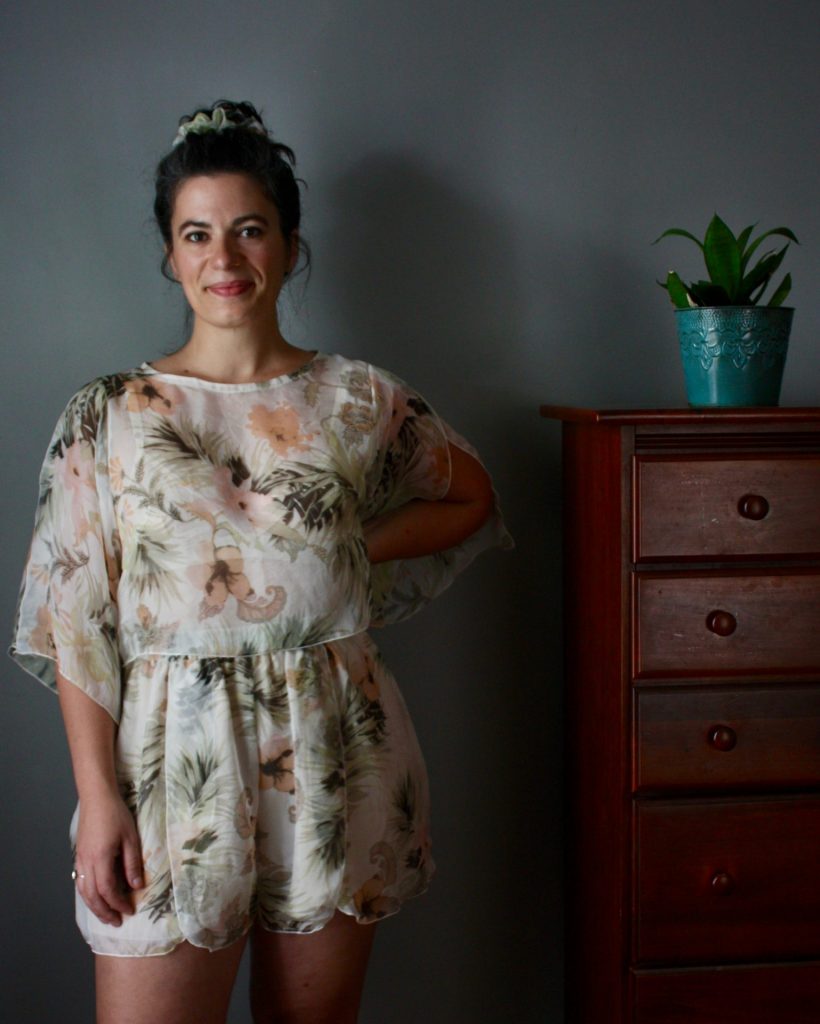
The Rae Pants (Shorts!)
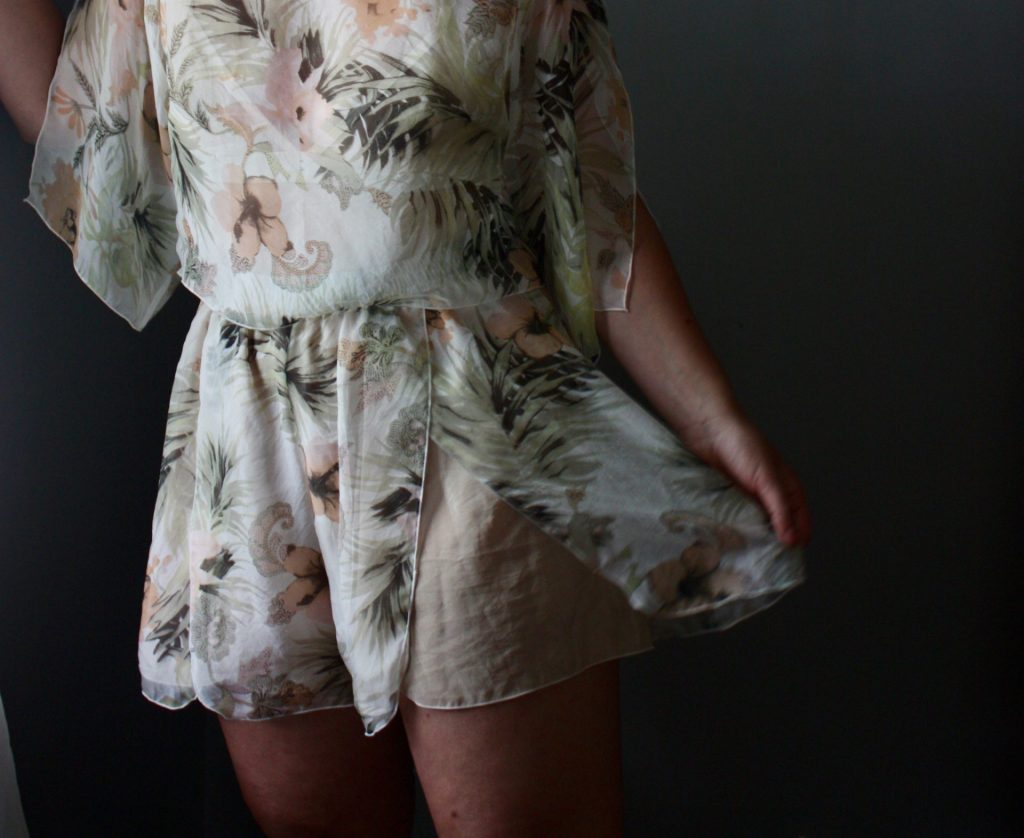
Elastic waist, breezy, silk – what could be better? I made a couple of changes to the pattern, including a beige silk under-layer since the tropical print silk is SO see-through!!
Size Chart Note for Curvy People
***A note about the size chart: there may be an error, let me explain. The finished garment measurements indicate plenty of ease through the waist. This is very important for me since I need that ease to get the shorts up over my hips. I have a 16″ difference in my hip to waist measurements. So, yes. Important. The finished waist measurement in the chart indicated that it would be larger than my hip measurement. Great.
When I traced the pattern pieces and overlaid them according to the seam allowances and the front pleat, something didn’t seem right. By looking at the size of it, I had a hunch, “That might actually not fit over my hips.” So I measured it and I was right, it wouldn’t have fit. I think the finished measurements for the waist did not take the pleat into account. Now I may be mistaken, as I didn’t go full-on-investigation mode here. It’s very possible that I could have traced the wrong size (the tracing made me cross-eyed). The waistband piece itself just barely fits over my hips. I just mention this now in case you also need to be mindful of the waist finished measurement to be large enough to fit over your hips too. I ended up adjusting the size of the pleat by about an inch on each side to allow enough room for me.
Rae Modifications
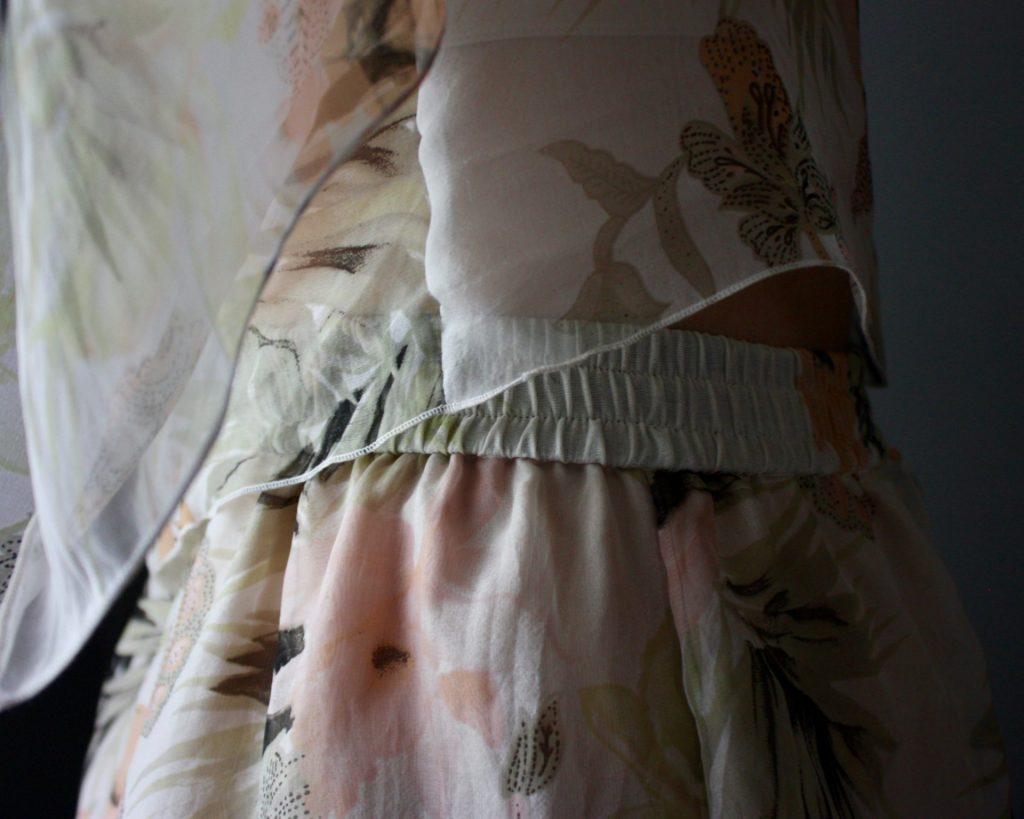
- Cut two layers of each piece besides the waistband; the beige layer is 1″ shorter than the outer print. Inseam is 2″ for inner, 3″ for outer.
- Don’t sew the front leg seam.
- Rather than making a pleat, overlap the inner front leg on top of the outer front leg and baste. Repeat on inner layer.
- Curve the right edges for a nice petal effect.
- Baste the inner and outer layers together at the waistline before attaching waistband.
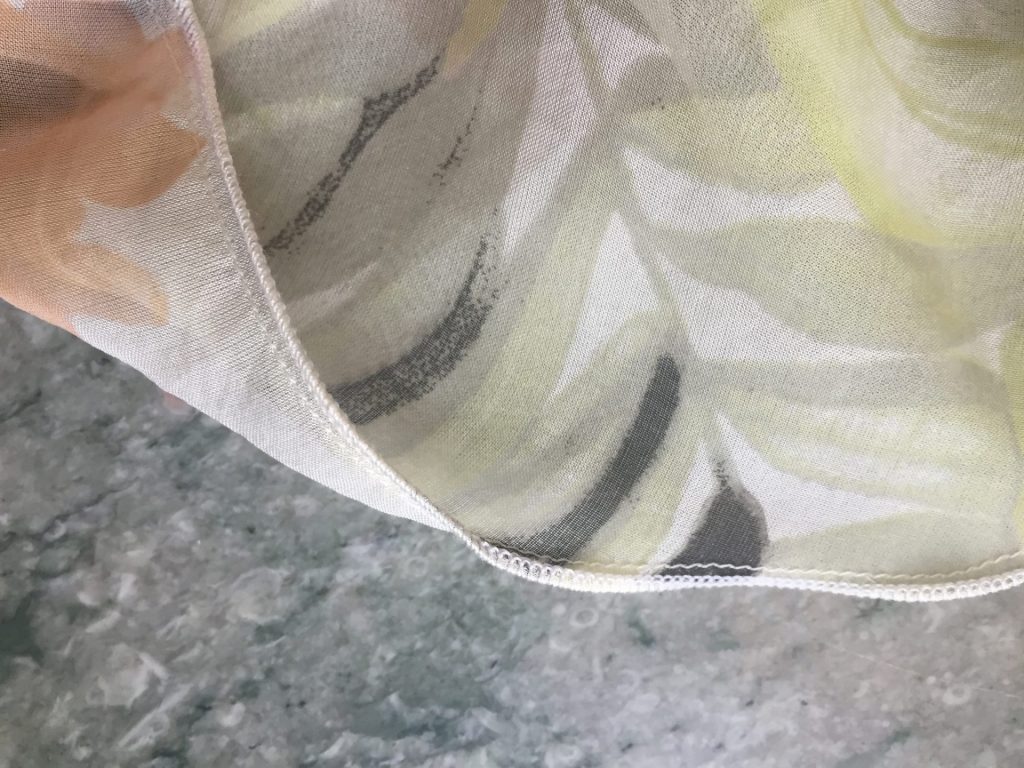
- Rolled hems everywhere 😉
- See the fun layering that happens over my left leg in the photo below. You can tack the layers together partway if you don’t want so much breeze.

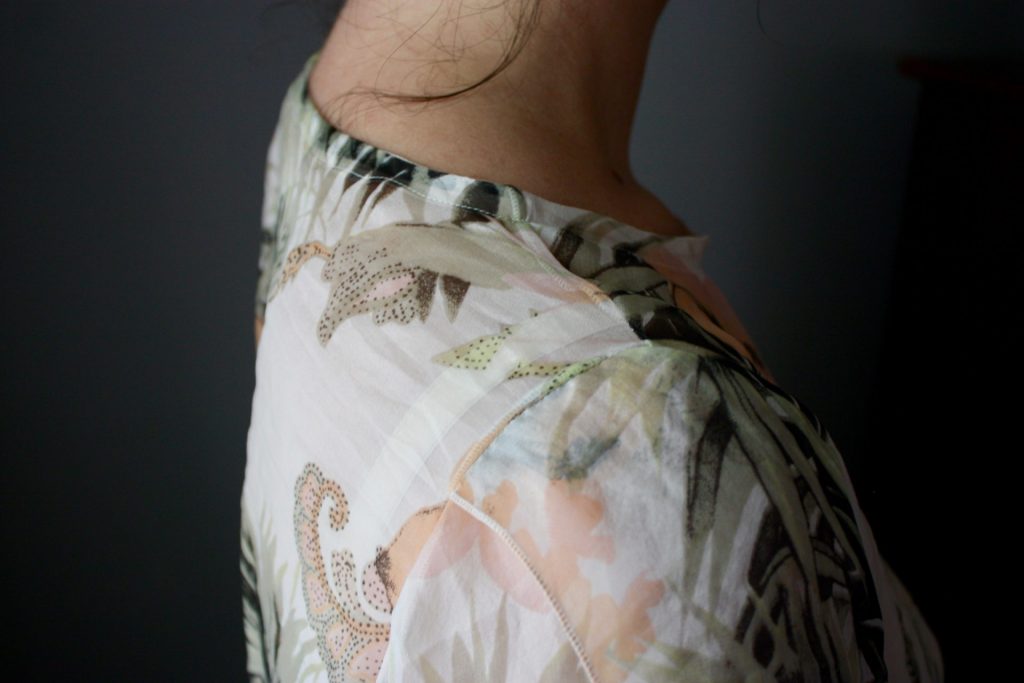
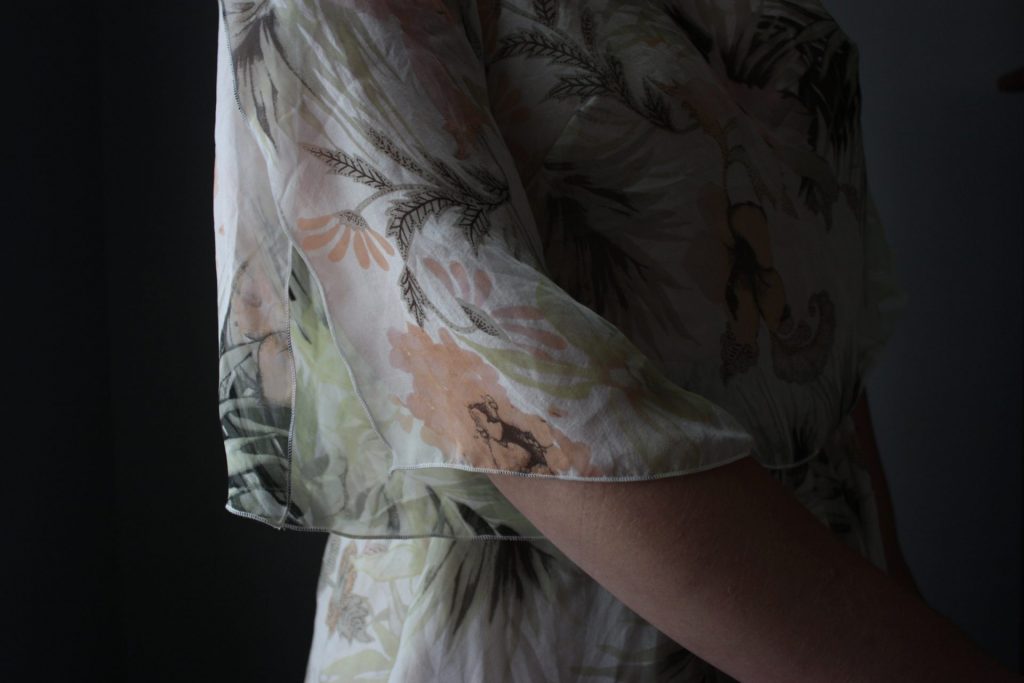
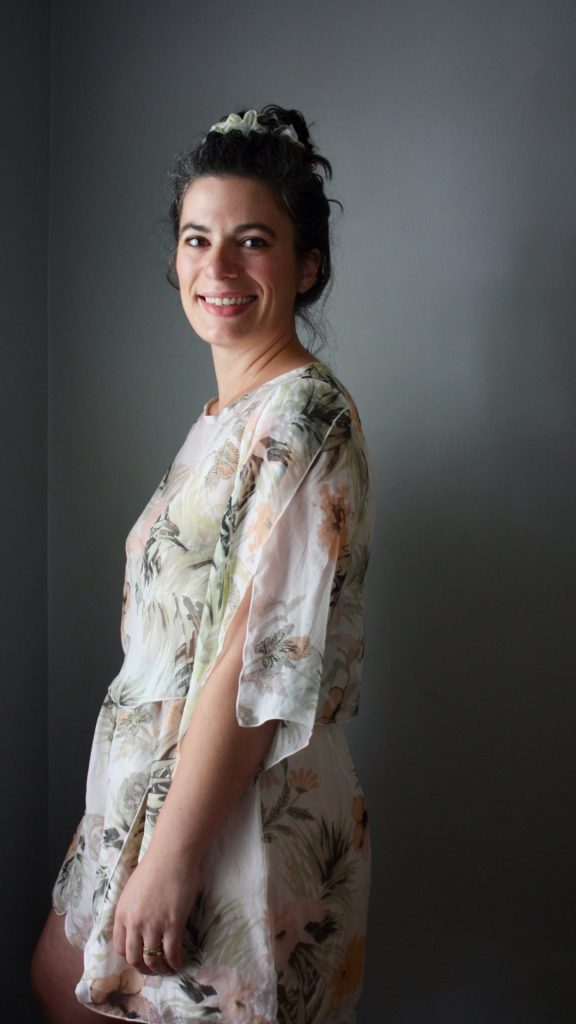
Sade Tunic (Cropped!)
I really like this pattern, and I would like to make the full tunic at some point. The fit is nice, and I love the sleeves. I traced the bodice to the waist line indicated on the pattern, and then added a bit of length so the top would fall near the elastic waist of the shorts.
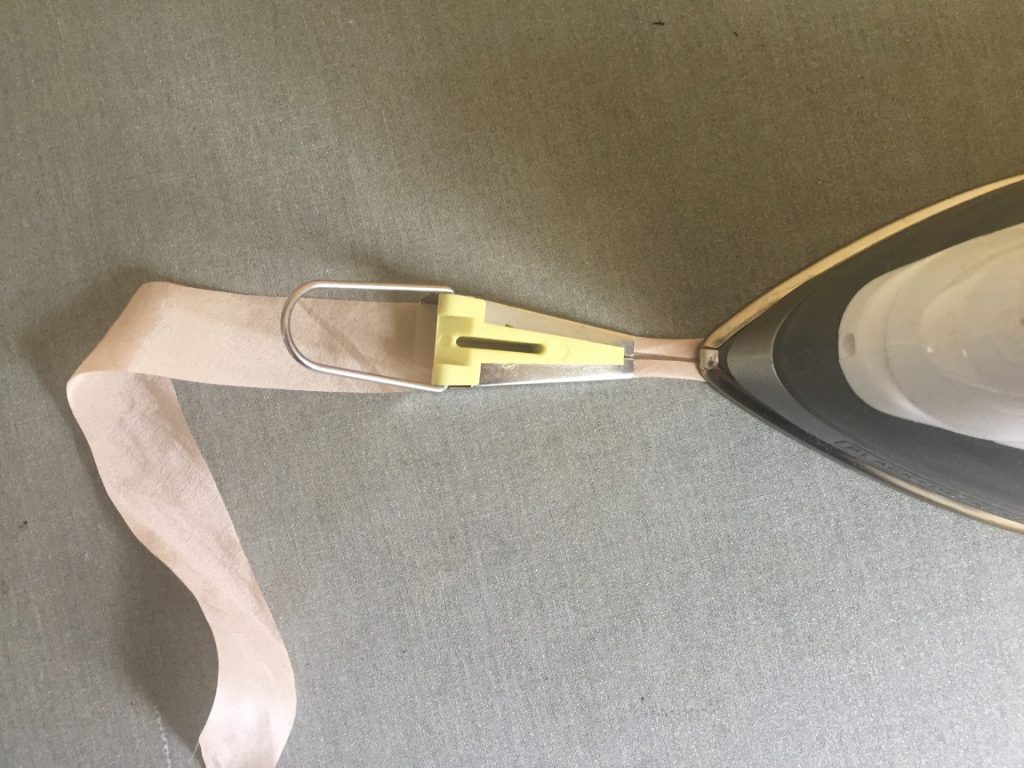
I even took the time to make silk bias tape with my handy bias tape maker from my shorts’ leftover beige silk! Patience and pressing were required.
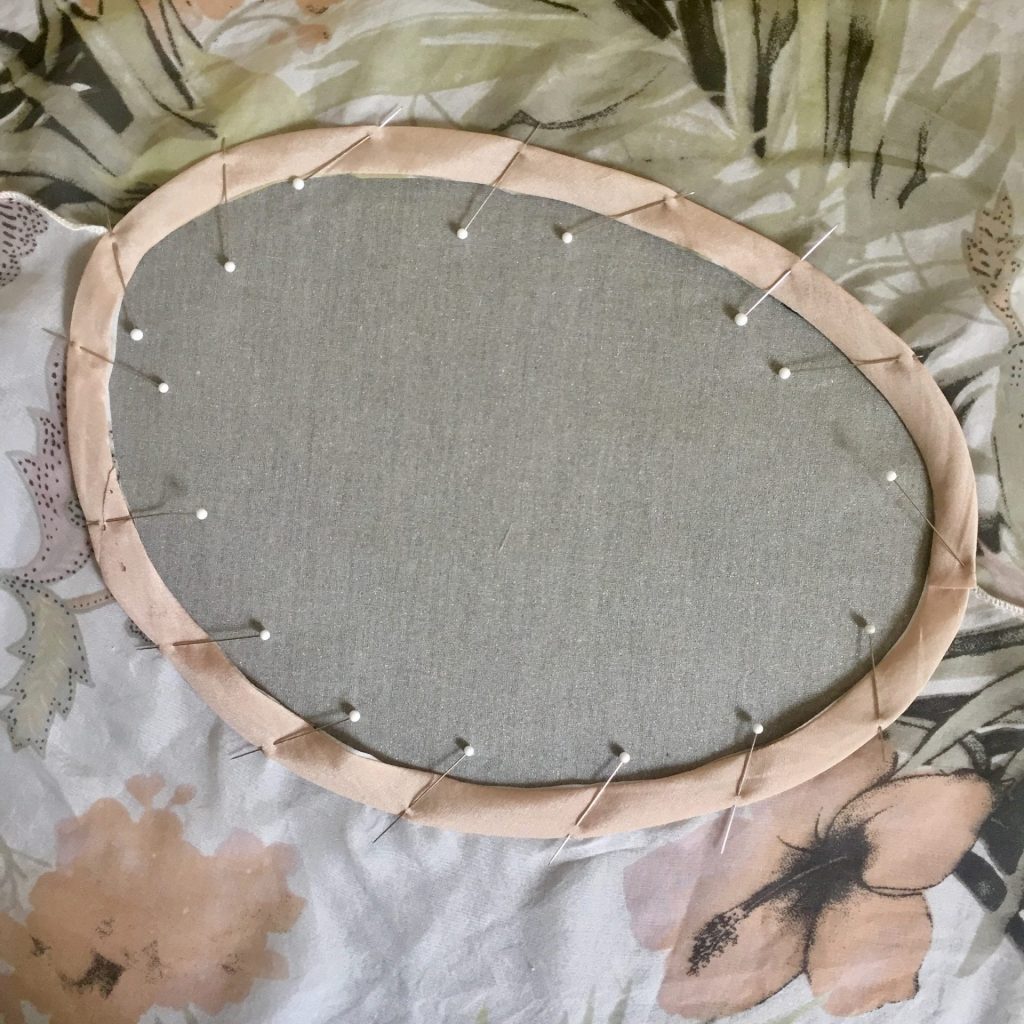
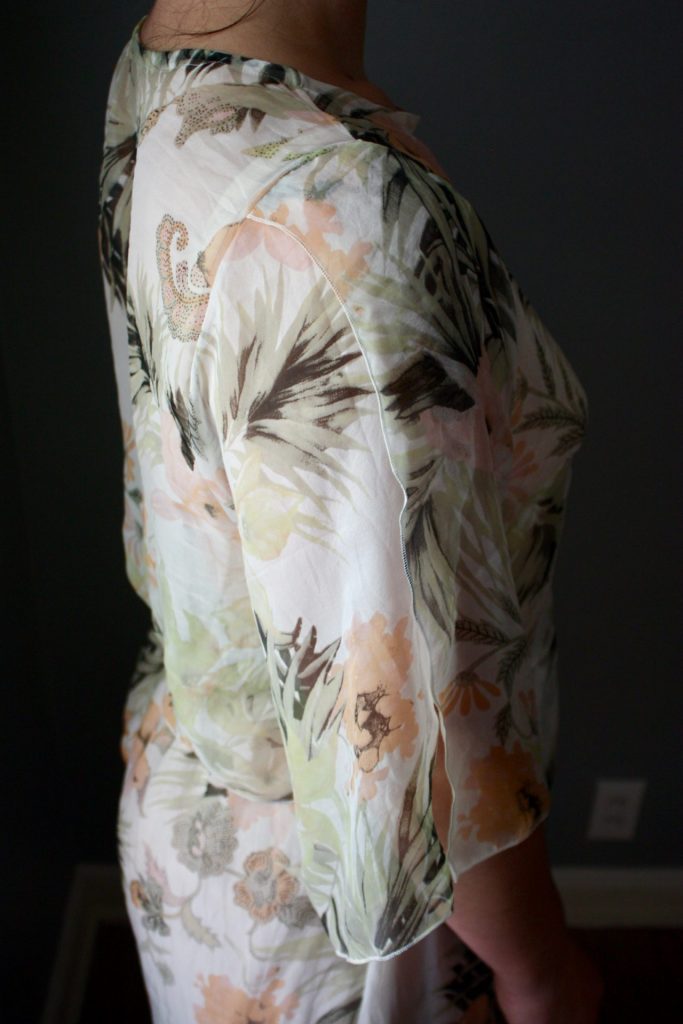
Again, rolling hems at every step! Shown below are the front sleeve (left), and back sleeve (right) sewn together along the underarm seam and rolled hems around the entire edges.

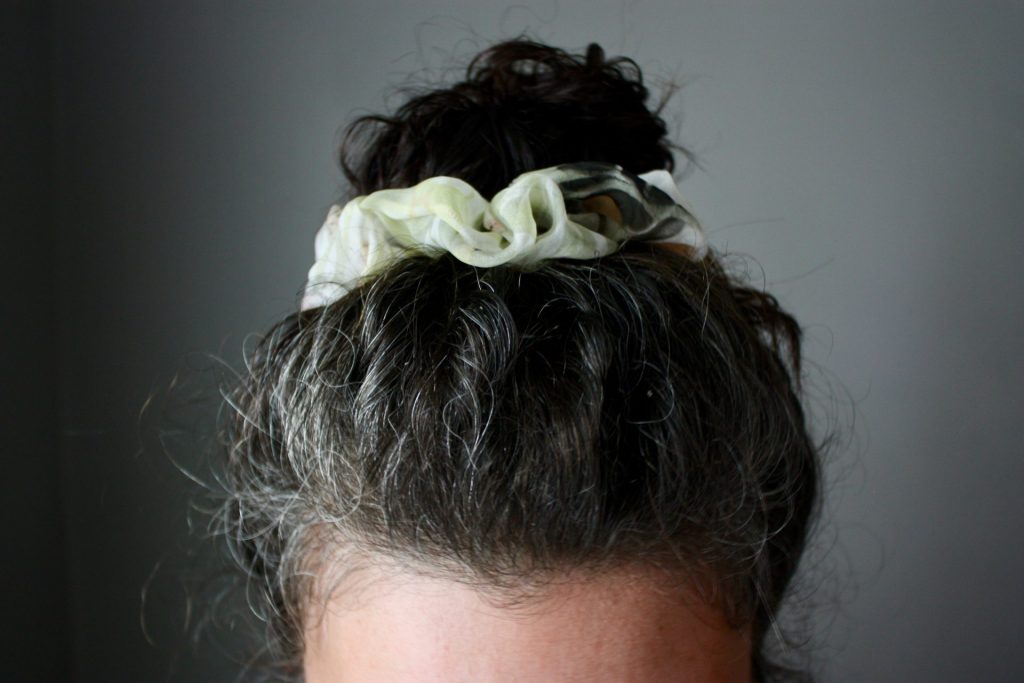
Oh yea, I made a scrunchie to match
Matching Sleep Set of My Dreams
Off for a nightcap, nighty night!
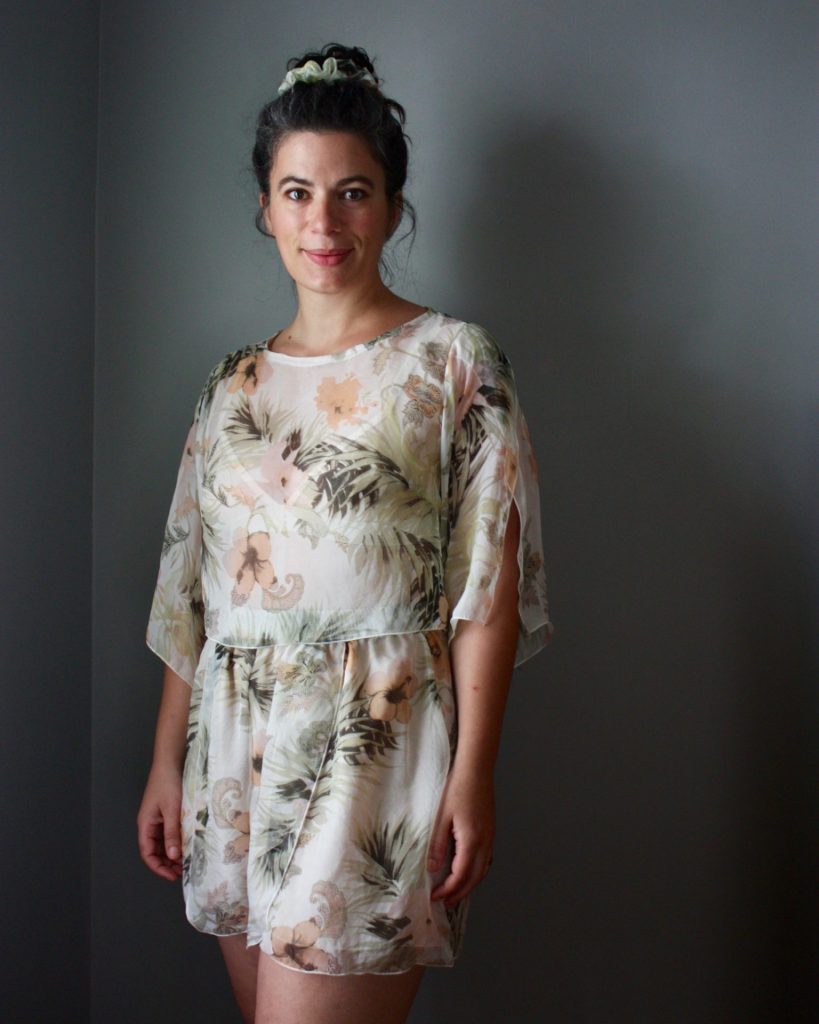
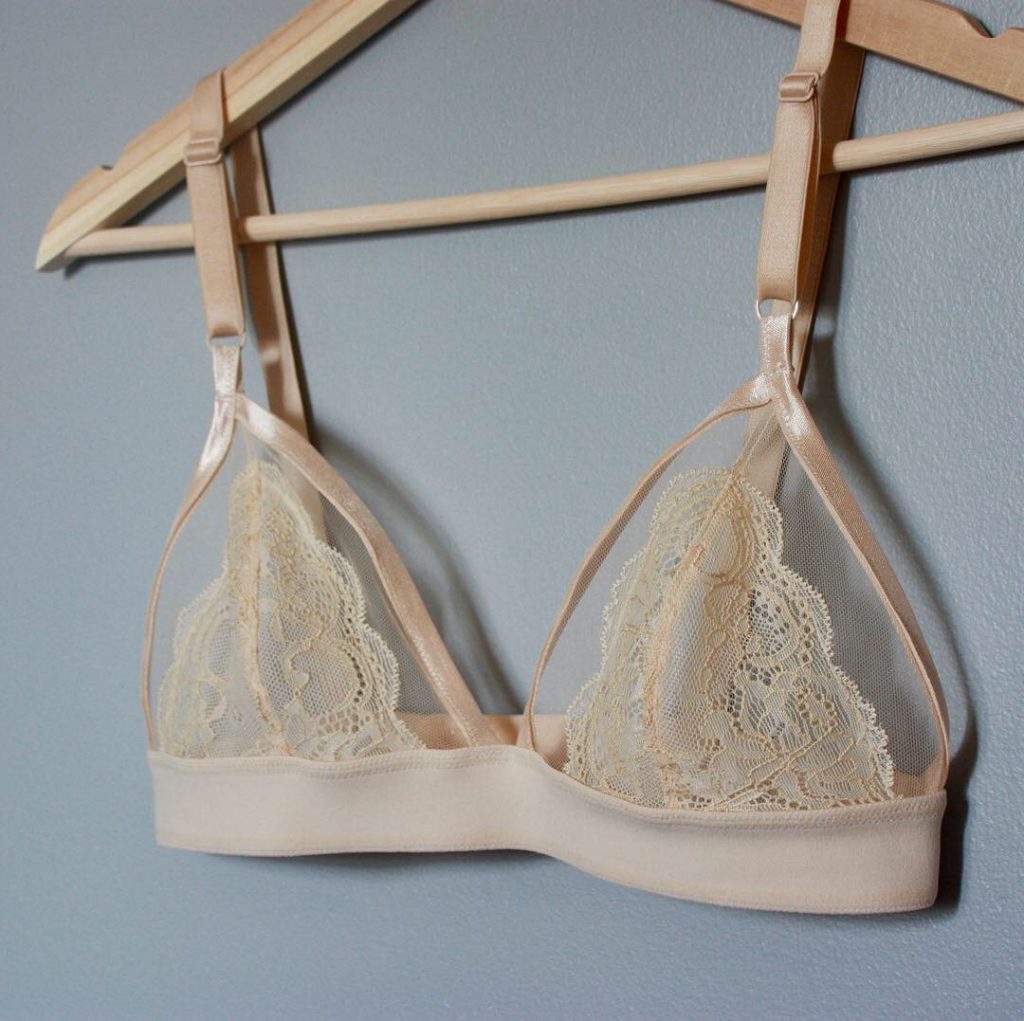
Yes, the top is quite see-through, so if you are wondering about the bralette, I wrote about that pattern here!
Thanks for sharing. Nice details and very beautiful on you!
Thanks so much, Linda!
This is a true luxury! What a beautiful set, and wow, the pattern is broken! I love the Sade tunic, and I’ve made a couple, but it never crossed my mind to crop it… Nice work with your serger, the finishing looks so proportionate to the fabric.
Thank you for such a detailed post. I have the same book and have yet to dabble with any of the patterns but this has inspired me. Your loungewear set just looks so lovely!