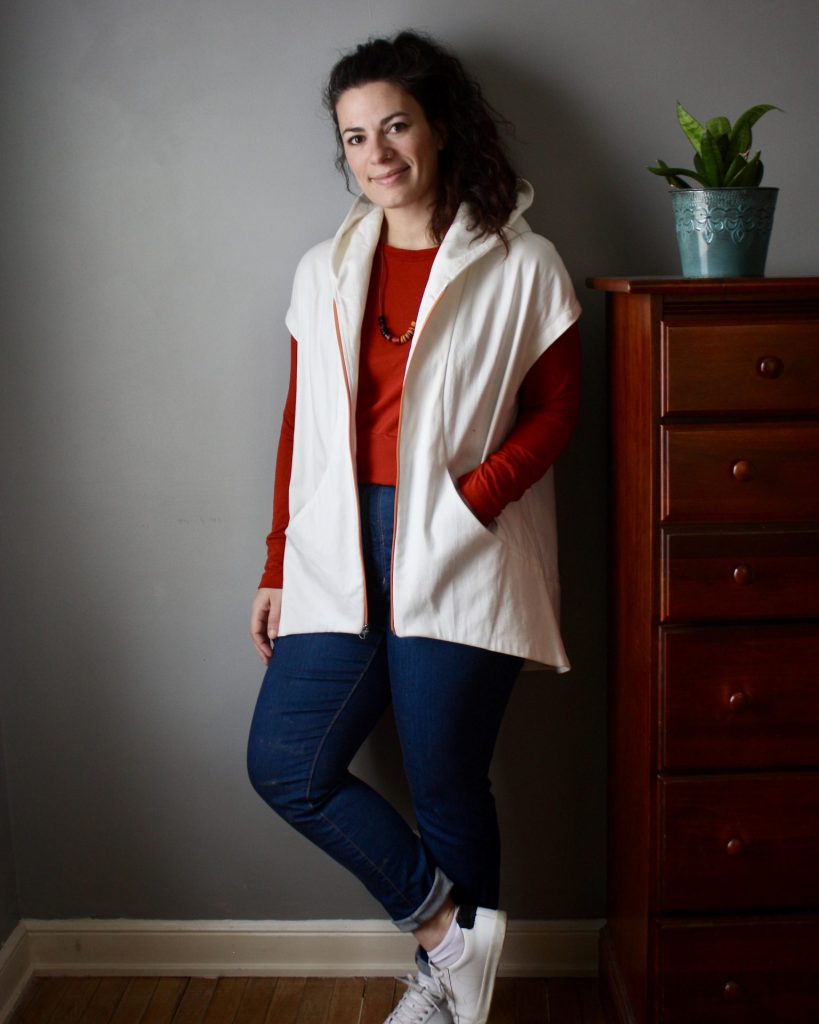
The Hove Jacket by In the Folds was one of my first pattern testing experiences last year. Emily (In the Folds) has been working hard on several patterns since then and it’s Hove’s turn to shine! This is a project that teaches a lot of great finishing techniques like bias bound and Hong Kong seams. I have been wearing it for over a year and I’ve been so eager tell you all the great things about this design. I’ve been able to talk about it in person because I’ve had strangers walk across entire rooms to ask me where I got this jacket. God I love saying those magic words: “I made it.”
The Details
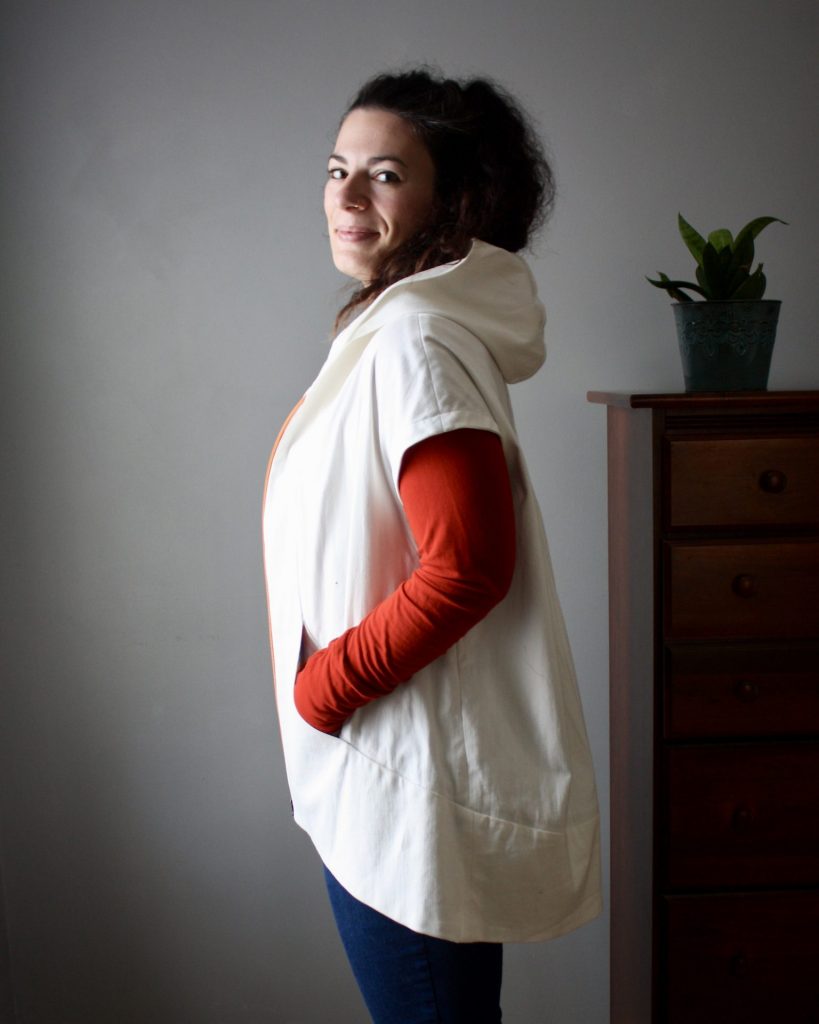
- Pattern is the Hove Jacket by In the Folds
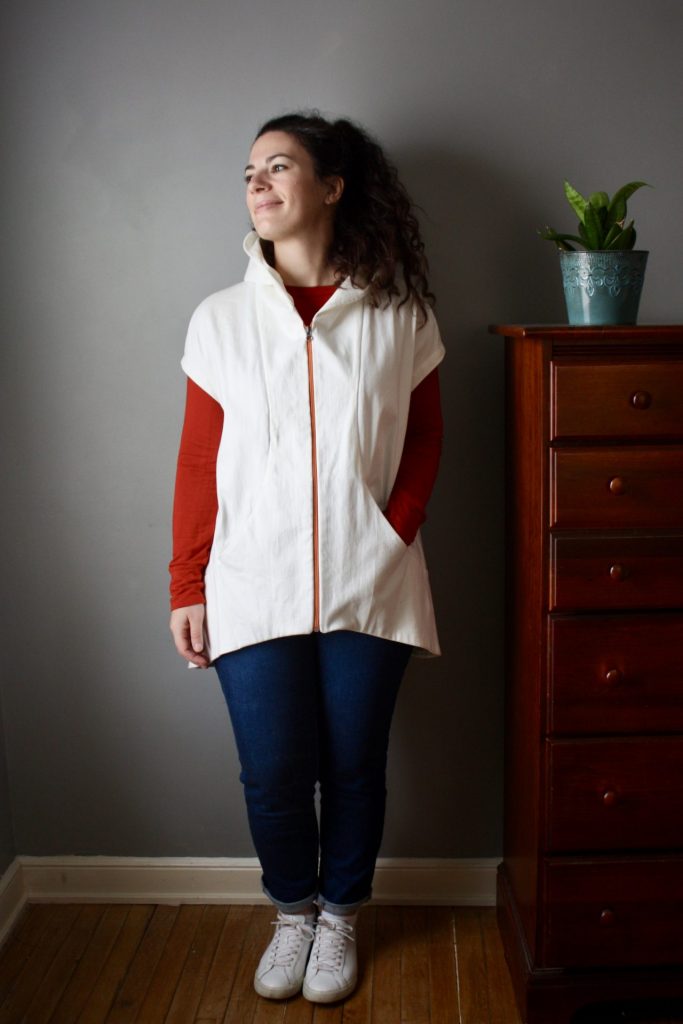
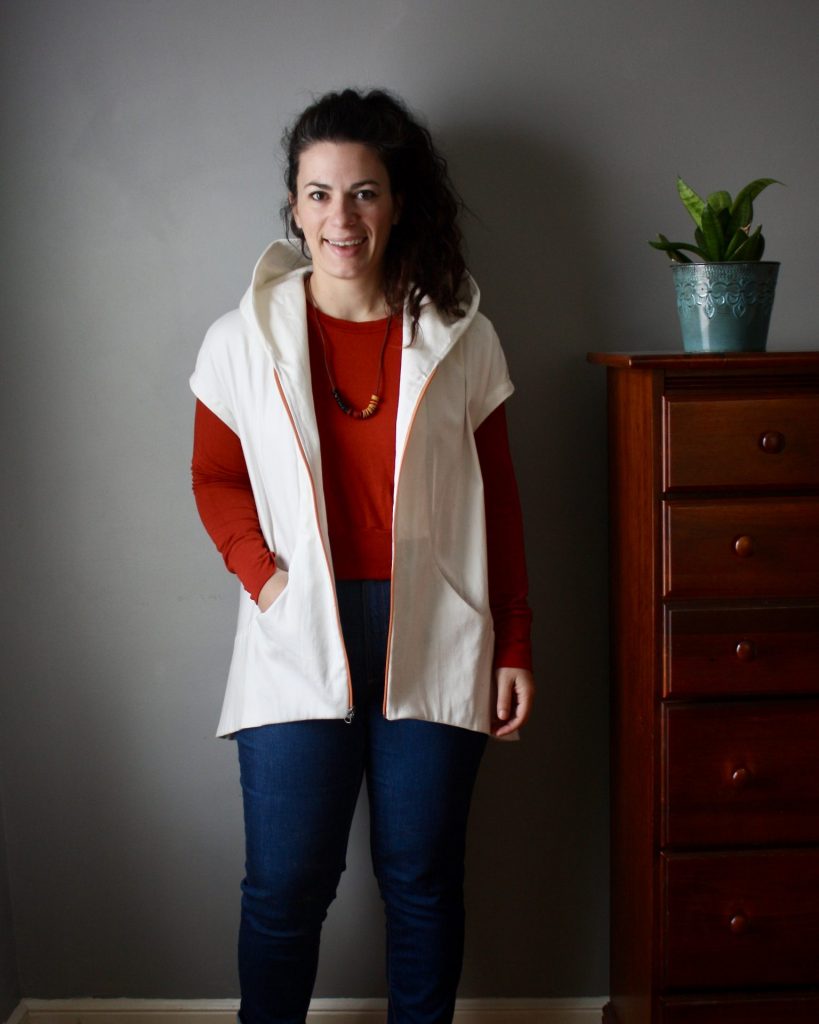
- I made View B (sleeveless) in size D
- No fit adjustments (I’m 36/29/45″ bust/waist/hip); pattern has lots of ease
- Fabric is white denim from my local outlet. It has a bit of stretch, though not necessary for this pattern.
- Bias binding fabric and pocket lining is rainbow checked cotton shirting and 22″ orange zipper from the same outlet (SR Harris).
- Completely sewn on regular sewing machine
- Useful tool: bias tape makers
- Styled with Cedar Sweater and Ginger Jeans
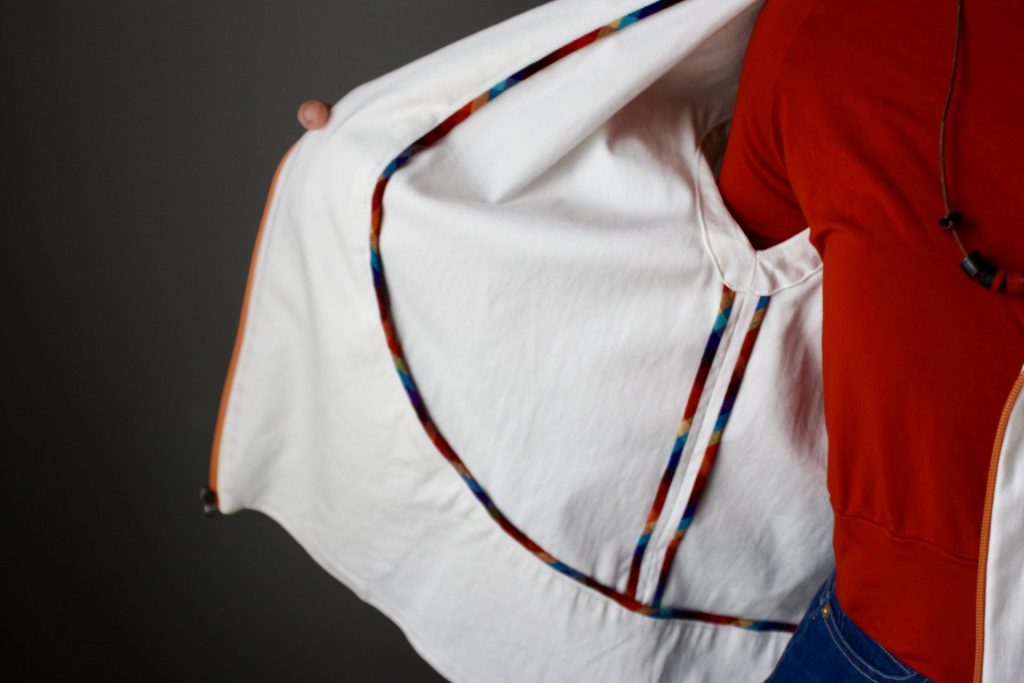
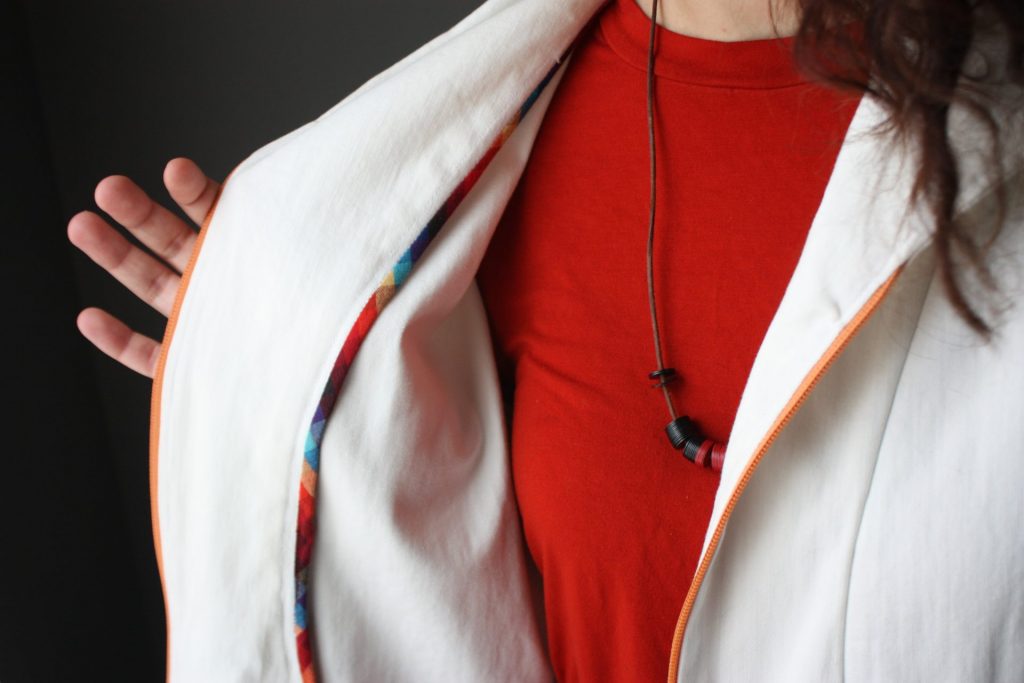
Bias Tape
Since the Hove Jacket is unlined, bias tape is used to finish all the seams on the inside. The pattern instructions have an excellent section on how to make your own bias tape. When I saw the required bias tape requirements (6.5 to 11 yards depending on view/size), I was thinking I’d need a ton of fabric in order to make it myself. That’s definitely not the case. With my little 24″x24″ square, I was able to make more than enough! I sent my extra length to a friend in the mail. I really love how the rainbow checkered fabric looks cut into little bias strips. It’s the perfect opportunity to use some of that crazy quilting cotton in your stash.
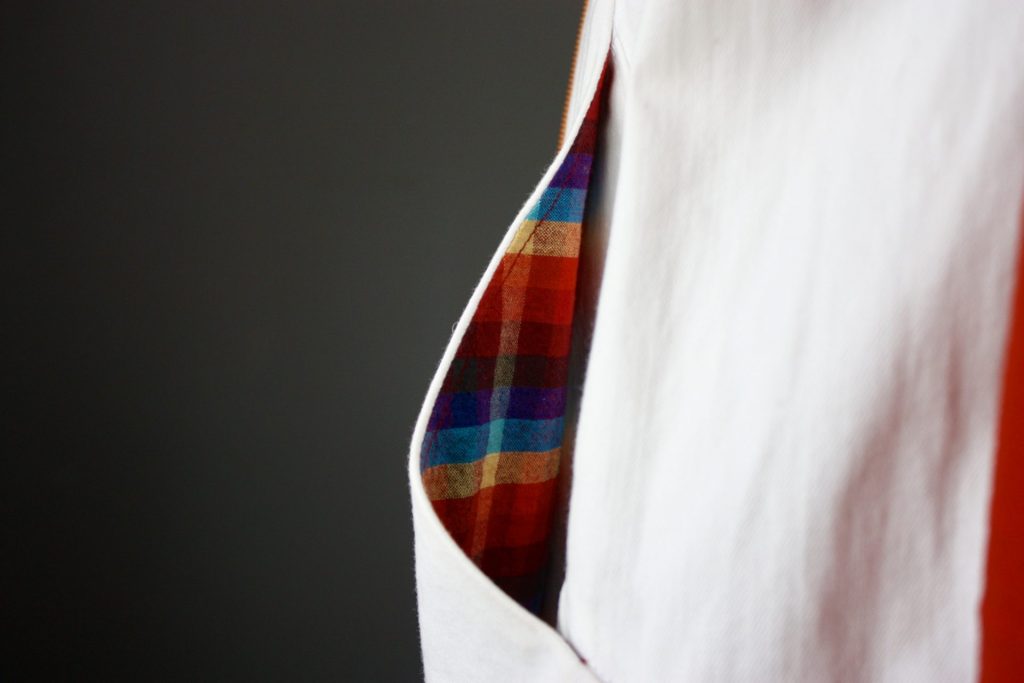
Pocket Lining
I used the same bias tape fabric to cut my pocket lining pieces. I look down into my pocket and see a little pop of color. With the white denim though, there is just a touch of see-through-ness. Not enough to bother me, but it’s something to think about if you make the Hove Jacket in a lighter fabric with colorful lining. By the way, the pocket lining that rests against the body is in the main denim fabric. I think that gives a more professional finish. I didn’t necessarily want people to be able to see the colorful pockets from the front view of the jacket with pockets slightly open. It’s really just for me, and if I decide to show it off to anyone willing to listen.
Curving Seam Lines
Easily the most remarkable feature of this pattern is the swooping seam lines around the body of the jacket. The big curved seam over one side of the chest carries on around the lower back and then back up the other side of the chest and up around the back of the neck. It’s a full circle. It’s amazing to see these odd shaped pieces come together and that was the most satisfying seam of the whole project. It goes on forever and when I finished it kind of blew my mind how it all clicked together. I thought sewing the inseam of a pair of jeans was a long go. This one takes the cake.
Enjoy the slow sew and the long seams. It’s all worth it in the end.
Easy Fit
As you can see from the finished garment measurements, the Hove Jacket is designed with lots of ease. I really loved not having to even think about grading sizes at the hip, since that’s almost always the case. I also didn’t make any changes to the length. The pattern is drafted for 5’7″ height and I feel the pockets land perfectly where I want them.

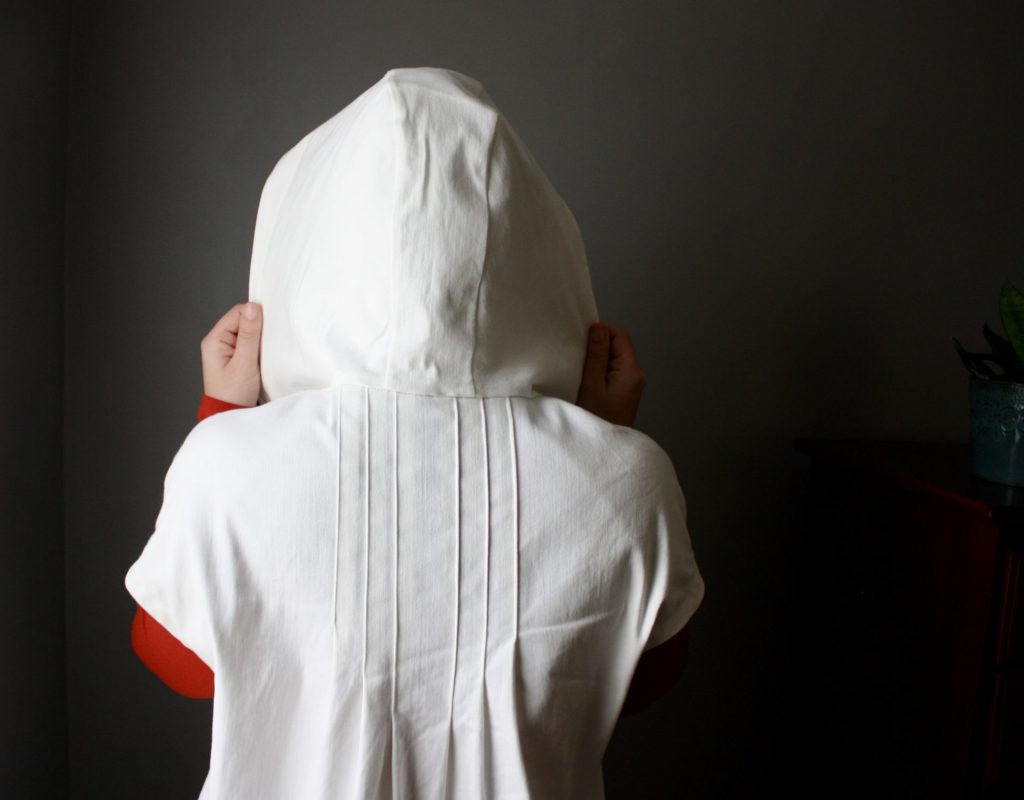
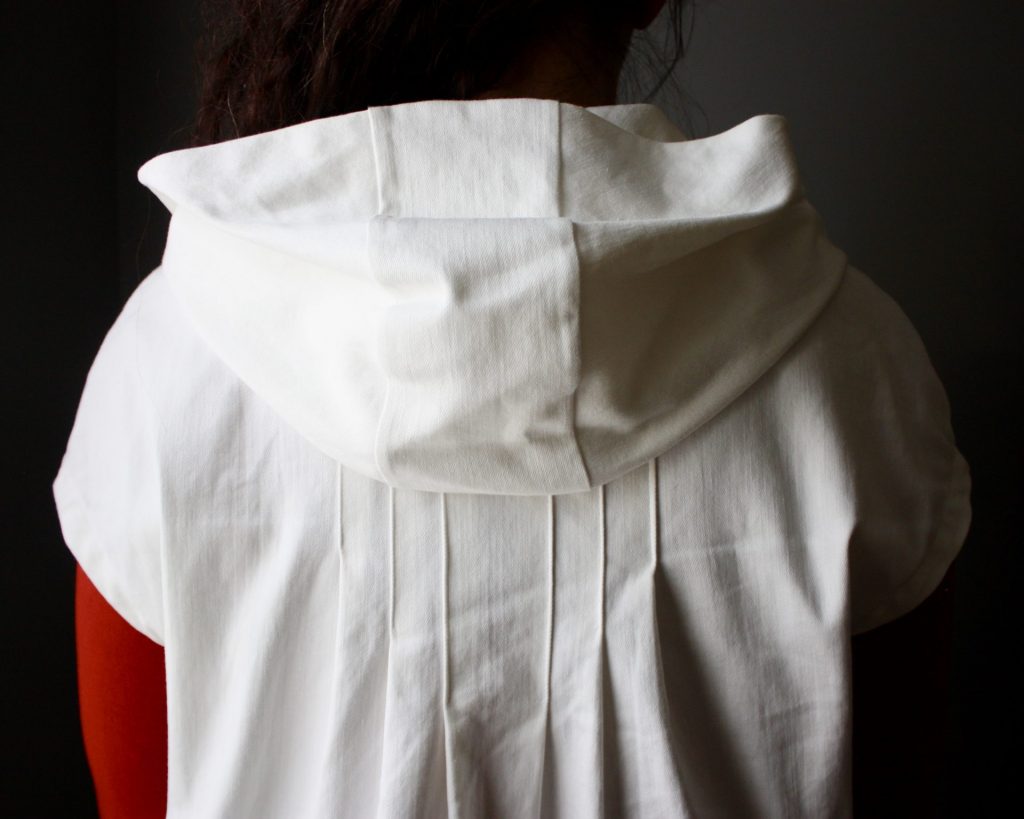
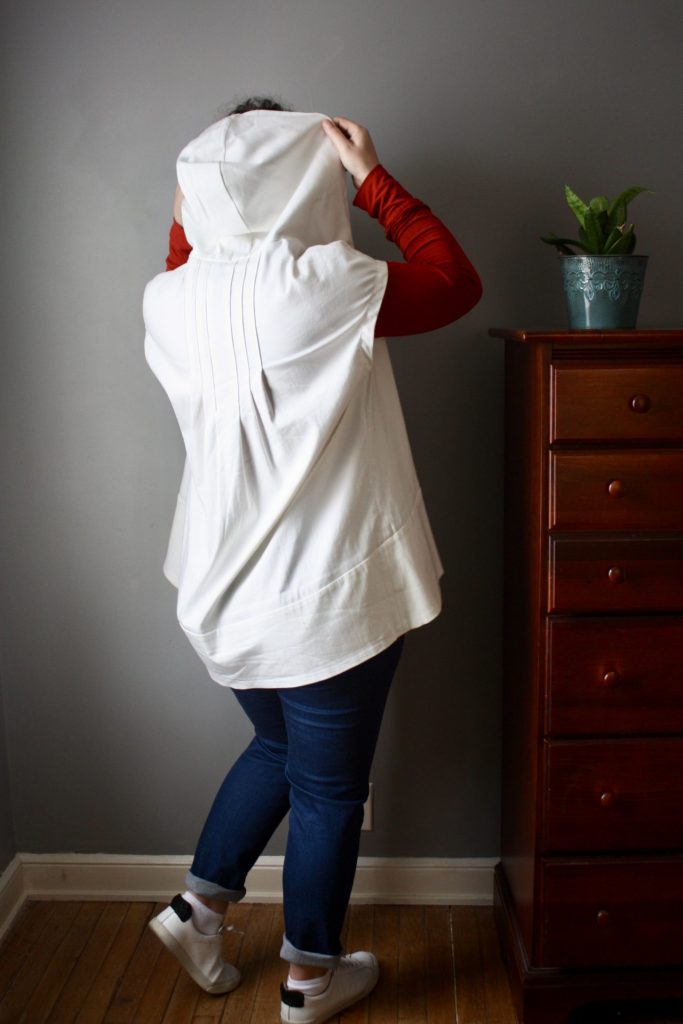
Pleat Magic
I got sucked right in to the magic early on in the project since this is the first step of the construction process. I’d never done pleats like this before and it is super satisfying to do those runs of top stitching, especially in denim. The pleats look fantastic with their varying lengths, but they also provide all the extra ease in the bottom of the garment too. As I mentioned before, I love a pattern that I don’t need to grade out with my 16″ different between waist and hip.
With the hood down, the pleats are covered a bit, but it’s a fun detail to show off when someone asks (aka compliments) about the jacket.
Cool Factor
When I finished this jacket awhile back, I was still fairly new to making clothes that packed a punch. I had a lot of basics and well fitting garments, but this was pushing my style in a new way. During the pattern test, I was crossing my fingers for the long sleeved View A assignment, but I am SO glad I made View B. I expect a lot of makers will initially gravitate toward making the Hove Jacket with sleeves, but I really think the sleeveless view is the dark horse of this pattern. Guess who stomped right around the house wearing this shouting, “Look how cool this is. I feel so damn COOL in this. This is why I make my own clothes now. I’m getting it. (swear words) yes.”
I loved hearing from Emily at In the Folds is that she doesn’t design based on what is trending. She can work on a pattern for as long as she needs without feeling like she is missing some sort of fashion deadline. This pattern is unique, well drafted, and timeless in its own way. I just picked up the Darlow Pants from In the Folds too. I am so looking forward to sewing those similar curved seam lines too.

Final Thoughts
Obviously, I love the pattern and I am really looking forward to making the long sleeve Hove Jacket too. Please let me know when you make the Hove Jacket, and by the way, just see how long it takes for someone to walk across the whole damn room to talk to you about it.
Bonus Jeans
With the leftover white denim from the Hove Jacket, I was able to squeeze out an entire pair of jeans! I made the Ginger Jeans and they are admittedly a tiny bit off grain, but better than scrapping the fabric. Check out a pic of those white hot Gingers from deep in the Instagram grid.
I love how original this is !!!
And live the sleeveless option !
Well done Mia !!
this is so cute!!! I live in a climate where it can be chilly one day and warm the next so this is the perfect style jacket to layer with!