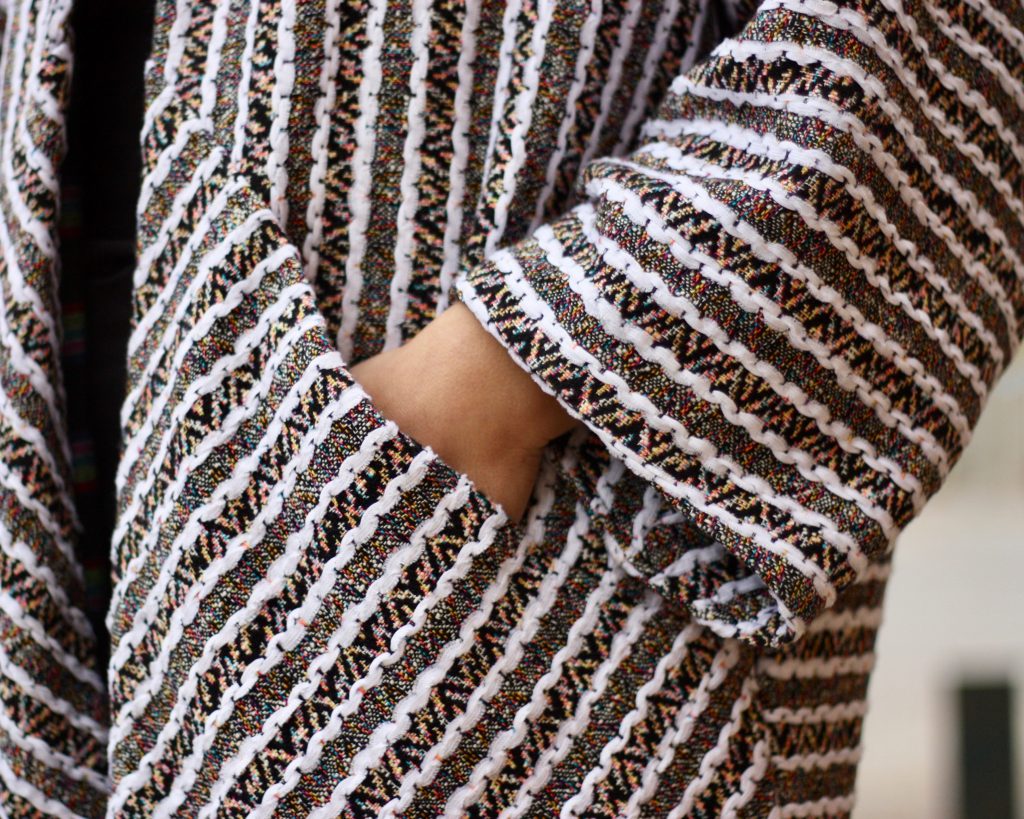
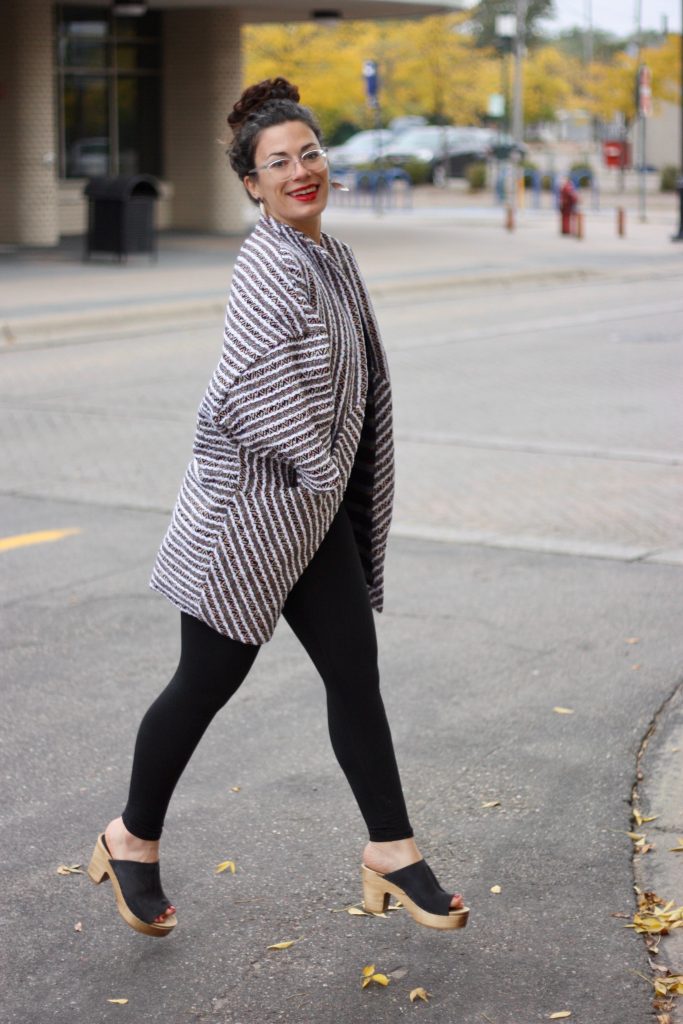
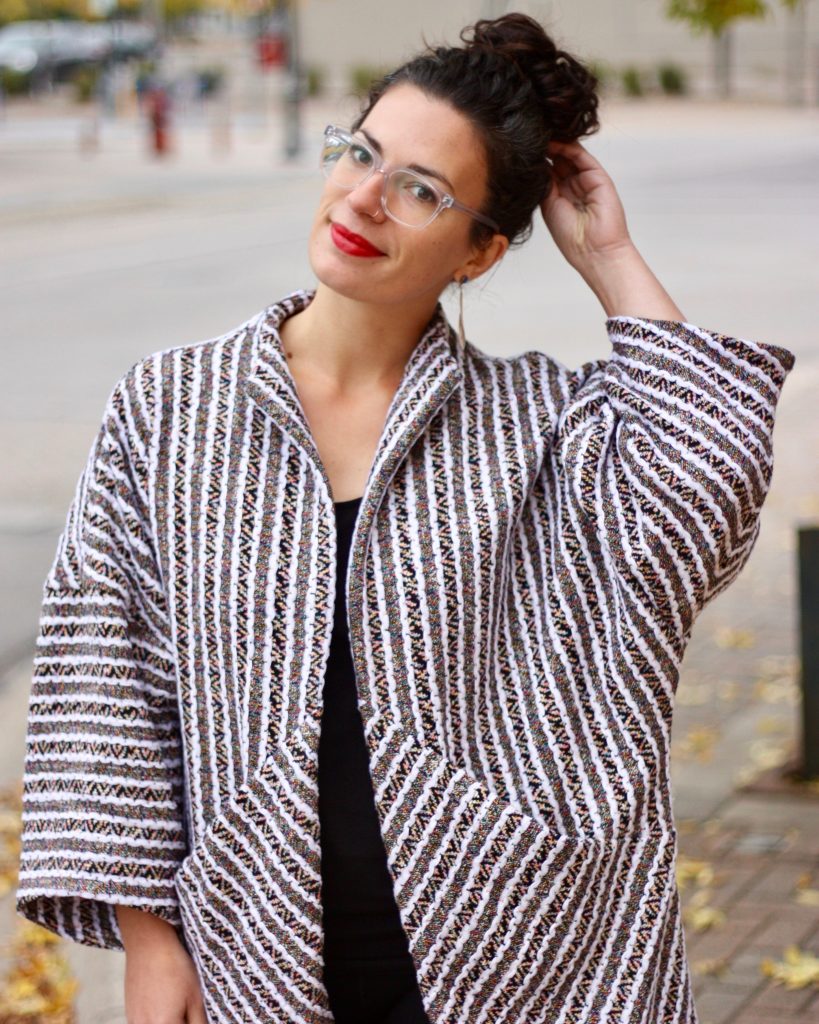
The Sapporo Coat by Papercut Patterns is a natural statement coat in just about any fabric. I went for all the marbles with this Italian stripe wool from SR Harris (Minneapolis area outlet). I’ll tell you about how much I love this pattern, and how I worked with these stripes to make what I think is the most flattering stripe direction for this oversized coat.
The details
- The pattern is the Sapporo Coat by Papercut Patterns
- Sizes available: XXS-XL, but only 3 sizes to cut from on the actual pattern (XXS/XS, S/M, L/XL)
- I sewed the S/M, following their chart. My measurements are 36/29/44″ (bust/waist/hip”)
- No modifications or adjustments to the size
- Fabric: Italian wool blend from SR Harris; soft wool lining
- Fabric stripes are on the cross grain
- Stripe direction:
- Back panels cut on grain
- Front upper panels cut on crosswise grain
- Front lower panels cut on bias and fully interfaced
- Outer sleeves cut on grain; inner sleeves cut crosswise
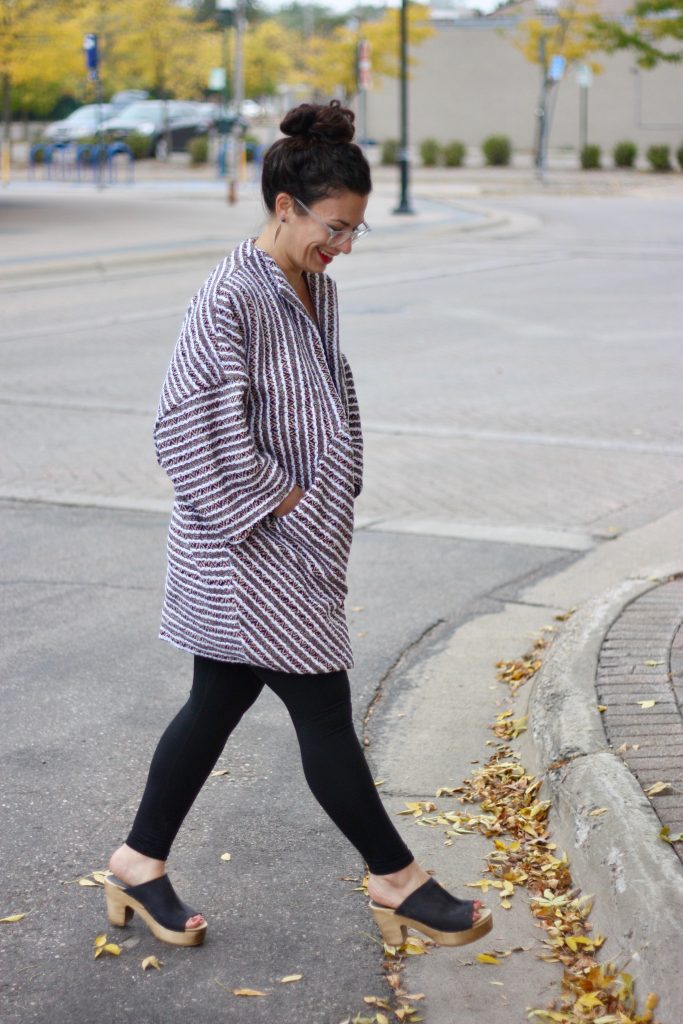
I do love this pattern. It’s definitely oversized, and I’ve heard others size down when they made theirs, but I’m happy with the intended ease. Shorter sleeves than this? No, thank you. This is why I stayed with the size that matches my measurements.
Stripe Matching
Stripe matching and preparing the fabric before cutting took more time than actually sewing the coat. I put the paper pattern pieces and pencil marked the center of each white stripe. Then I could line paper-to-paper pieces along the seam lines and mark the correct spots for the stripes on that piece. I didn’t require more fabric to do this, as I put two of the sleeve pieces on crossgrain, which saved on fabric too.
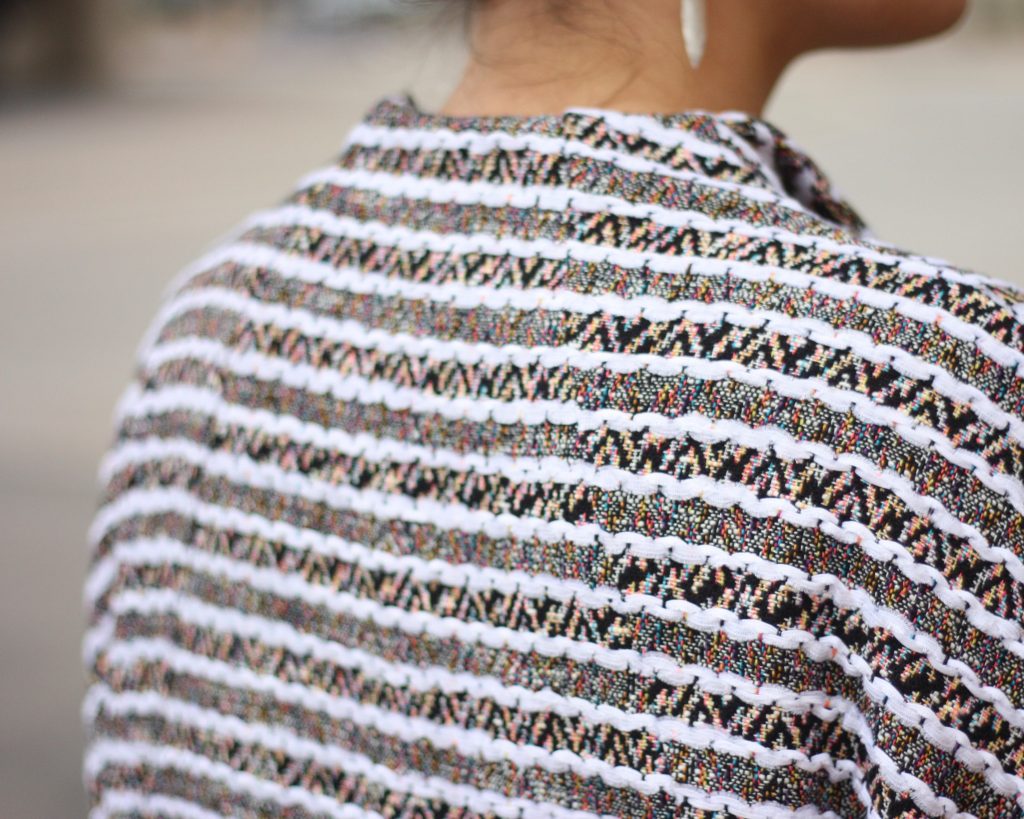
Stripe Matching the Back
I was most meticulous on stripe matching the back pieces. You can notice in the photo above that I attempted to alternate stripe textures along the diagonal seams on the back, but you have to really look to even see the seams there. I would love to see someone put some contrast piping along those seams, because they are really a lovely feature of the Sapporo Coat design. It’s a little lost on mine, but I’m still happy with the continuous white stripes across the whole back.
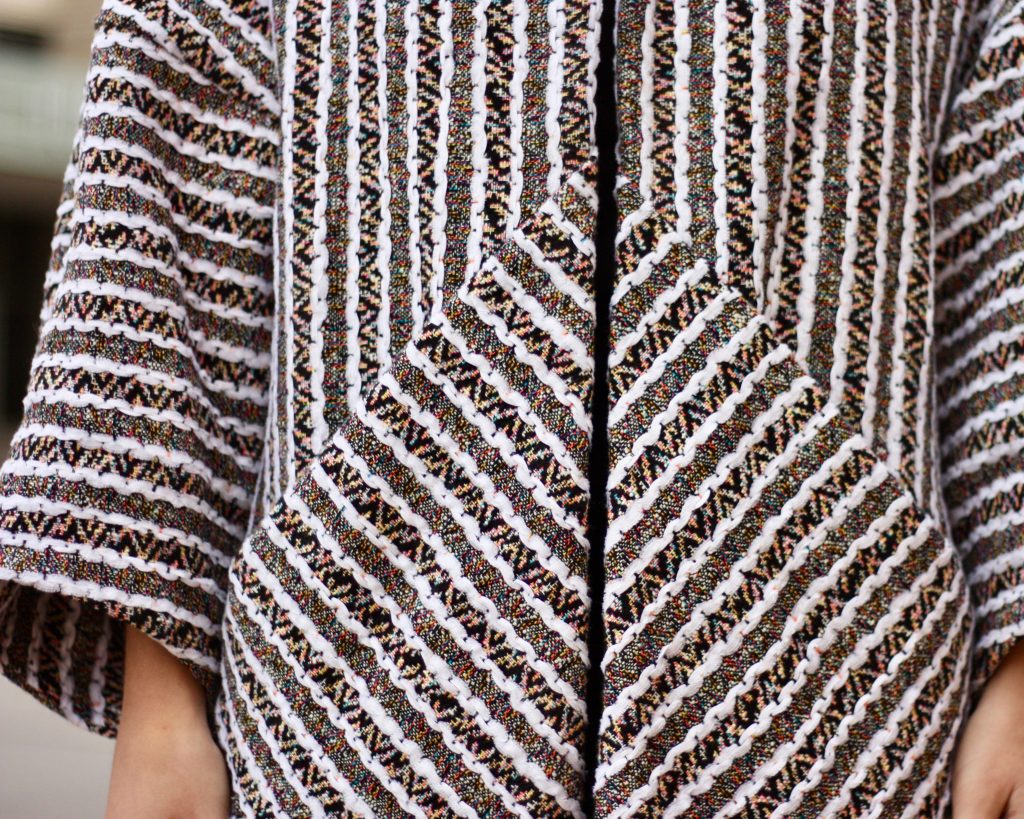
If I cut the pattern as directed on the grain line, this coat would be all horizontal stripes, and I’m not loving that look in my imagination. My version is much more pleasing to my eye. Also, diagonal stripes in this direction creates a Müller-Lyer illusion that suggests lengthening the lower half. Not sure if that’s been fully researched, but at the very least the front of my coat is smiling and not frowning.
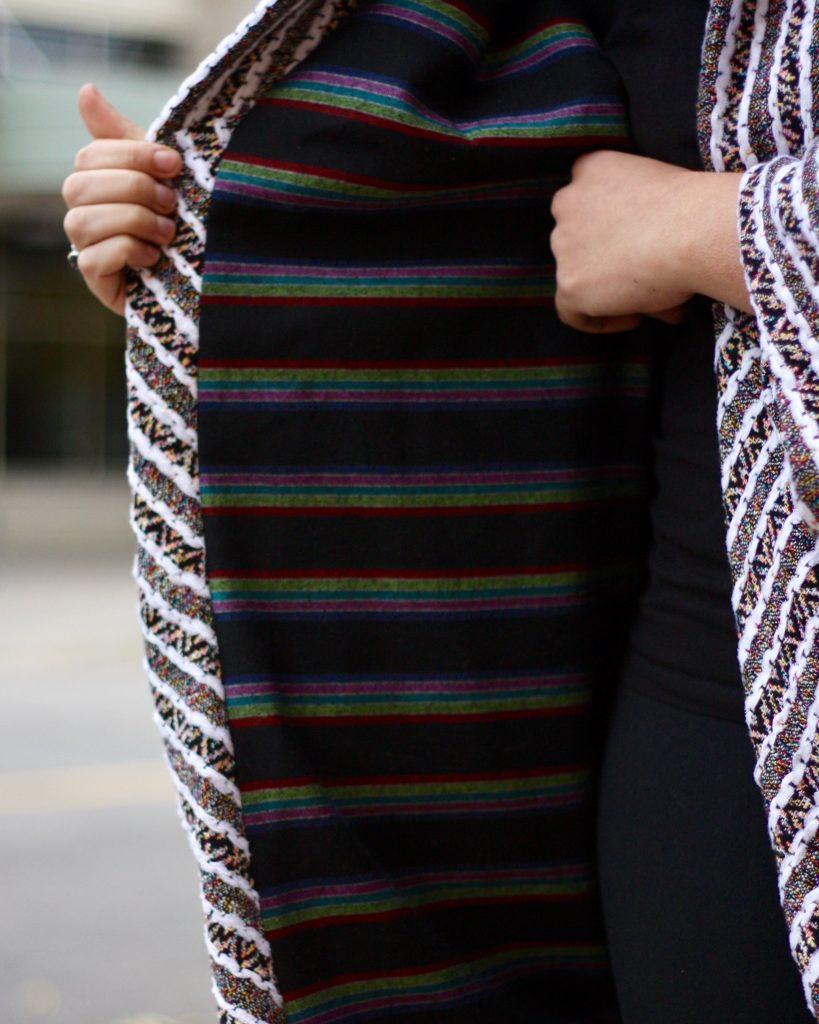
Wool Lining
I used a stripe wool lining as well. I worried about static cling, but with so much ease in this coat, I haven’t had any issues. Perhaps it would be a problem if the Sapporo Coat was much more fitted.

Final Thoughts on the Sapporo Coat
The Sapporo Coat pattern is a quick sew, packs a big punch, and has lots of possibilities for fun with color blocking, bold fabric, and flattering stripe directions. This would be a great place to start if you haven’t sewn a coat with a lining before. An overall winner in my book!

This is the most gorgeous version of the Sapporo coat I have seen!
Thank you Mona!!
So perfect! Have two Sapporo’s in mind! Thanks for a great post! les
Excellent! Have fun with your makes!
You did such a gorgeous job on this coat that I was inspired to find fabric immediately and drove to SR Harris to get my creative juices flowing. To my utter shock, I actually found the wool you used, and I’m over the moon excited to get going on this pattern! Thank you for the incredible idea!
Fun! I always smile when I see that fabric still on the shelf too. The ‘wrong’ side of the fabric is SUPER cool too!