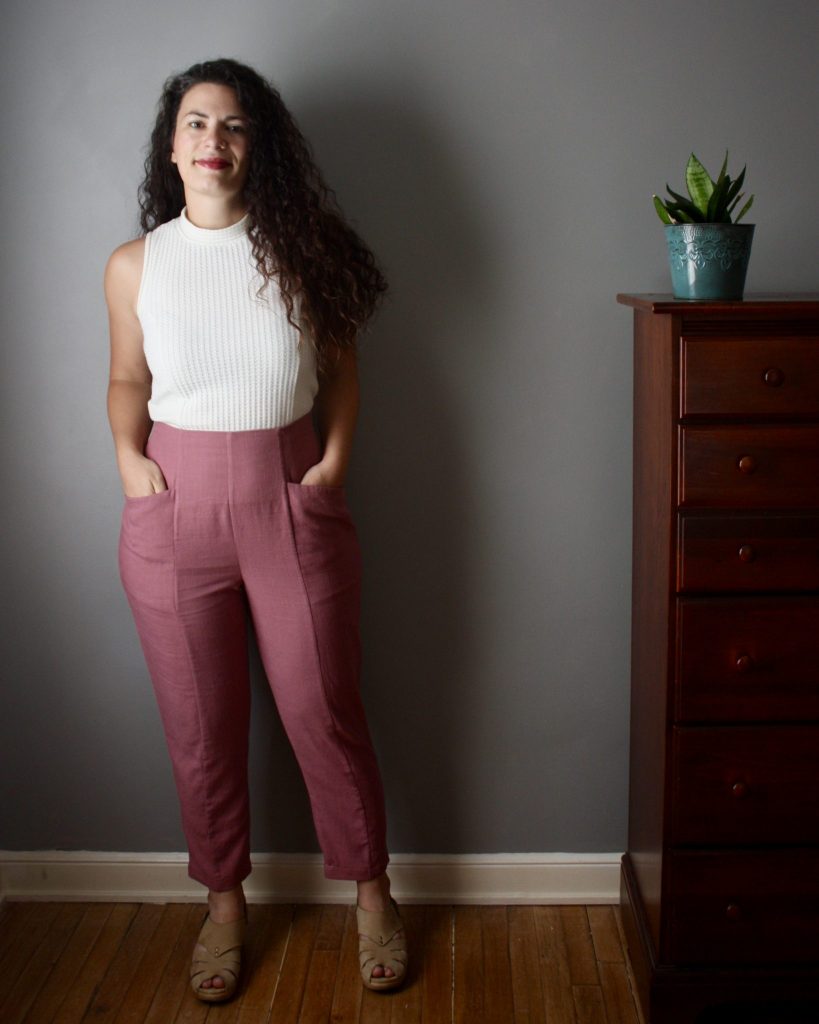
Elastic waist pants are a dream! But…(butt)…you gotta be able to get them on first. These Pietra Pants from the Rome Collection by Closet Case Patterns have such a beautiful design. Most sewists will be able to follow their clear instructions and sew them up easily, slipping them on and calling it a day in no time. Pants without closures are a quick little dream to sew! However, with my waist-to-hip ratio, I wouldn’t be able to pull them up over my tushie, even with the elastic. I’m not complaining, and neither shall you! Check out how I graded sizes, added an invisible side zip, and included some nice finishing touches. Survey says: New favorite pantaloni!
The Details
- Pattern is the Pietra Pants by Closet Case Patterns view B, available sizes 0-20
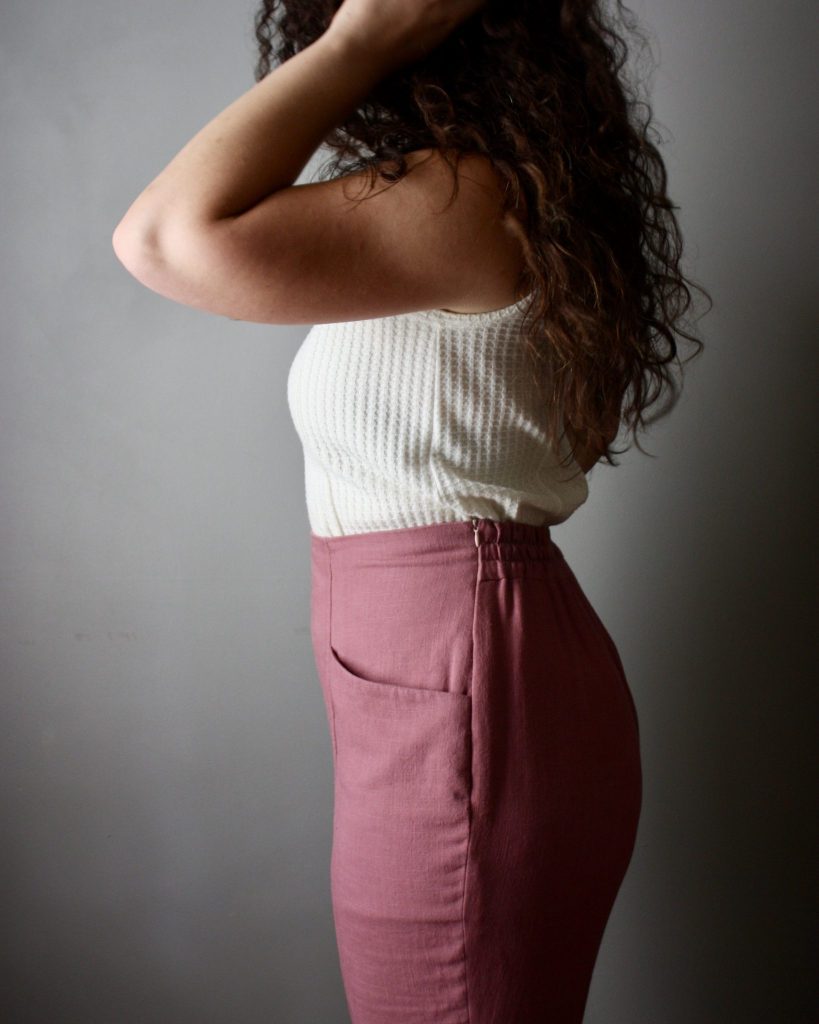
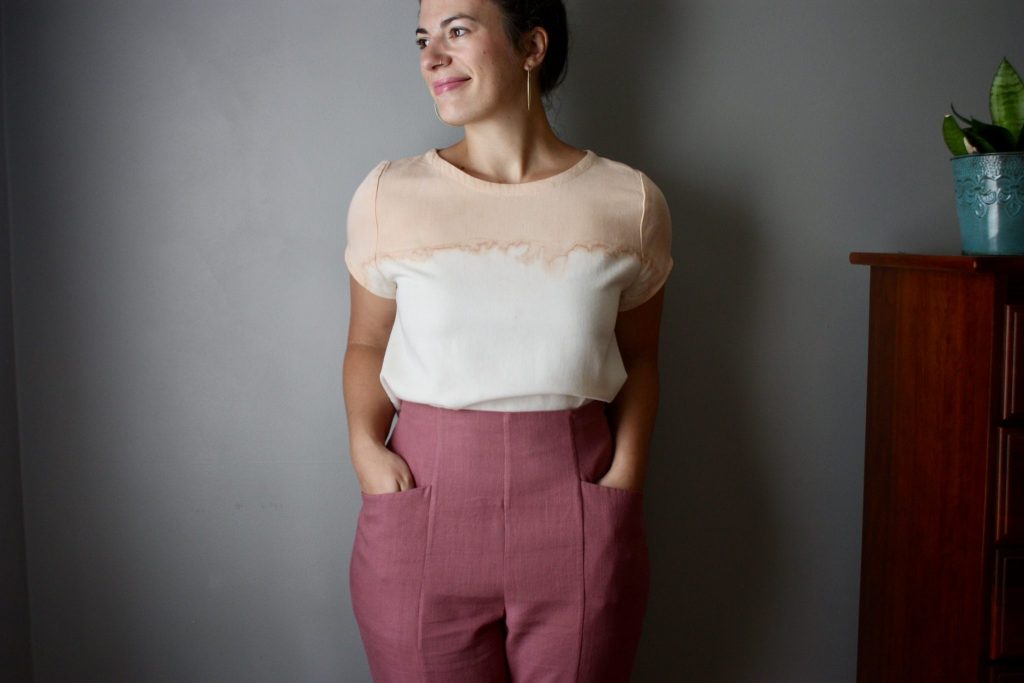
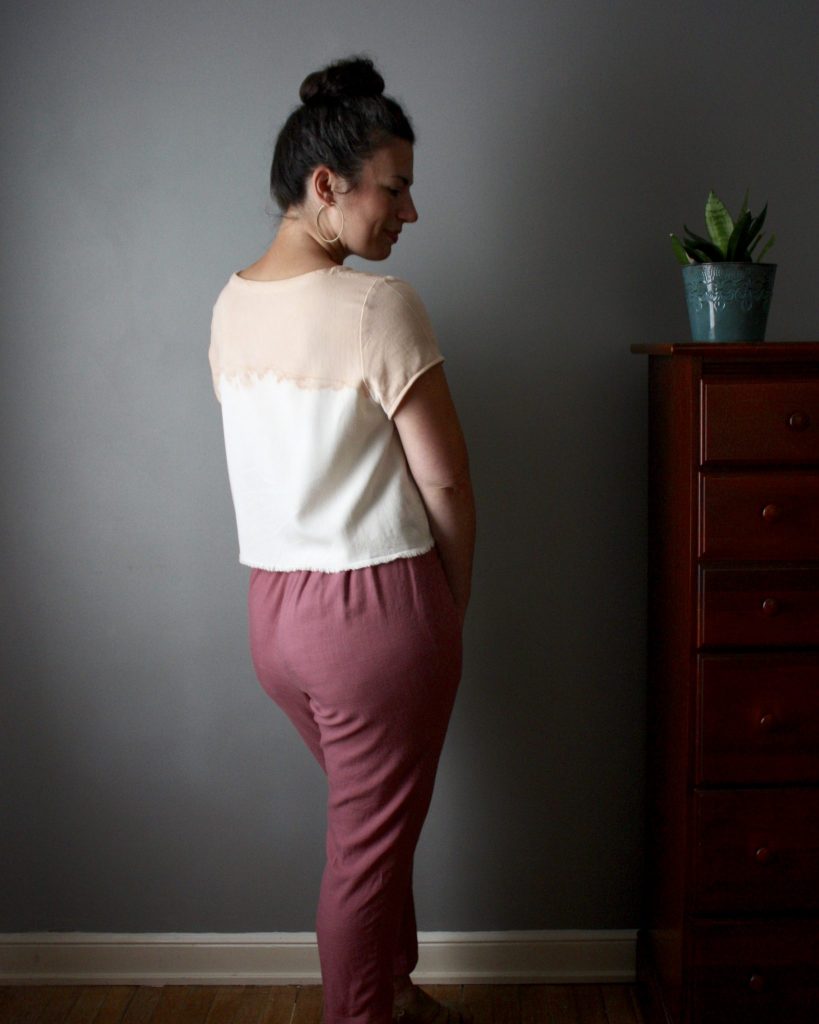
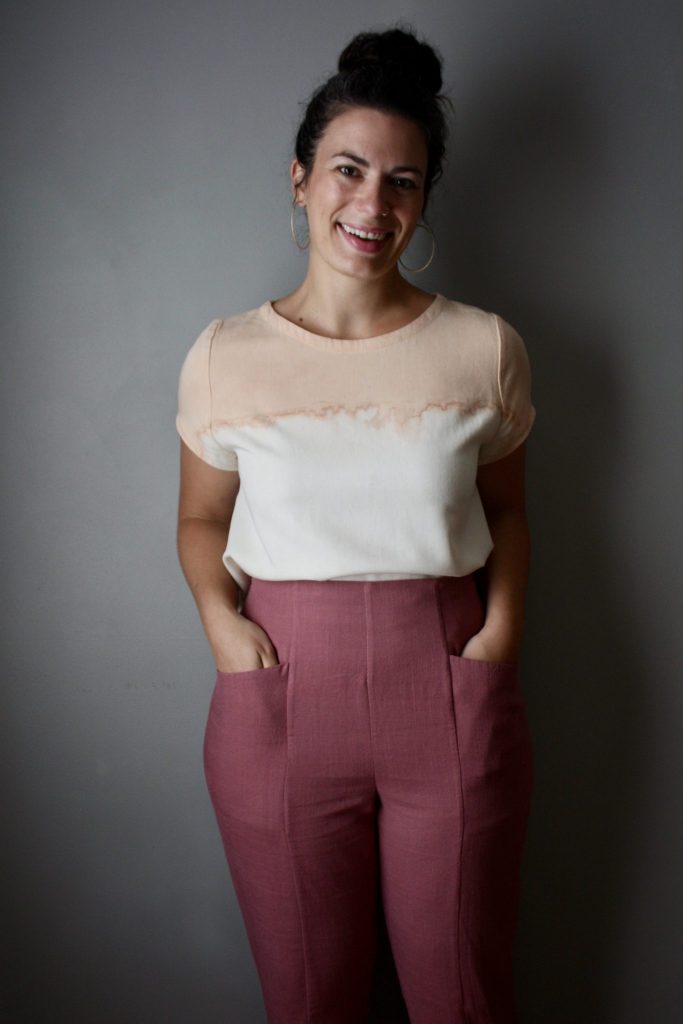
- I graded from a size 10 waist to size 18 hip (my measurements are 29/45″ waist/hip)
- Modifications: lengthened size 10 rise by 1″, added invisible side zipper
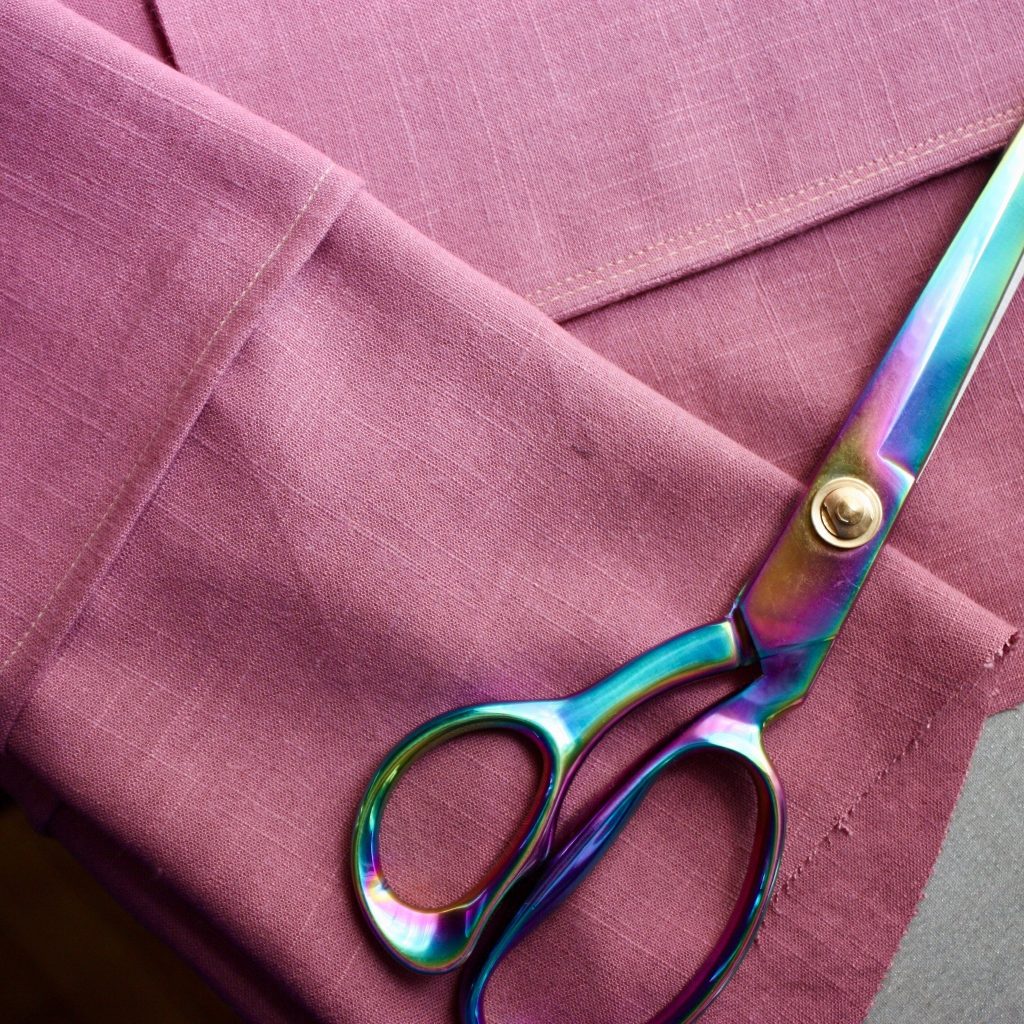
- Fabric is hemp blend from Chiang Mai, Thailand brought to the US by a dear friend
- Finishings: French seams for front and crotch, bias bound facing seam, and overlocked inseam and side seams
A note about this blog post: It’s long and photo-heavy. If you’re looking for specifics, use these links to jump ahead to the section you need, or just get comfy and come along for the whole ride.
- Grading Sizes and Lengthening Rise
- French Seams
- Bias Bound Facing
- Invisible Side Zipper – Front Leg
- Invisible Side Zipper – Back Leg
- Finish Elastic Waistband
- Finished Photos!

Grading Sizes and Lengthening Rise
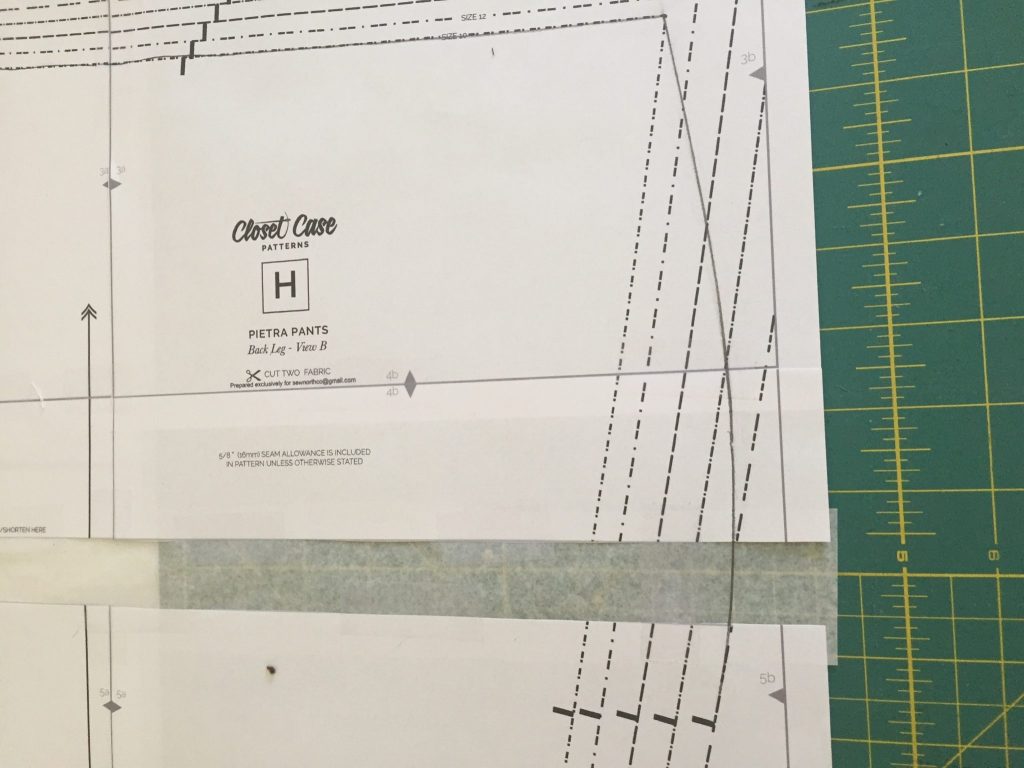
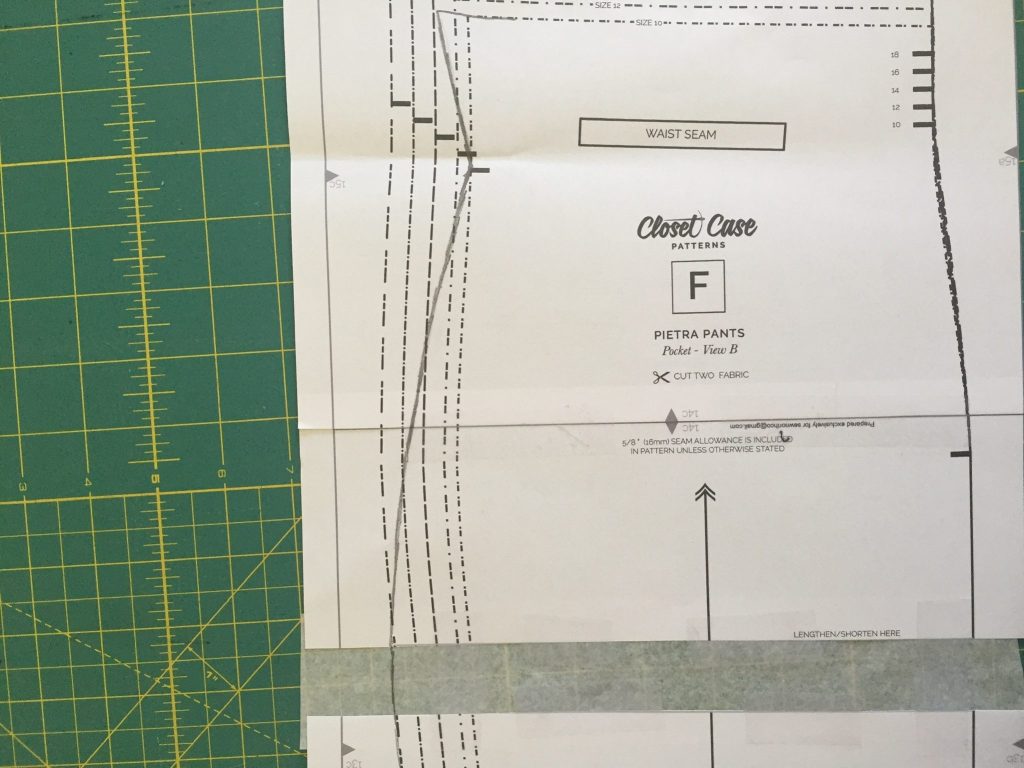
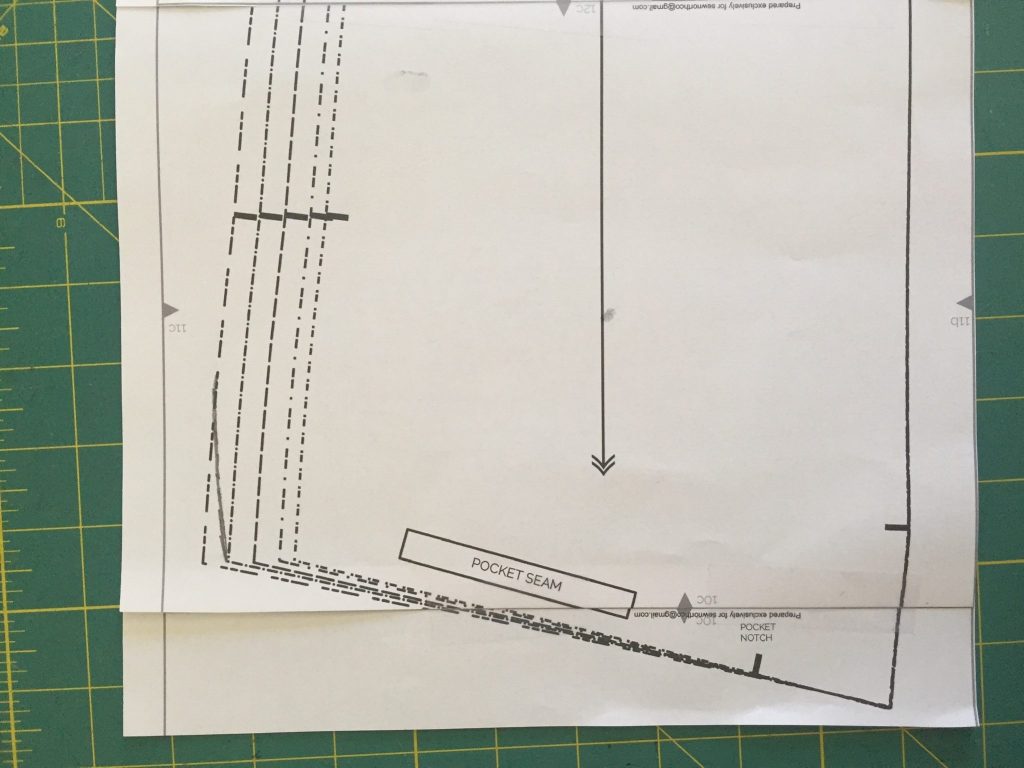
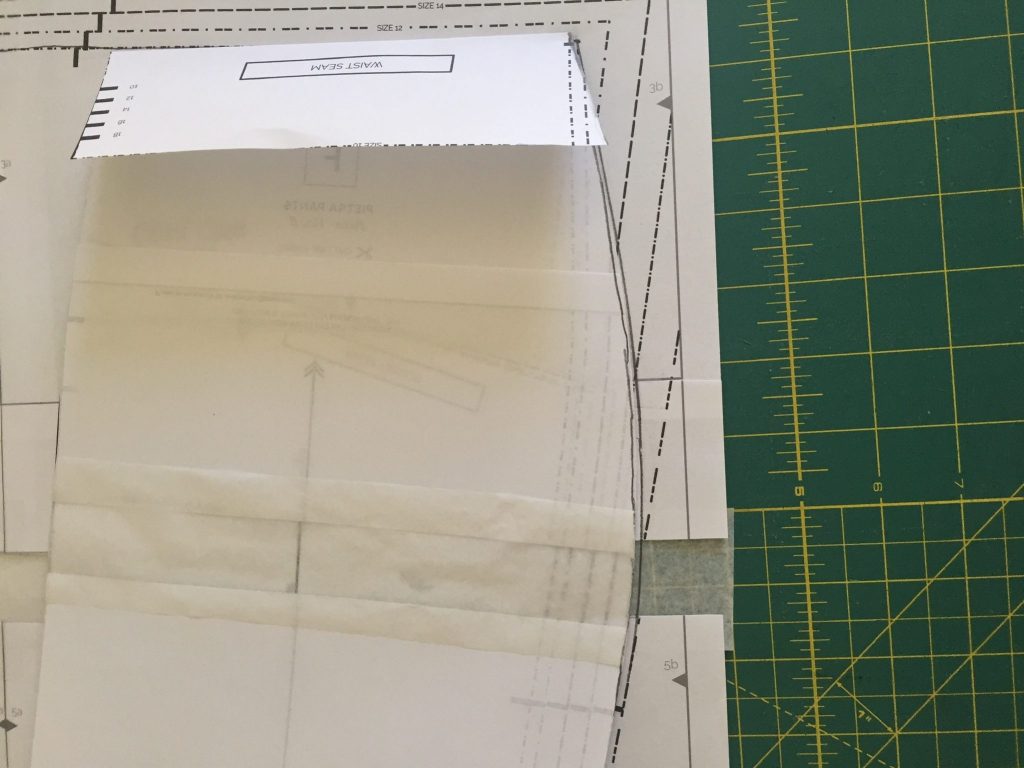
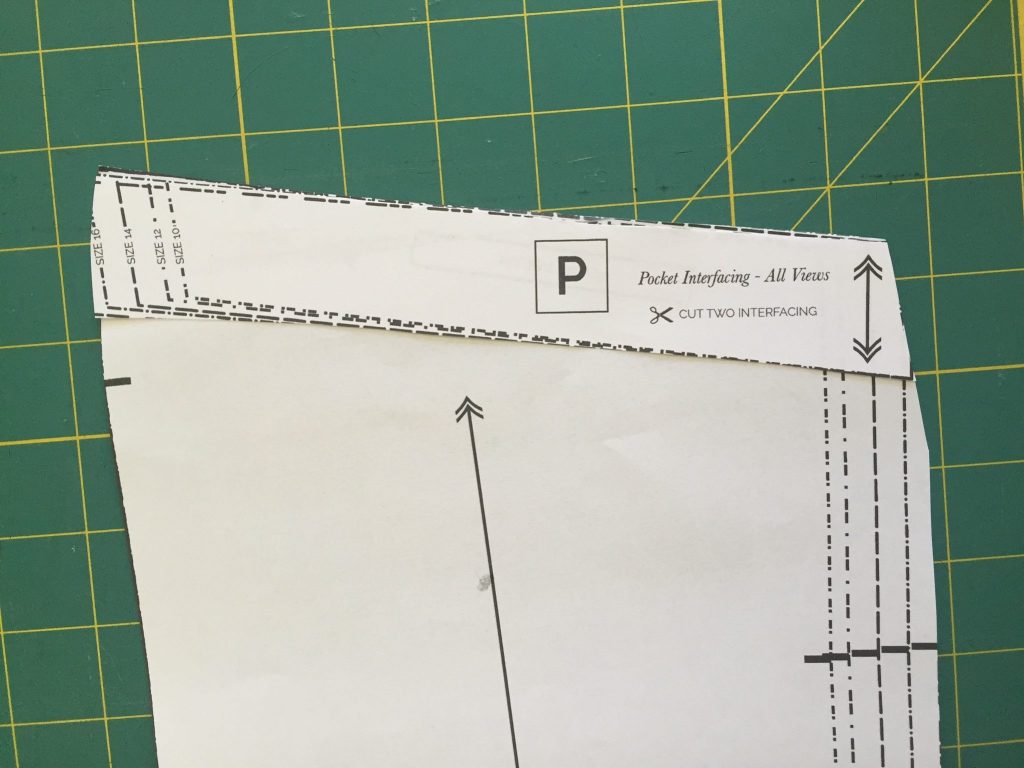
In the Pietra Pants pattern, Closet Case gives really great instructions on grading sizes because they tell you which pattern pieces to start with, and then by lining up the other pieces against the notches, you’re able to make sure all your pieces will fit together nicely. Pay attention to their instructions on which seams not to grade sizes as well.
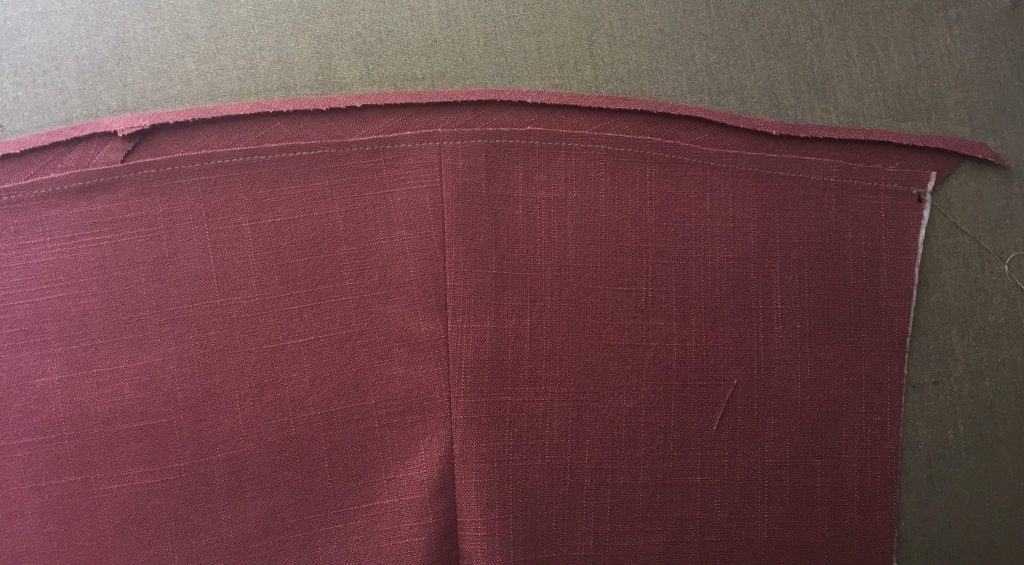
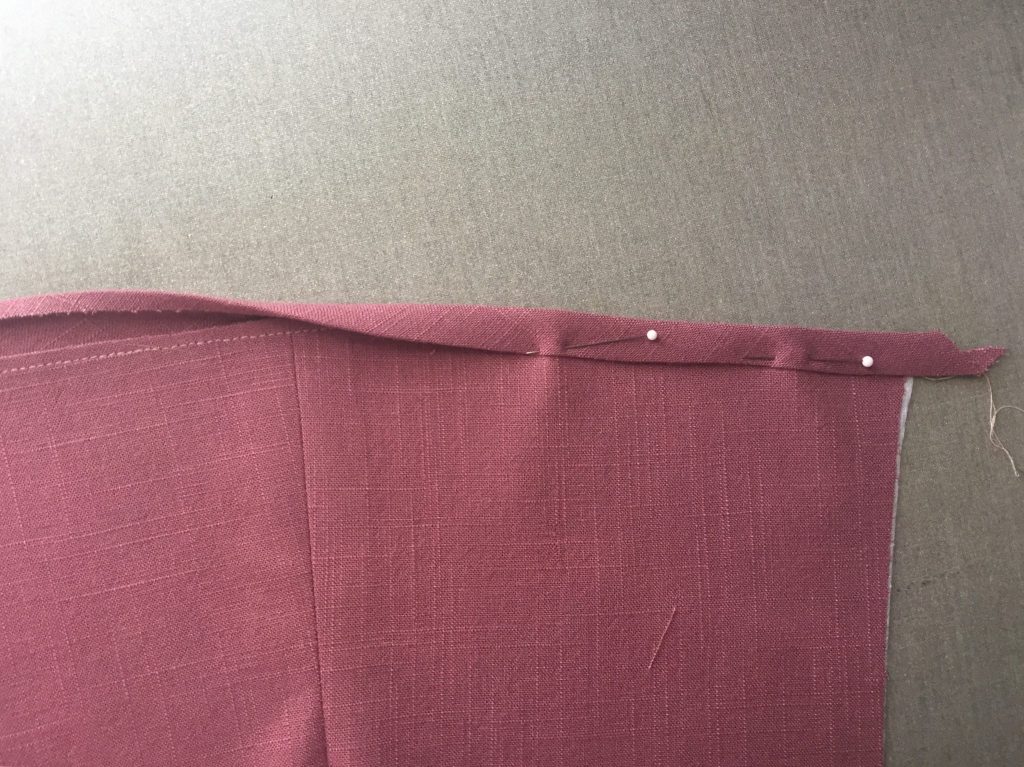
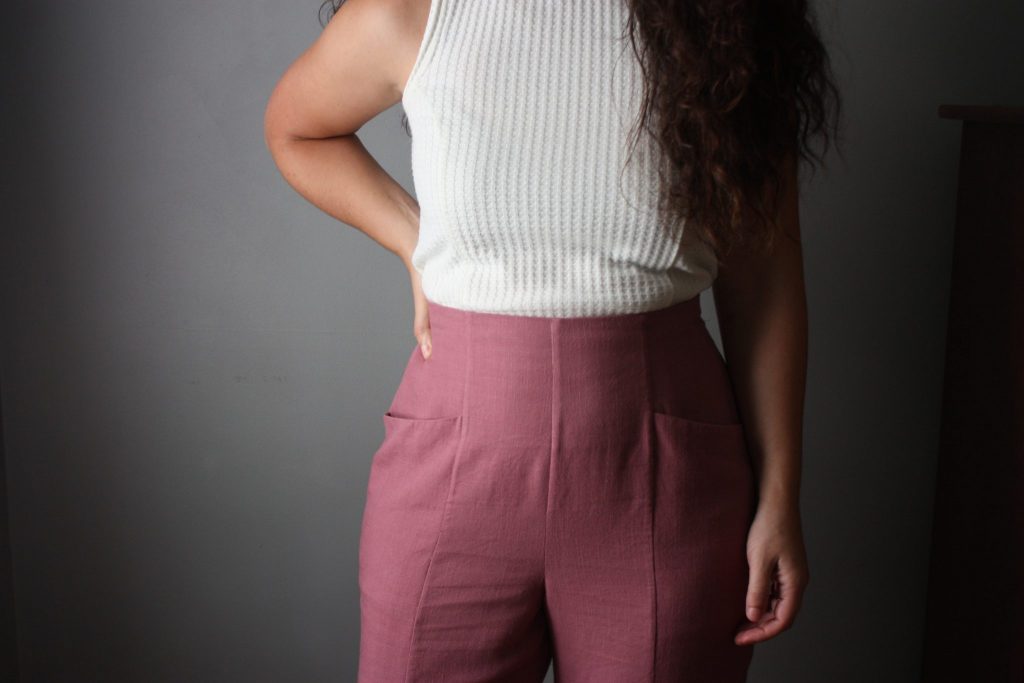
I graded from a size 10 at the waist to a size 18 at the hip. This hip curve ruler was so useful to get a smooth line. I added 1″ to size 10 rise. You’ll see how I used medical tissue paper to cut and spread the pattern pieces apart. If you lengthen or shorten the rise, don’t forget to do it twice on the pocket piece so it mirrors itself when you fold it upward. That goes for the grading as well. It’s important to fold the pocket up, and fold the waist seam side of the pocket back down so the curves match. I did not make a full seat adjustment like I often do with other pants. See the photos and descriptions below. My grading lines are in pencil, and I only printed sizes 10 through 18 using the layers feature in the PDF.


French Seams
I’m embarrassed to admit this so imagine this in really small text because I do not endorse this message: I didn’t make a muslin/toile. I didn’t do a fit check. I just went for it with really precious fabric….using French seams.
Please don’t do that. It worked out in my favor, which is sending mixed messages. French seams give a wonderful clean finish, but they are a bitch to undo if the fit isn’t right. I used French seams on the pocket, front, and crotch seams. Also, I admit I was not in the mood to rethread my serger so I went forward with the French seams. I did end up caving and threading the serger for my side seams and inseams because I got my wits about me and realized I might want to check/change the fit, though I didn’t have to!
There are great tutorials on how to do French seams out there, including in the Pietra Pattern instructions! The quick and dirty is to sew wrong sides together at 3/8″, trim down to almost nothing (1/8″), flip over and press right sides together carefully and really well, then sew right sides together at 1/4″. That works for a 5/8″ seam allowance because your two runs (3/8 + 1/4) = 5/8″, so any other seam allowances, you’ll have to adjust accordingly.
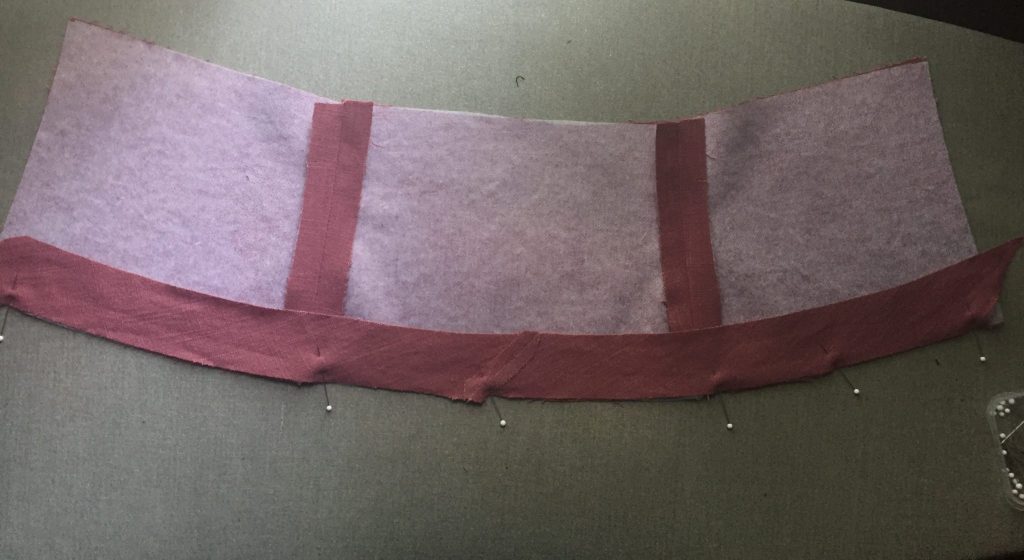
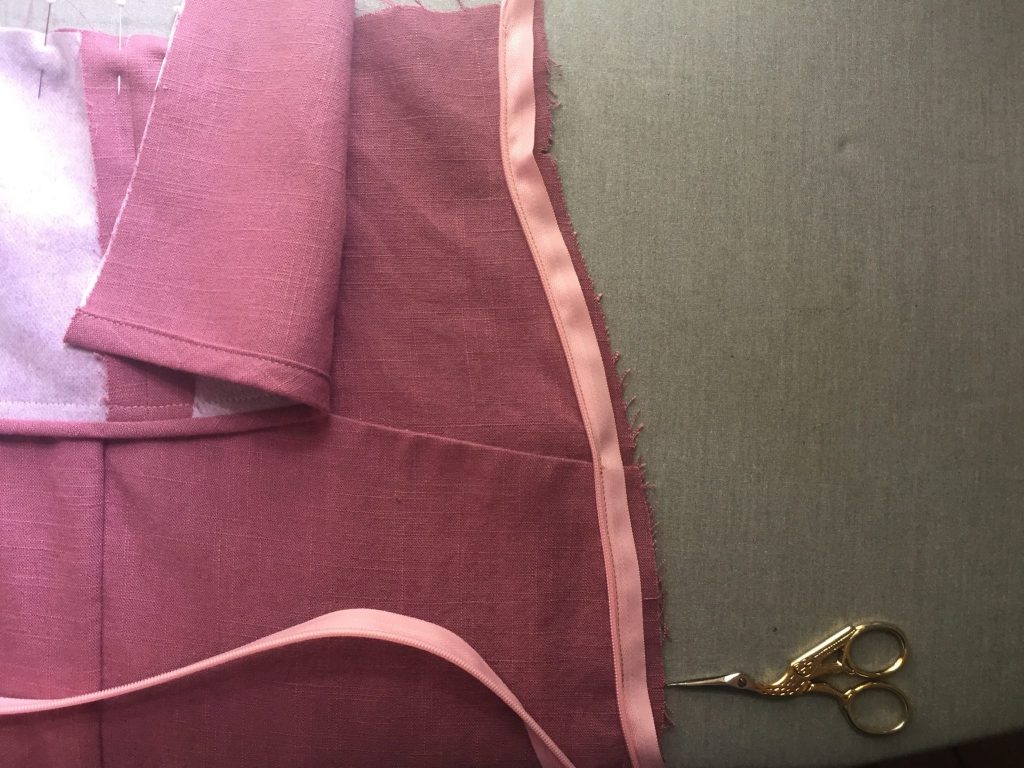
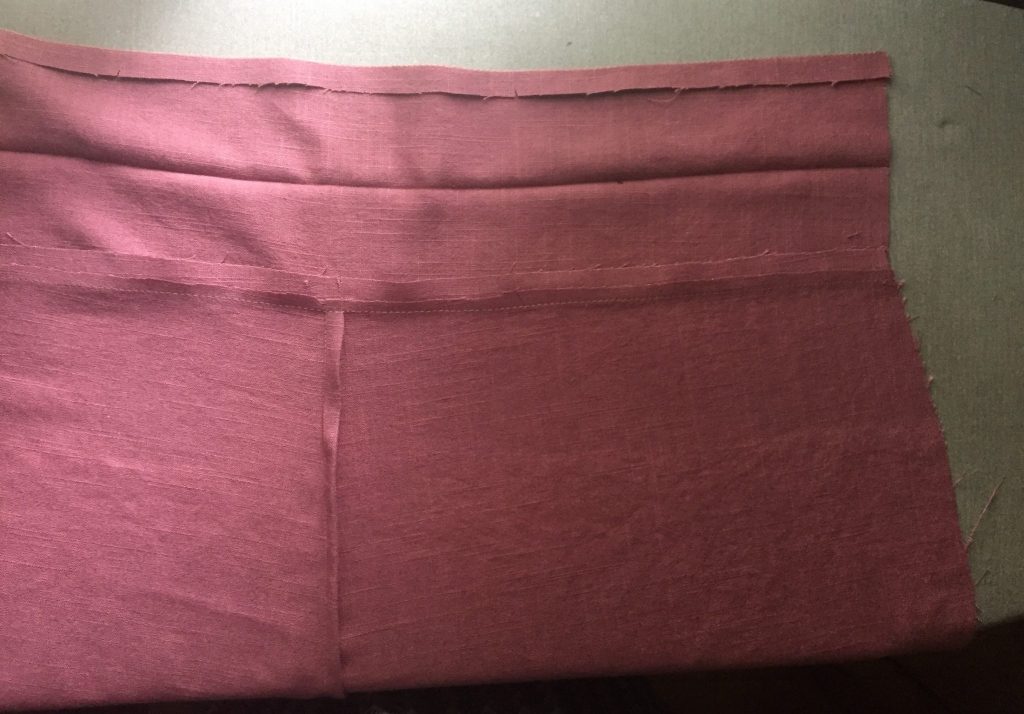
Bias Bound Facing
Further stubbornness in avoiding rethreading my serger: using bias tape on the lower edge of the front facing pieces. Laziness can indeed lead to more work. I love the finished result though. I also have these bias tape makers, but I didn’t use it here. There are lots of ways to do this, but here’s mine! Each of the following images in this section leave me more and more oddly satisfied, and I need a cigarette after the last one. Lol. JK, I don’t smoke, but you get what I mean.

I went back in my pile of scraps and managed to get two small strips cut somewhat on the bias. Maybe a 30 degree angle instead of the true bias at 45 degrees. Still works! I pieced the two pieces together at an angle and pressed seams open.
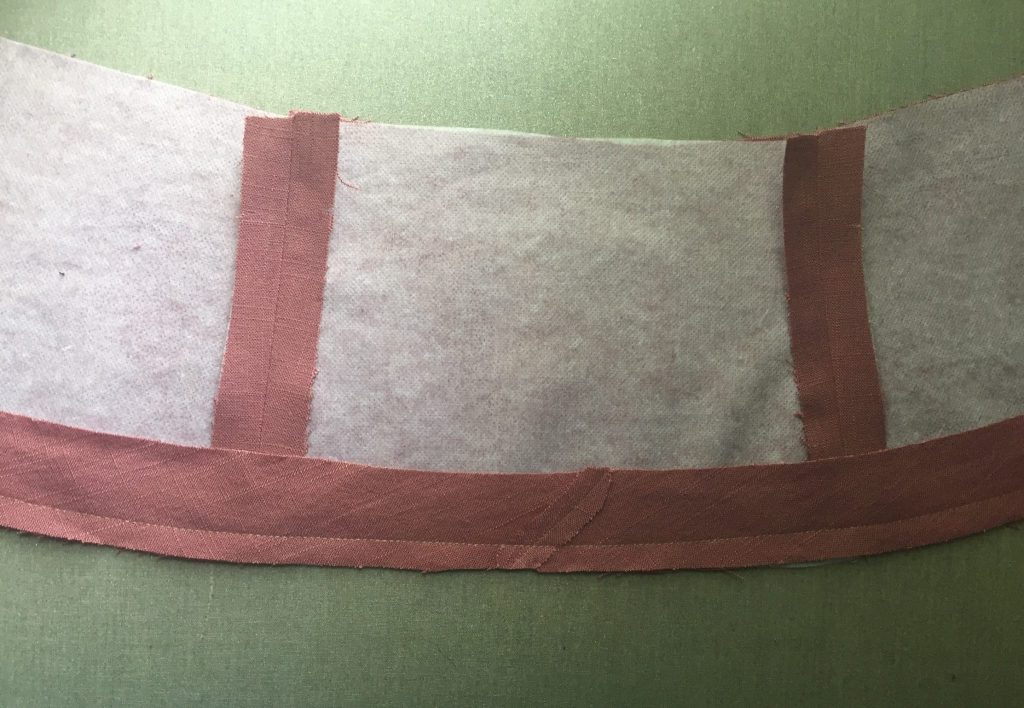
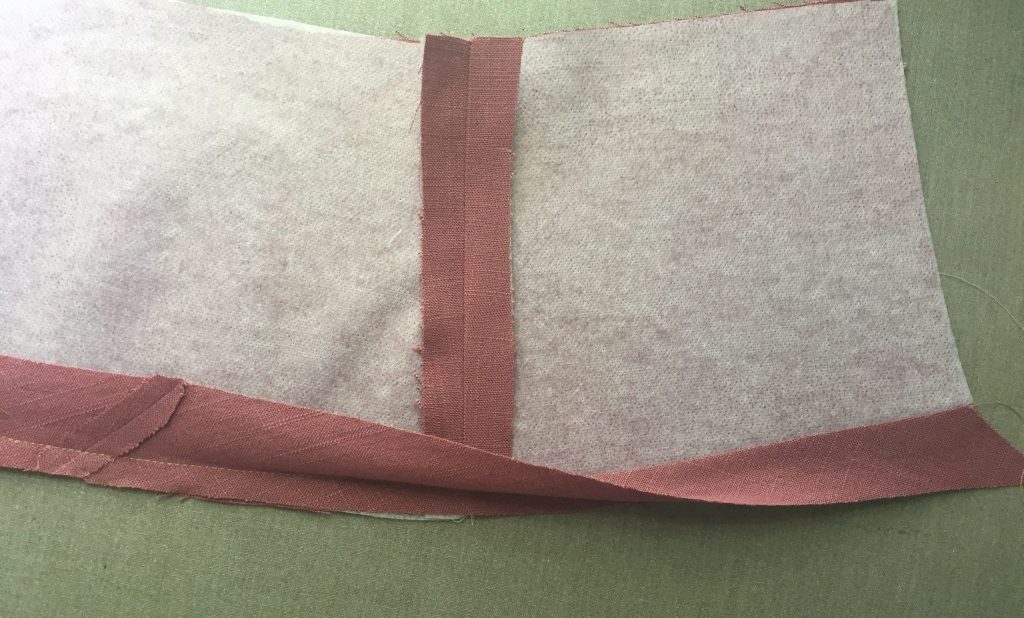
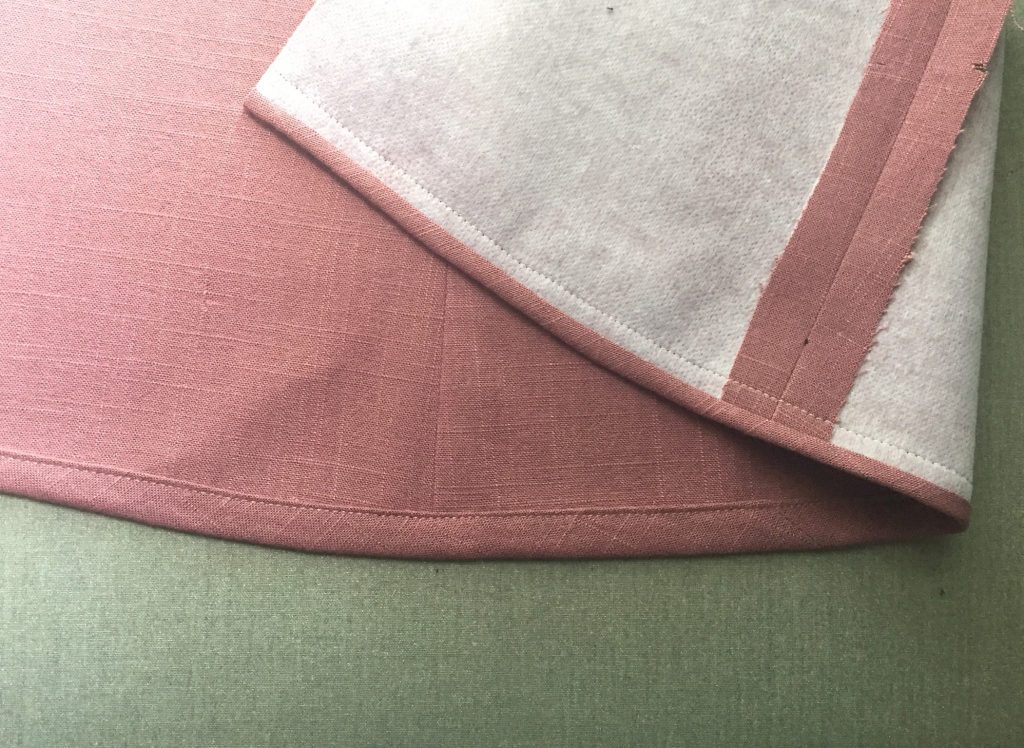
Admire it. Yeah baby.
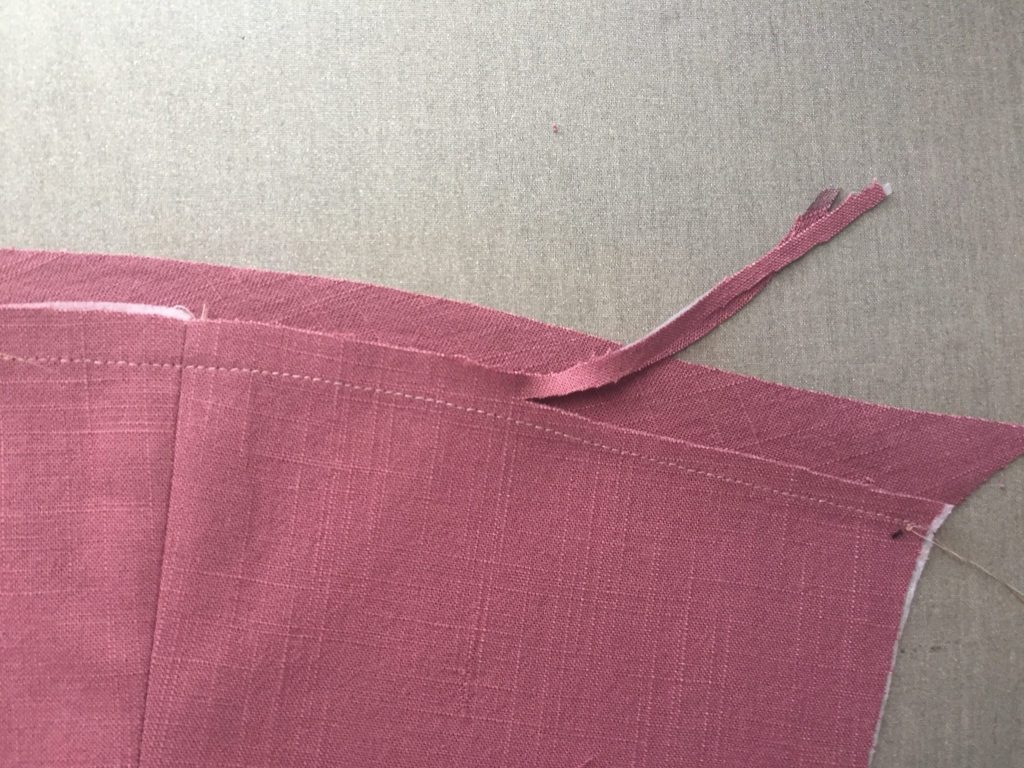
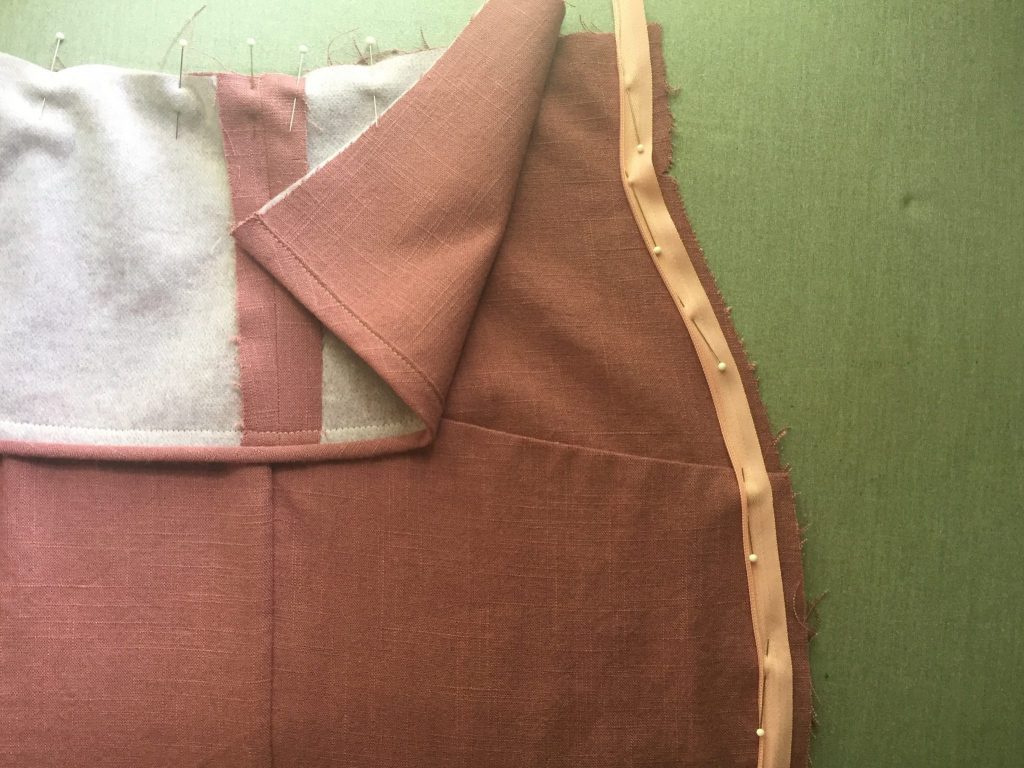
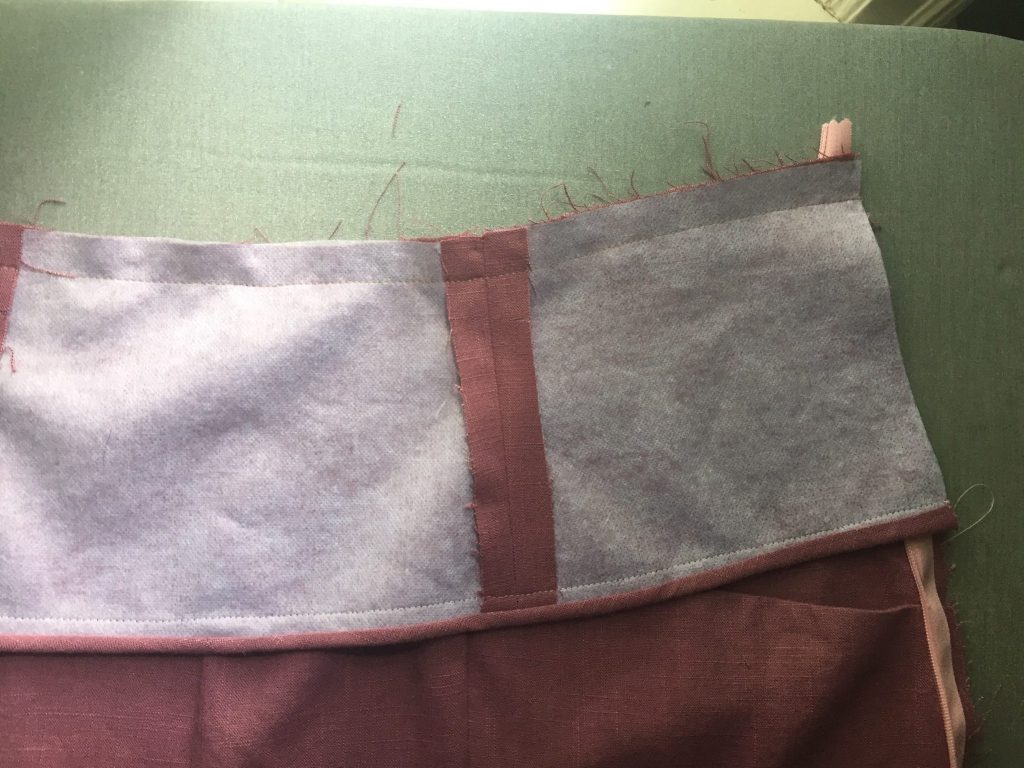
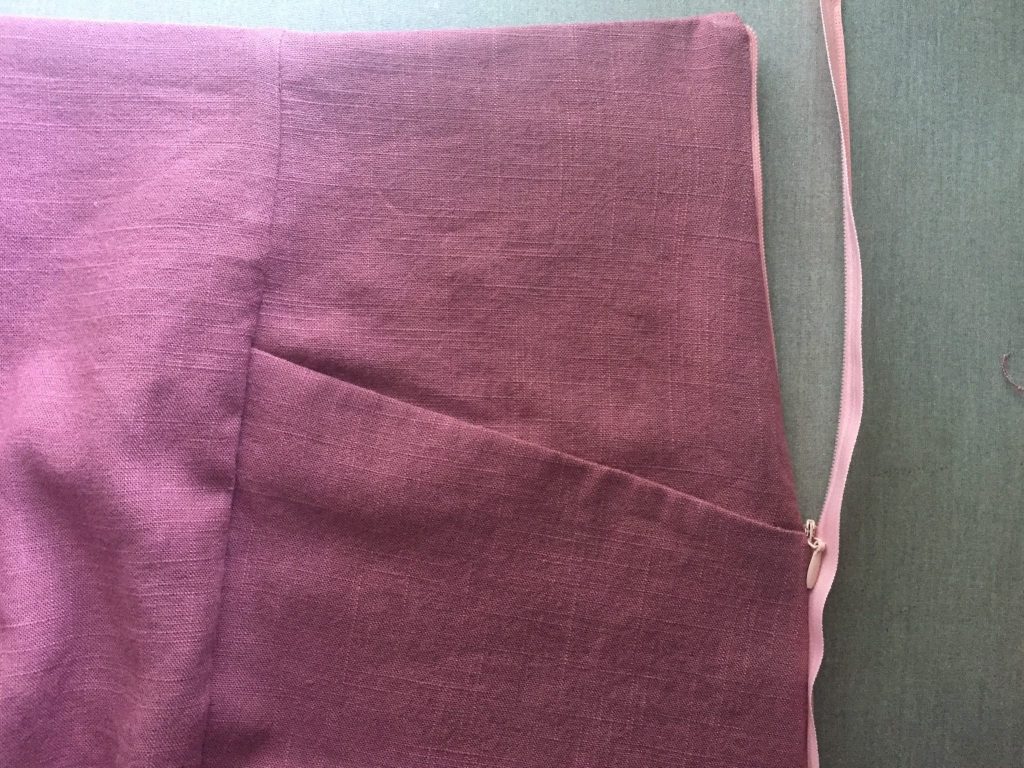
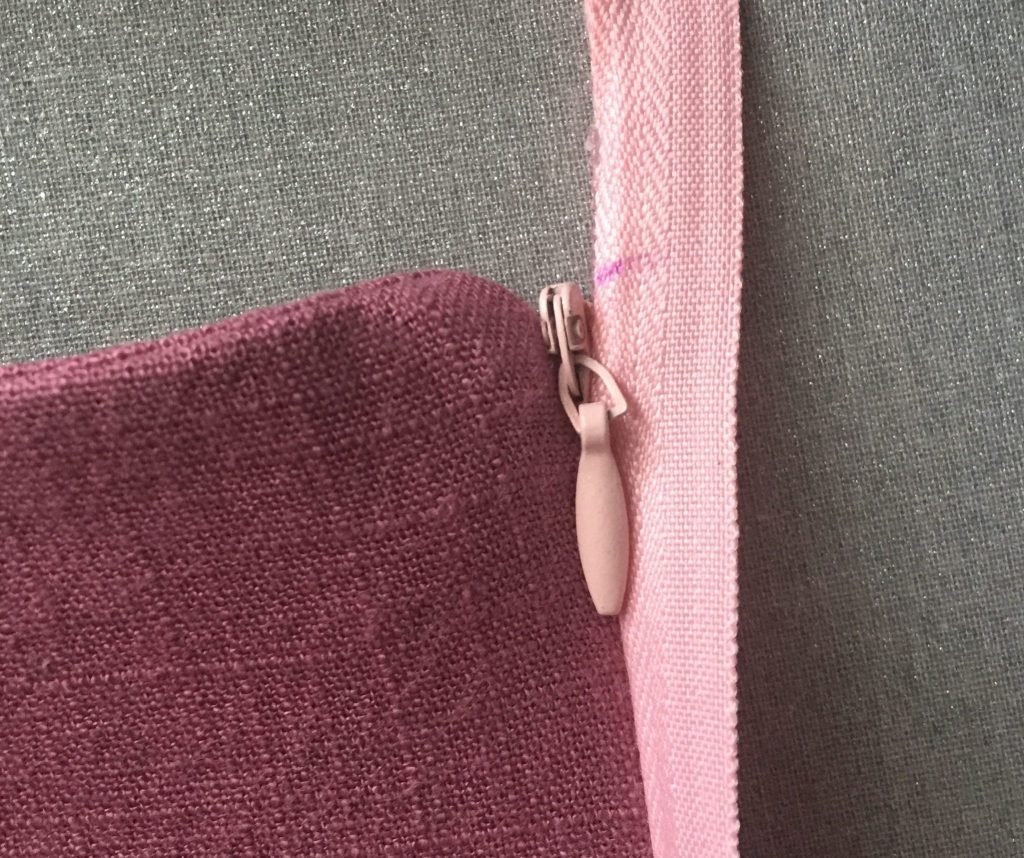
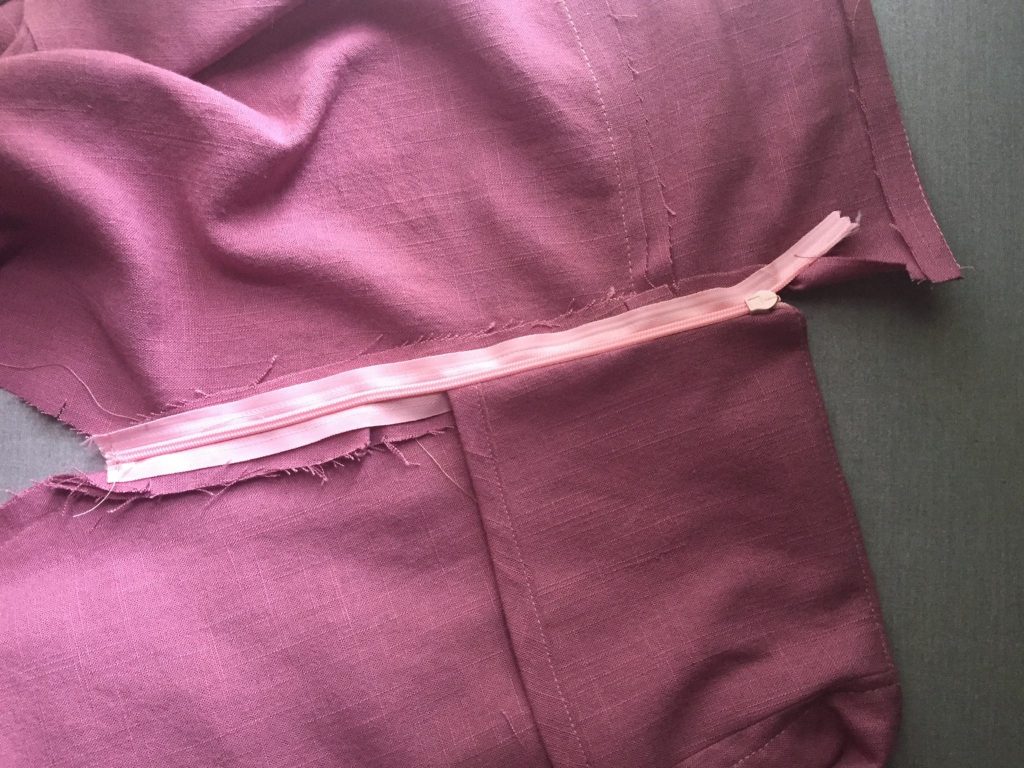
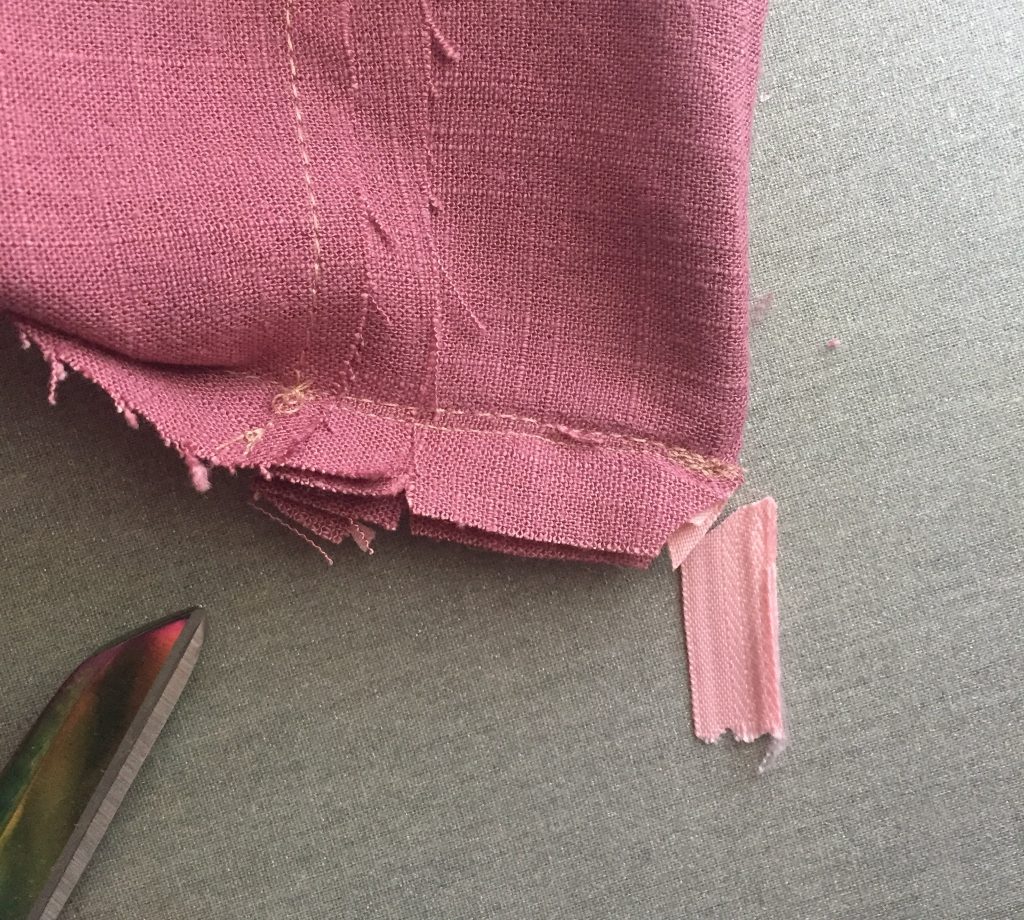
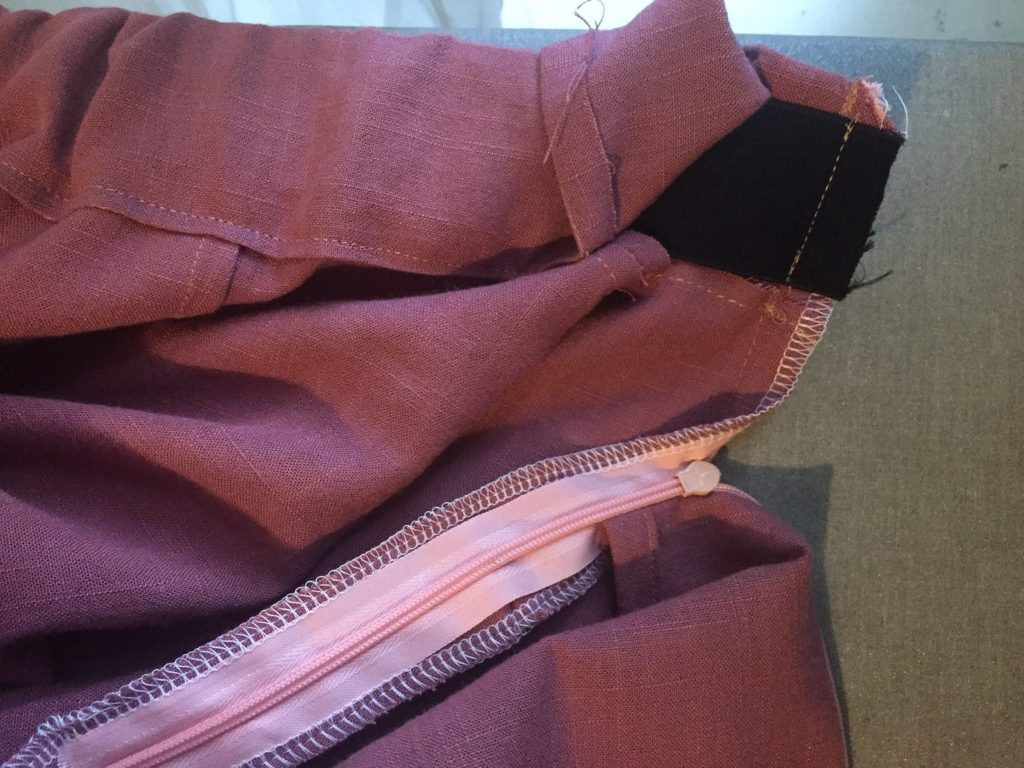
Invisible Side Zipper – Front Leg
Closet Case mentions in their instructions that if you do grade several sizes larger in the hip, you may want to include an invisible side zipper. I fall into this category! They don’t include instructions for a side zipper, which is why I took careful notes and lots of pictures. So, I hope you find this useful! I know an invisible zipper isn’t the most challenging thing in the world, but this one was only my third invisible zip ever, I think? So I just bought a colorful pack of these and I think they’ll last me awhile, ha!
I had to take a step back and wrap my brain around it with the facing and the waistband, but I got it right on the first try! Feel welcome to copy my steps! Let me know if you would have done something differently, but I might not care because this turned out so well. Ha!
Ok, follow all of the instructions to assemble the front legs and front facing. Before you sew the facing to the front of the pants, follow along with the pictures below.
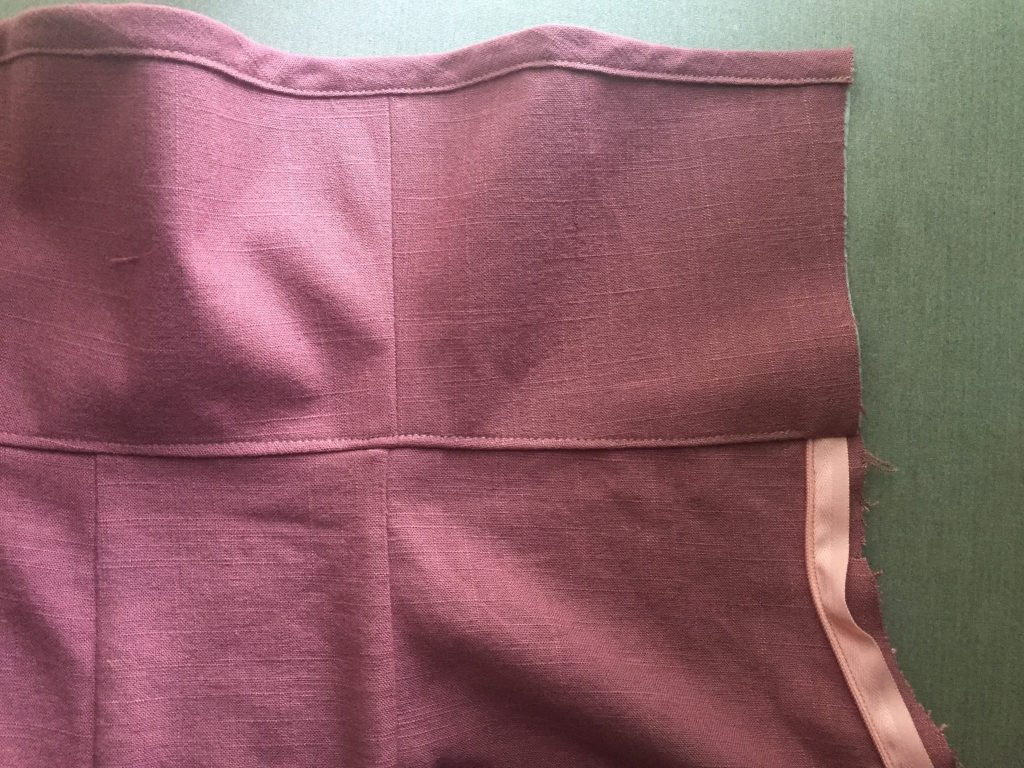

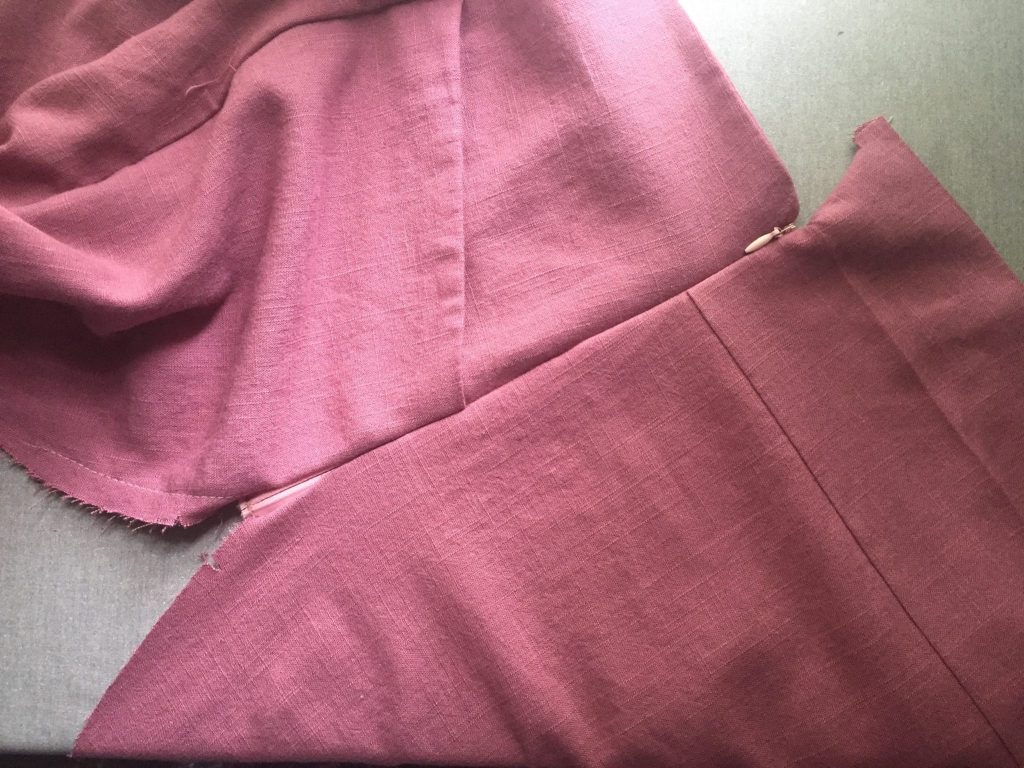
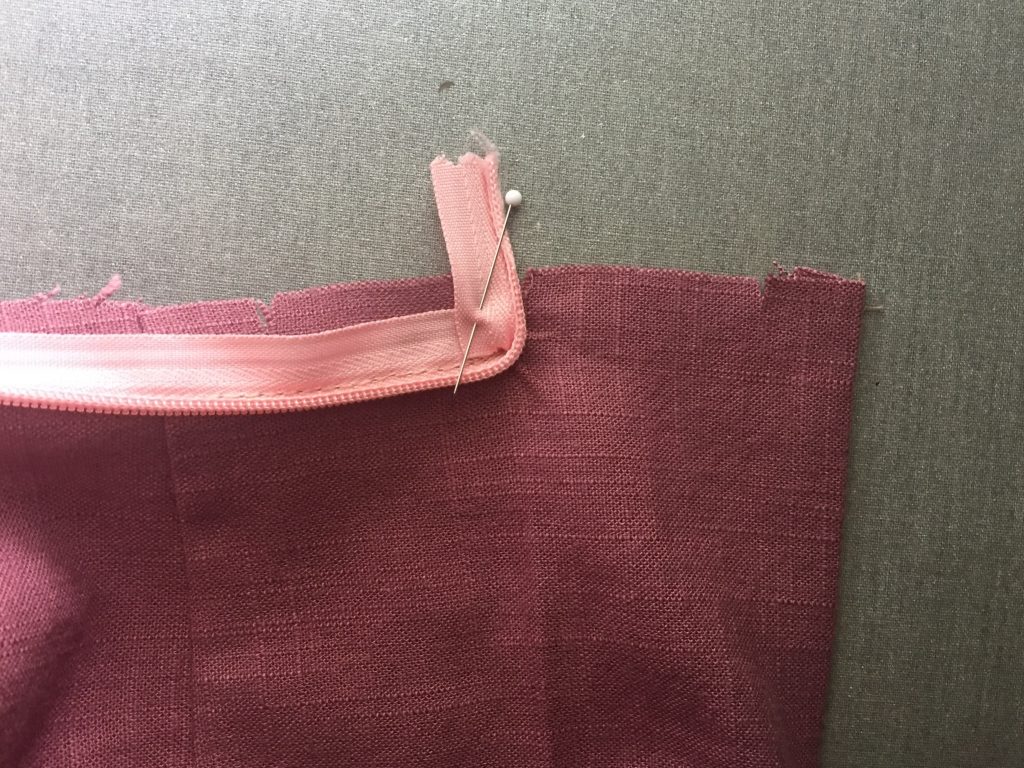
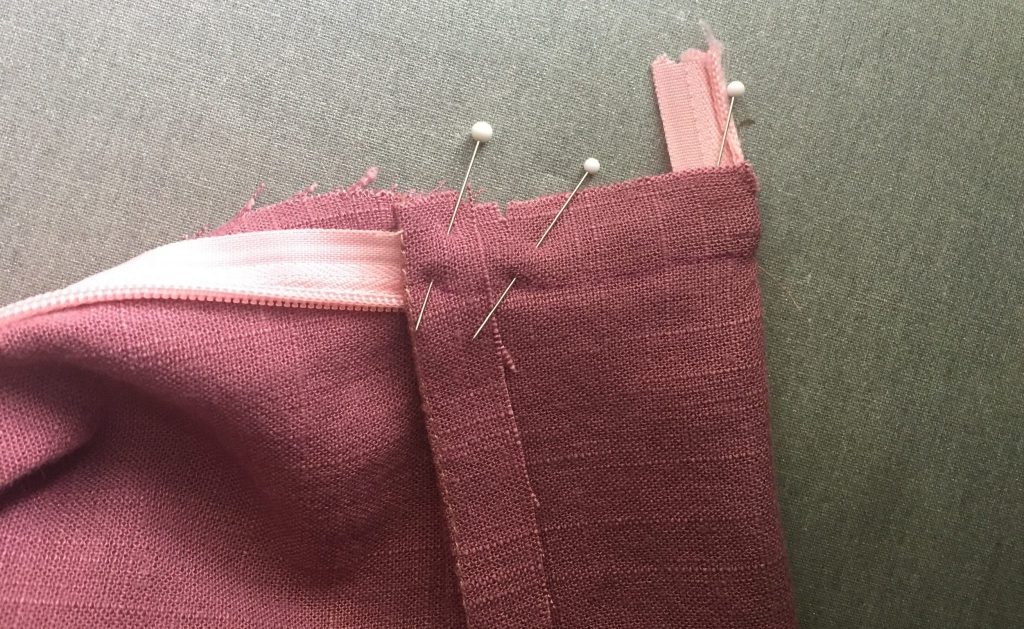
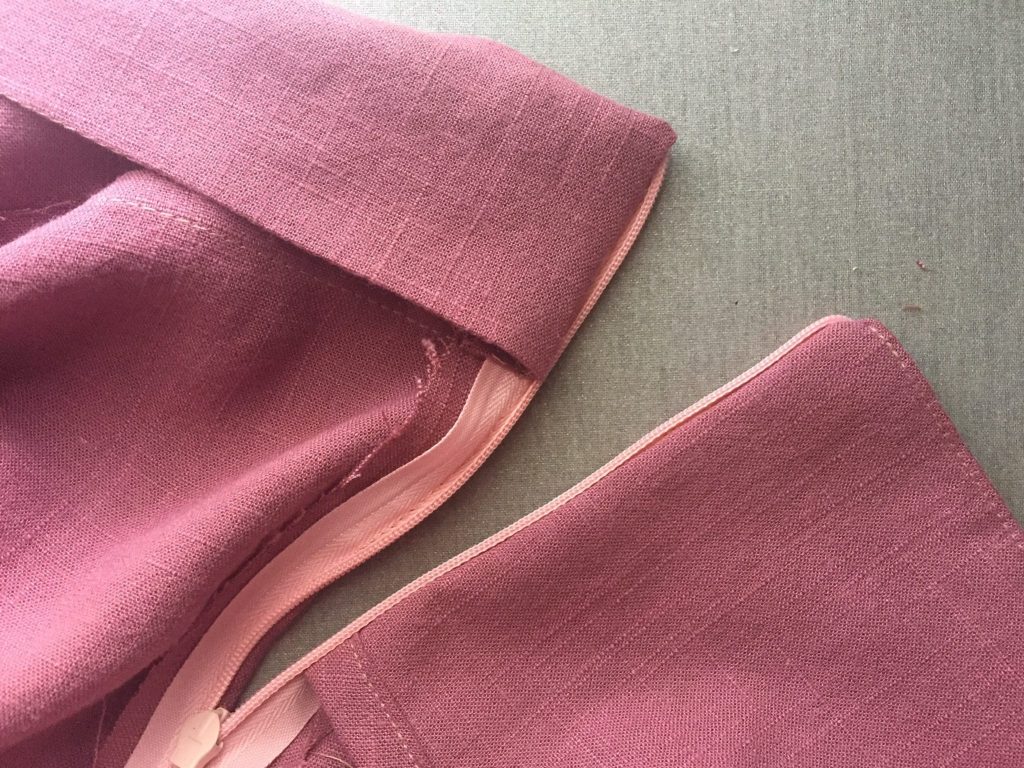
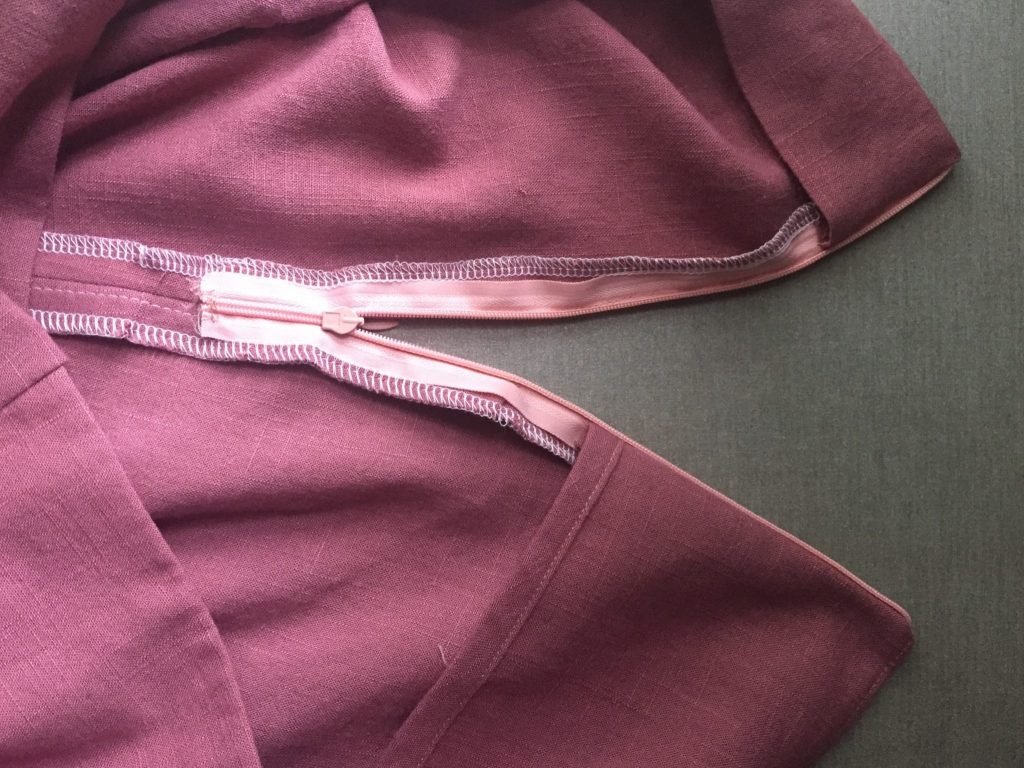
Invisible Size Zipper – Back Leg
After the invisible zipper is sewn to the front leg in the previous steps, follow the instructions in the pattern to assemble the back legs. Once you are ready to sew the side seams, follow along with the photos below.
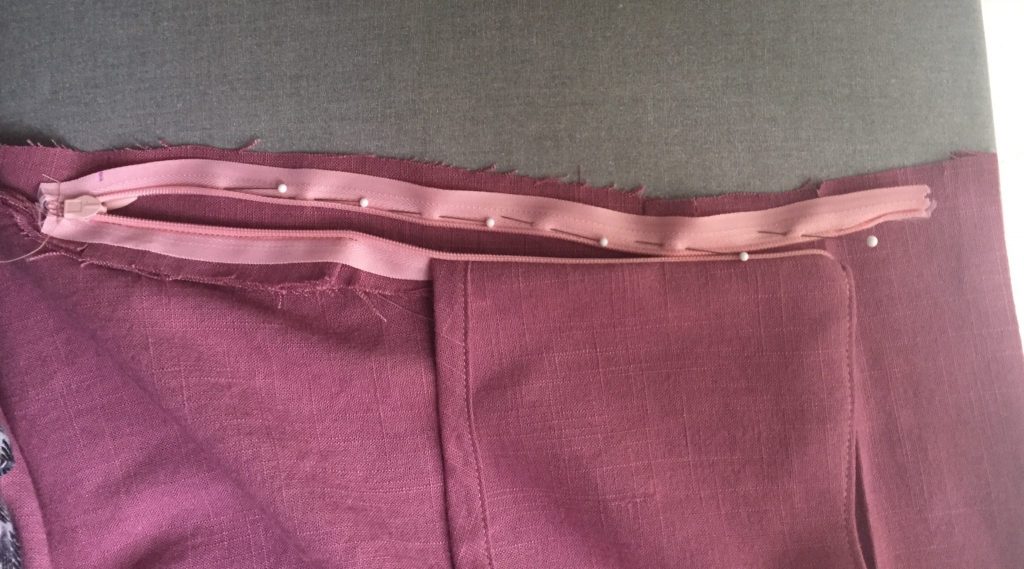
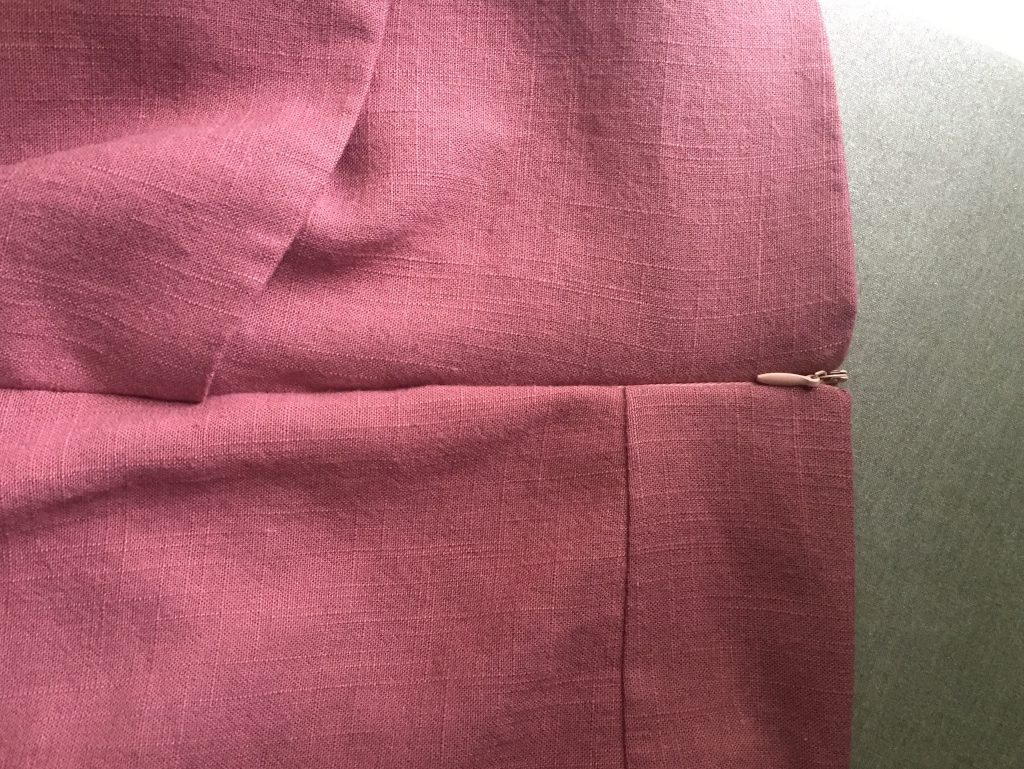
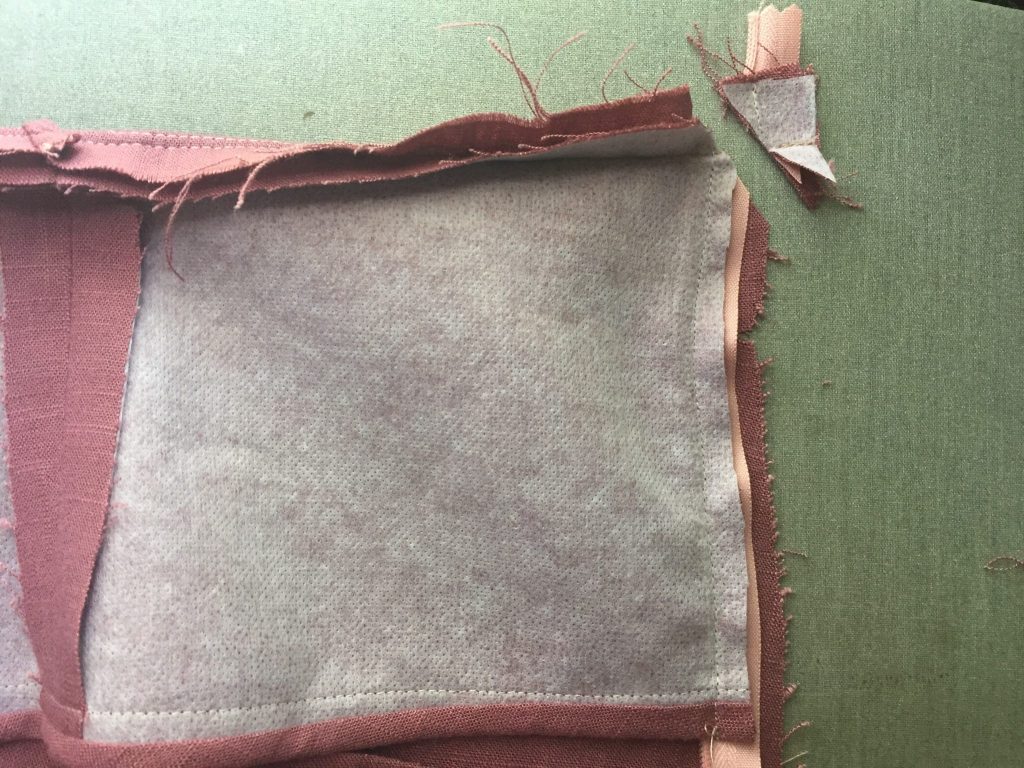
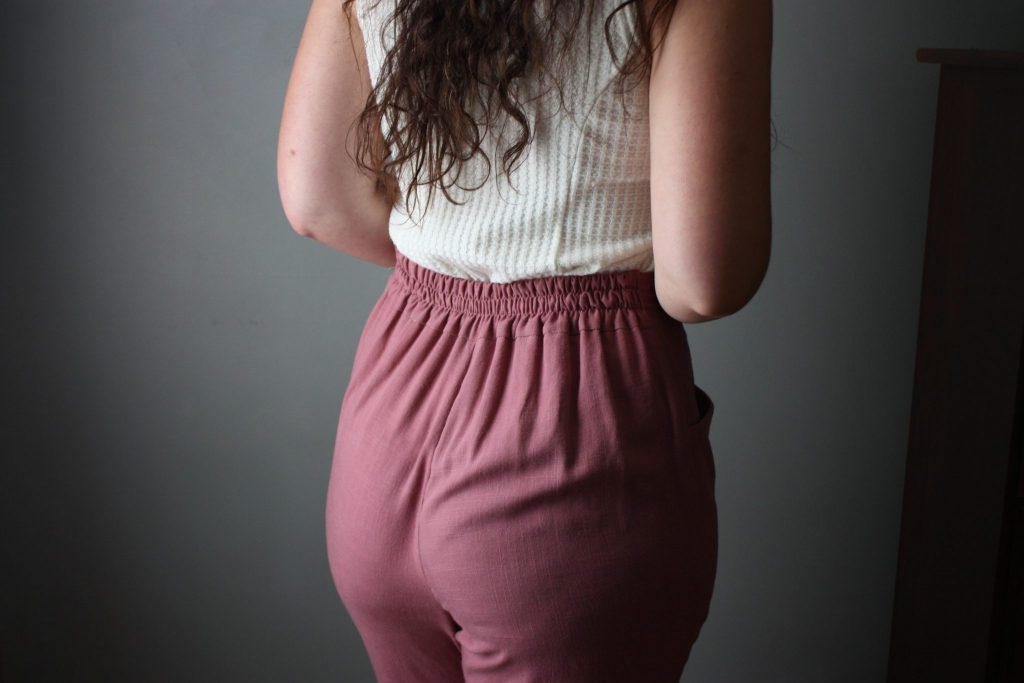
Finish Elastic Waistband
It should be fairly straight forward to finish the waistband and elastic of the back of the pants at this point. I just want to point out that in the instructions they say to leave a 4″ opening at one end to pull the elastic through. I did this on the zipper side. Once I pulled the elastic through, I could sew it to the seam allowance side of the zipper. That way you don’t interfere with the zipper teeth on the right side of the garment.
Finished Photos!
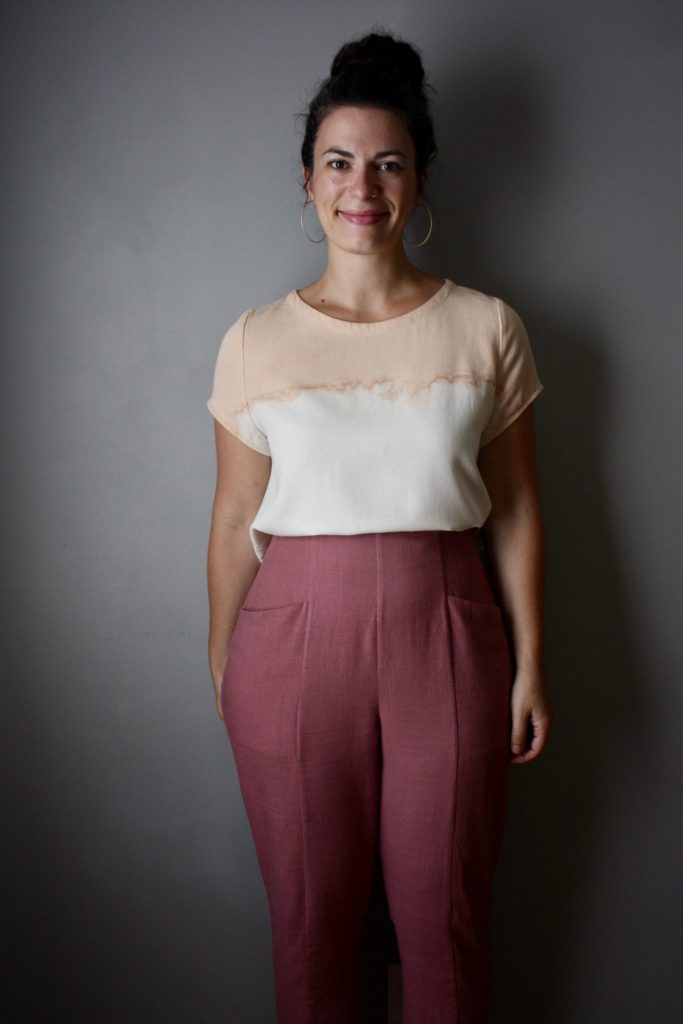
We made it! Now for an excess amount of finished photos. I loved trying these with a couple of different tops. The cream waffle knit is the Taos Top by Threadbear and I think these textures and colors really work for me!
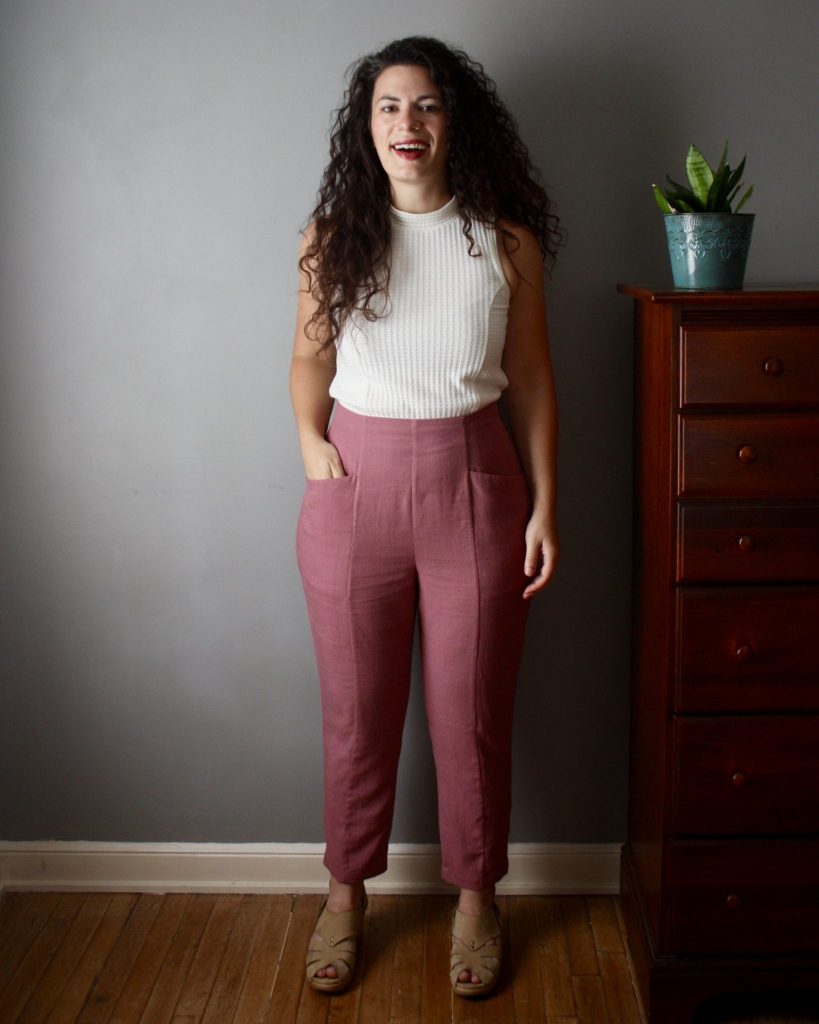
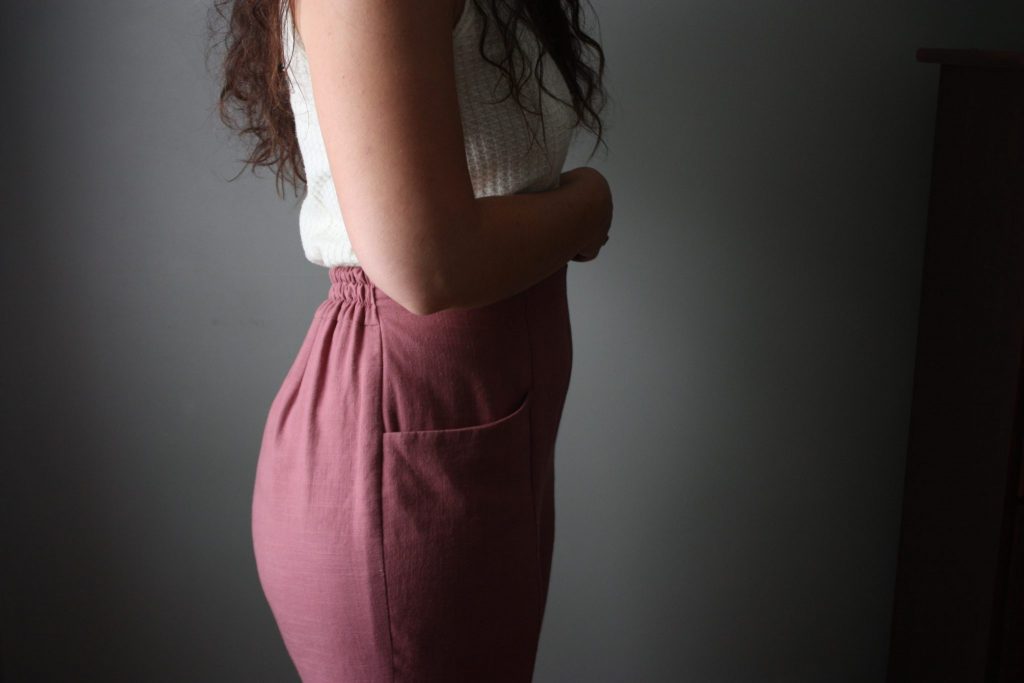
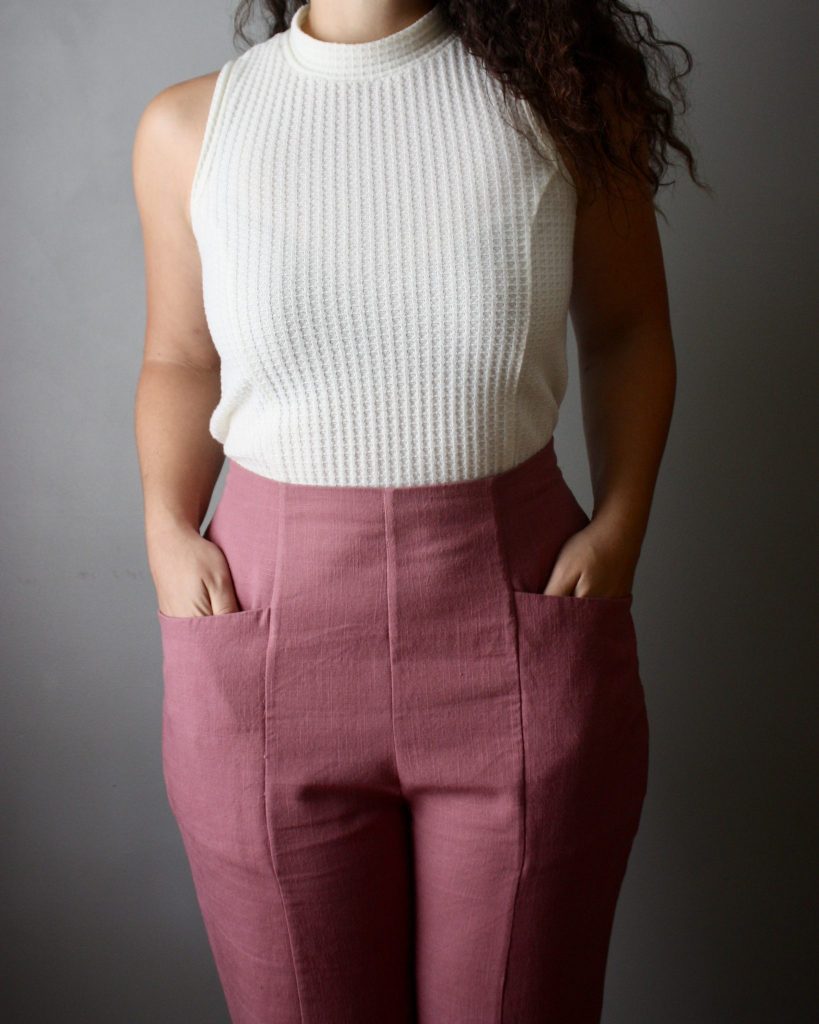

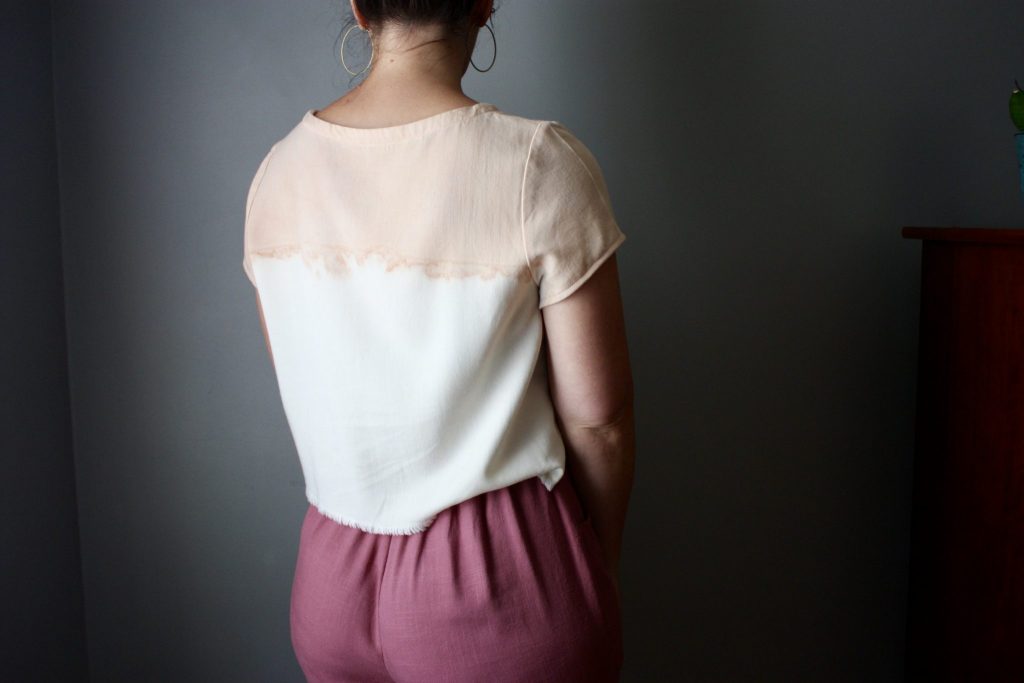
I also tried the pants on with my beloved avocado dyed Inari Tee by Named Clothing. If you want to read about how I dyed the upper portion of this handmade top using avocado pits, read about that here! I would never think to mix pink and peach like this but with the white in between I’m digging.

Final Thoughts
This is a great pattern, beautiful design, and a fun sew! I’m so thankful I got the fit and the zipper modification right on the first try. I really hope you can find my process useful if you are also considering this pattern and grade larger in the hip. It might sound cheesy, but the quick and swift movement of pulling up pants over your hips should not make you pause, struggle, cry, or make you feel less than the queen you are. Make the pattern bow down to you! xo
Wow, that was fantastic. I could follow along right with your great tute. Thanks, and God bless…
Thank you Mary – that means a lot! xo
That bias bound facing is a work of art -bestill my beating heart! I intend to steal that idea ihopeyoudon’tmind…
Unfortunately I don’t need to insert that zip, because (as my husband lovingly says) I “have no a*s”. We always want what we don’t have. lol
Thanks for all the details!
Haha! Please steal away, and I am so happy it makes you happy. Skipping the zip will make these a super fast sew! Have fun!
You’re a genius!!
I love a comprehensive blog post, especially one this instructive. But what I REALLY love is that fabric. It is so beautiful, pairs wonderfully with this pattern, and so meaningful that a friend brought it over from Thailand for you. Thanks for a great read.
Thank you so much, Chloe! Yes, I used to live in Thailand, but it was before I learned to sew. When my friend was coming over to MN for a visit, it was SO FUN to have her send pictures from fabric shops and ask me which I liked most. When she brought this one over last summer, I remember saying, “Oh I’ll have to save this one for something special!” xo
Excellent tutorial – and really gorgeous end result.
Beautiful fit, pants, photography, tutorial! Unlike you I have no hips although I wish I had more of a curve. My daughter though has a very big waist /hip differential and often cannot find pants that fit . I have not tried to make her pants but when I do I will need all the help I can get.
Great looking pants and a lovely job with the zipper ! I’m half done with the Pietra shorts which are ending up a bit sloppy /big in the waist but need width in the hips/rear. So will bookmark your zipper instructions for future use. thanks.
Thanks so much for your post! I have to grade from a size 6 waist to a size 10 hip. The side zipper is a really great idea – cuz I can’t pull these pants over my hips either. This is my first pair of pants – and it’s been a challenge!
Mia, I’m just impressed by these beautiful photos. It is so delightful, combines magnificently with this example, thus important that my husband brought it from abroad. I wish I had to a greater extent a bend. My cousin, however, has an extremely huge abdomen differential and regularly can’t discover pants that fit. Thanks.
THANK YOU for taking the time to share this post! I’m about ready to start my very first pair of pants (the Pietra, btw) and looking for any great advice. “Listening” to your sage advice gives me more confidence going forward. And your pants did turn out so beautifully!
Thank you Aileen! Have fun making your Pietra Pants!!
This post was wonderfully detailed. I followed your process step by step and my concealed zipper went in like a dream — thank you so much!!
Just bought the pattern – gorgeous tutorial on the zipper – and a great fabric. That binding is divine! Thanks for a brilliant tutorial, and fitting pics!