
This top might look complicated to make, but it’s totally doable! Give yourself a sewing day or two, grab your Pattern Magic book by Tomoko Nagamichi and the Ogden Cami Pattern by True Bias and let’s do this!
The Details
- Pattern is Ogden Cami by True Bias, size 10 (two sizes larger than my measurements since I wanted added ease with this project)
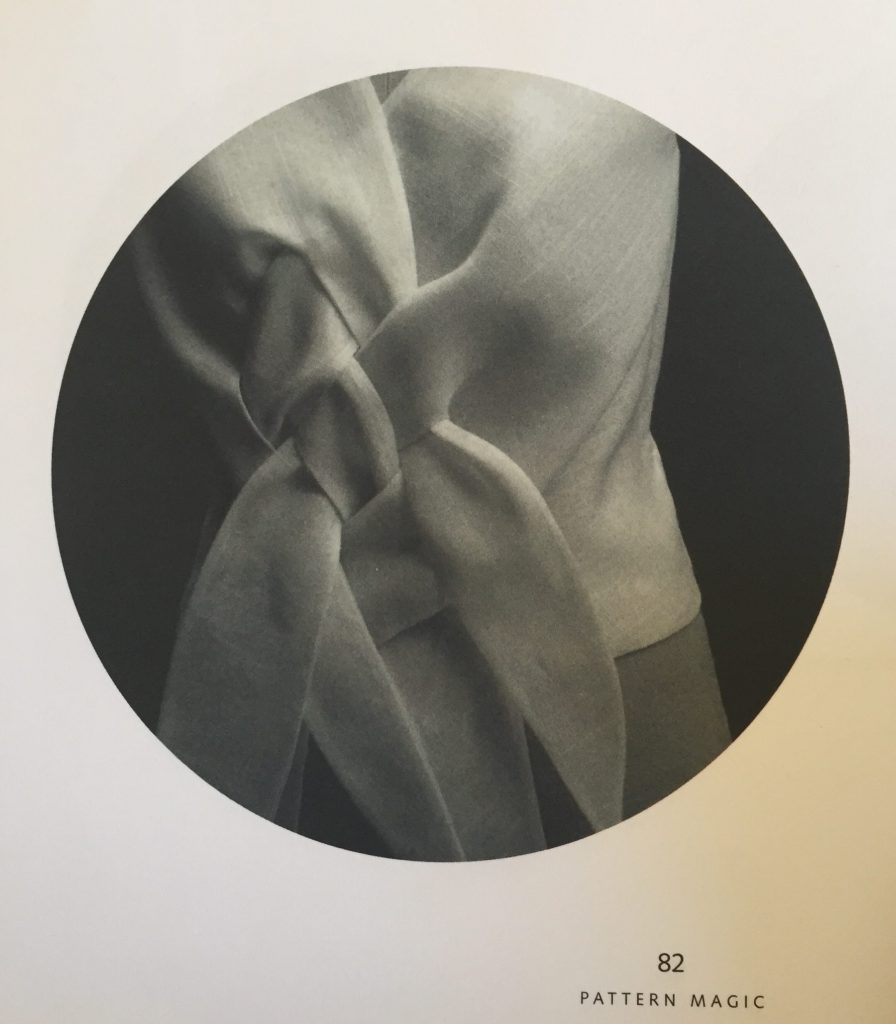
- Book is Pattern Magic (first book in the series) by Tomoko Nagamichi; page 82
- Fabric is handwoven, hand dyed cotton from northern Thailand
- Helpful materials include tracing paper and erasable pens in different colors.
Preparing the Pattern
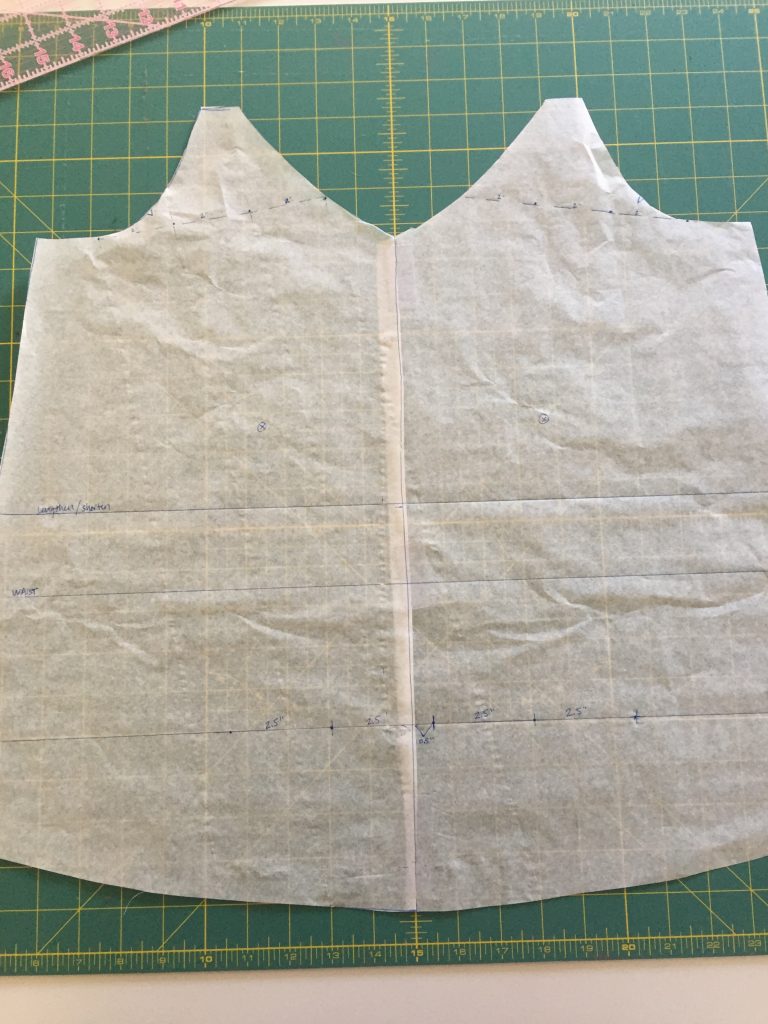
Step 0: Start with your Ogden cami front piece (right and left) including waistline, notches, and other markings. 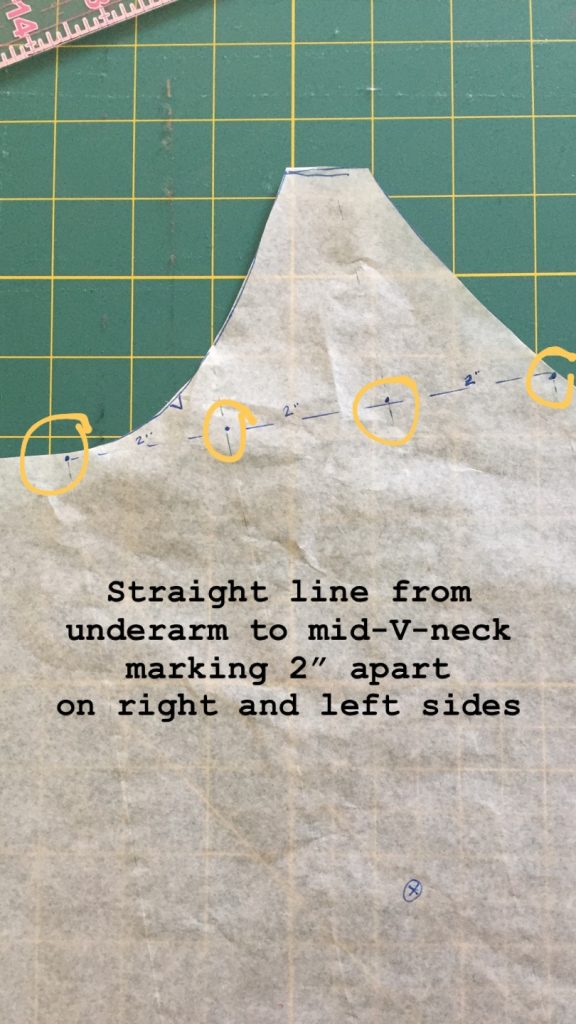
Step 1 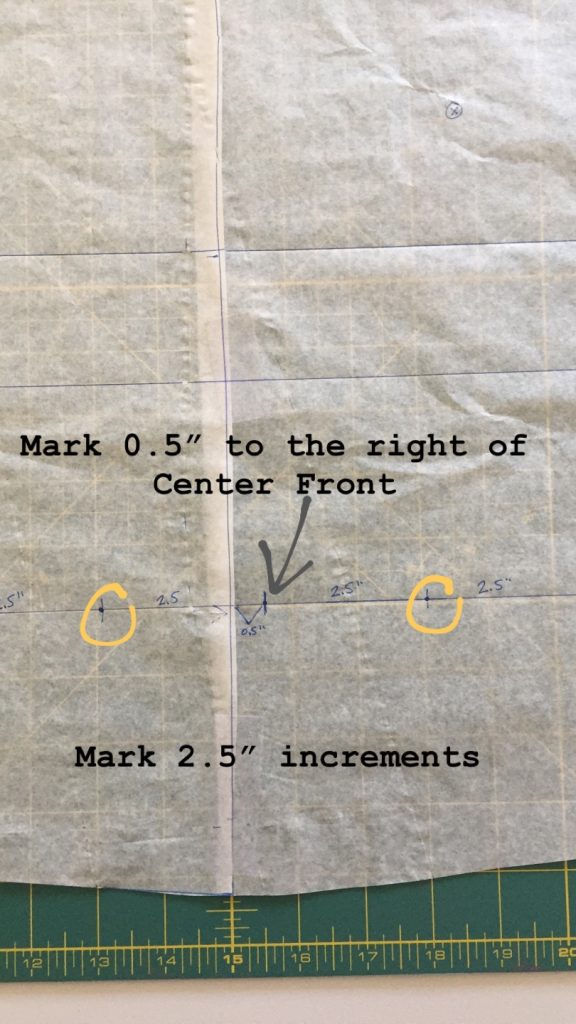
Step 2 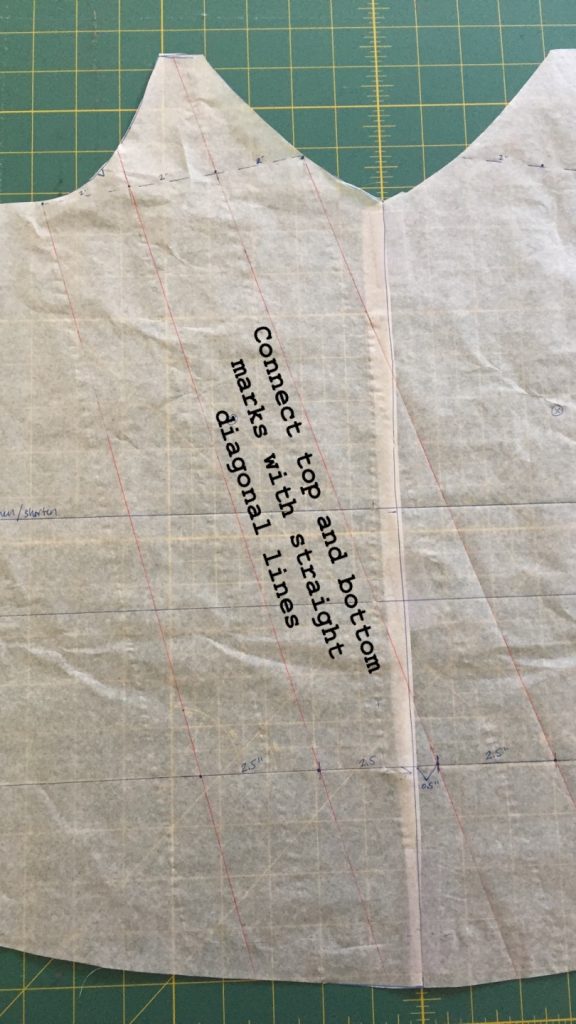
Step 3 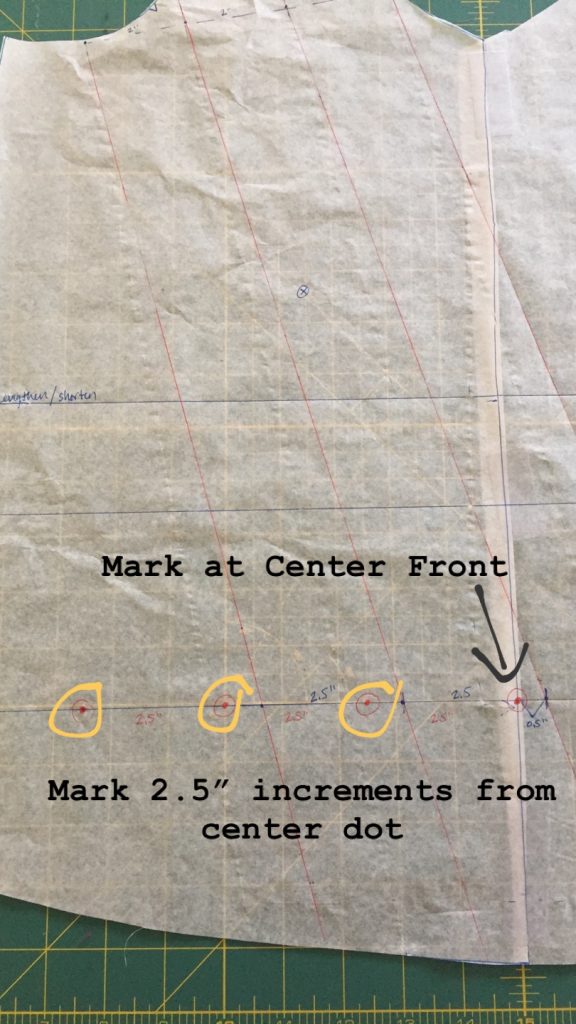
Step 4 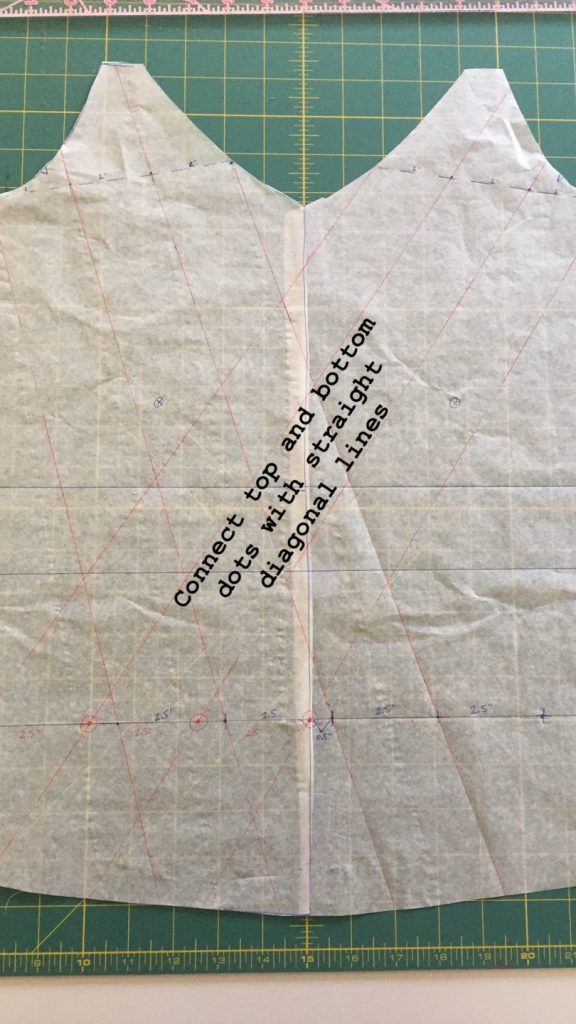
Step 5 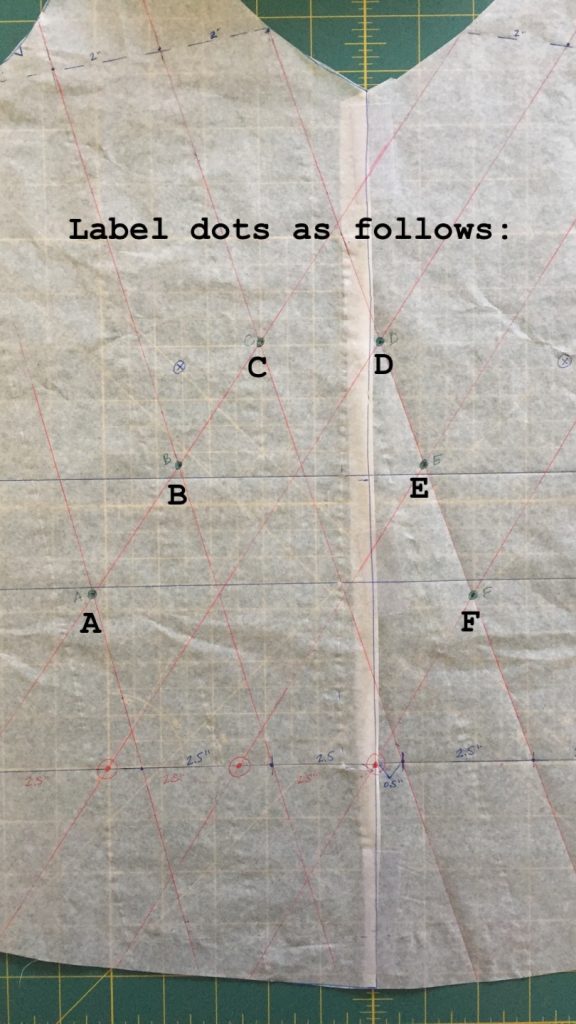
Step 6
You’ll see the following steps correspond to images in the Gallery above. Some of the steps in the Pattern Magic book will be slightly different since the project in the book is for a fitted bodice, and you can also feel free to make changes as you see fit if you try this on another type of pattern too. In my opinion, anything goes if you keep a playful mindset!
- Step 0: Start by tracing the Ogden Cami front pattern piece by tracing the right and left sides. You’ll see I have two pieces taped together. Include a vertical center front line, horizontal waistline, and transfer notches and other markings from the pattern. Don’t worry about the back piece at this time, you will use the original pattern for the back.
- Step 1: Draw a straight line from the underarm to the rough mid-point between the shoulder and the bottom of the V-neck, marking dots roughly 2″ apart for a total of 4 dots equidistant from each other. Complete this step at both right and left sides.
- 2: Along the waistline, mark 1/2″ from the center front. Place dots 2.5″ away on either side of that first dot, and then one more dot 2.5″ further to the left (as you look at the pattern, not as you wear it).
- 3: Connect the top and bottom dots with straight, diagonal lines, extending beyond the dots to the very top and bottom.
- 4: Along the waistline, mark a dot at center front, and then three more dots to the left of center, each 2.5″ apart.
- 5: Connect the upper right dots and the lower left dots (as you look at the pattern) with straight, diagonal lines.
- 6: Those sets of nearly-parallel lines you drew will intersect with each other in several spots. View the photo in the gallery to see where to label each intersection A-F. You’re looking good AF now! Let’s keep rollin’.
Preparing the Pattern, Continued
Step 7 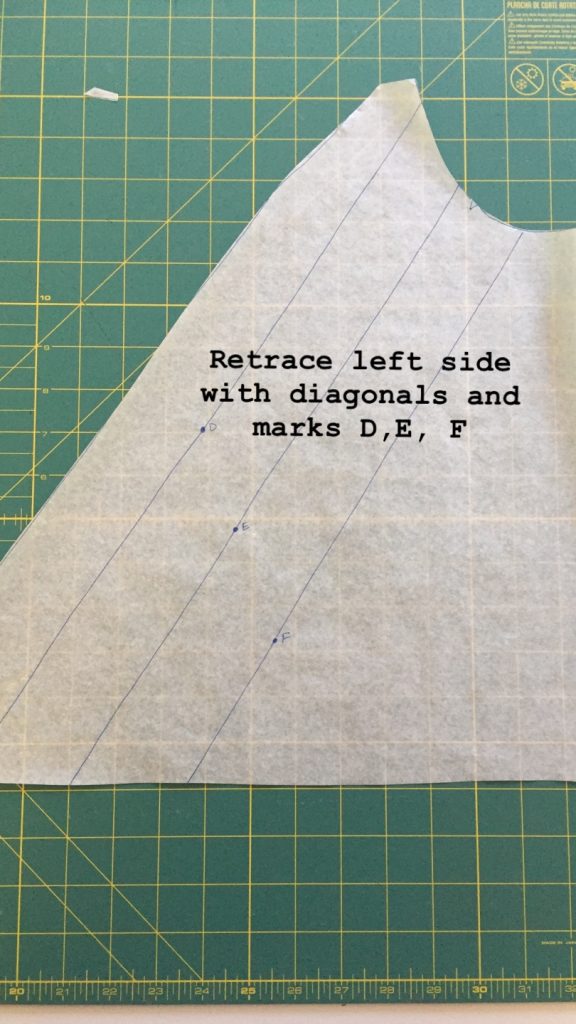
Step 8 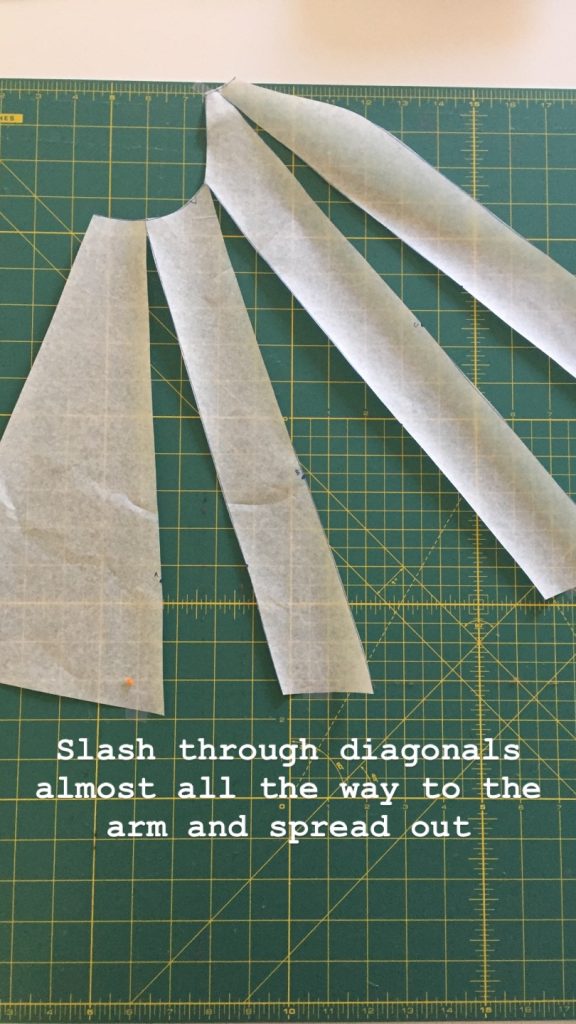
Step 9 
Step 10 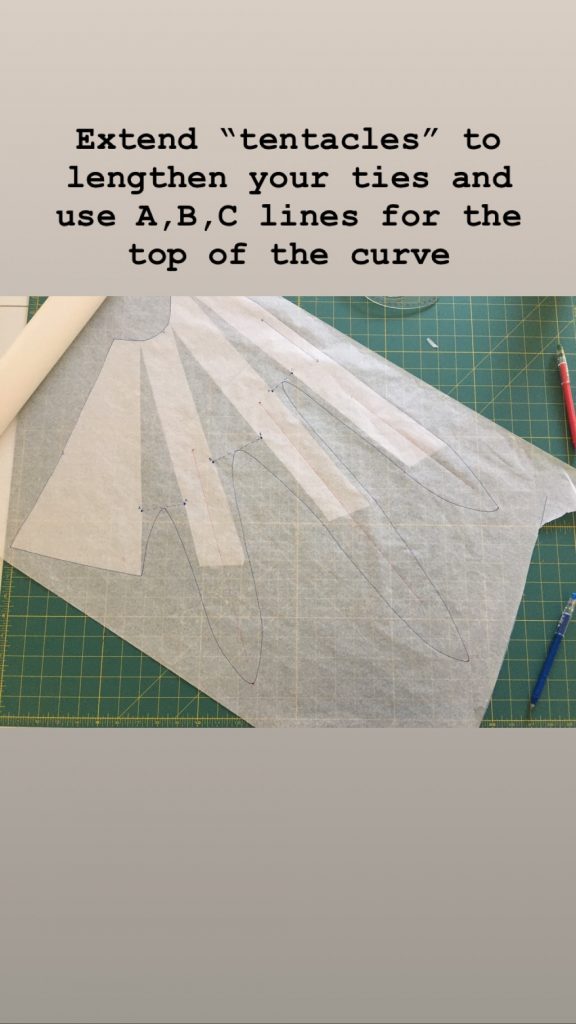
Step 11 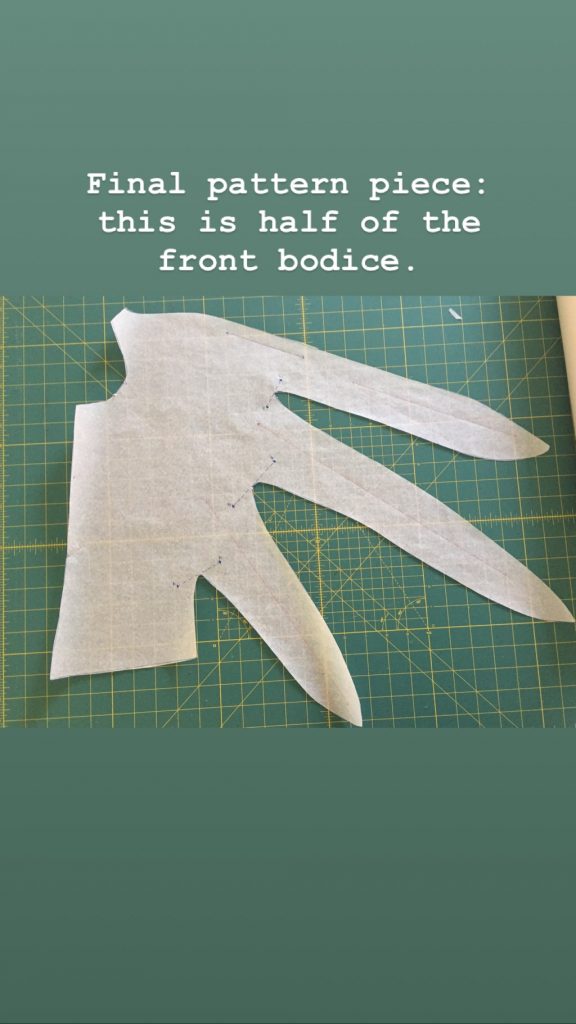
Step 12 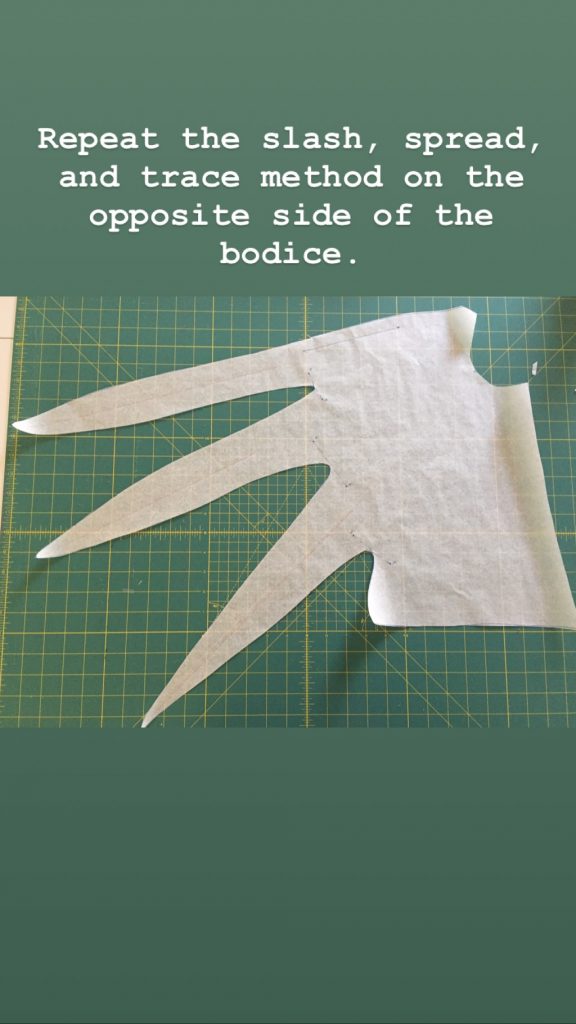
Step 13
You’ll see steps 7-13 correspond to the gallery above. Now we are changing gears a little bit because we will be splitting the pattern into two pieces, the right and left side. Going forward, those now will be referred to as you wear them. Coolio? Grab some more tracing paper and top up your coffee. I hope you like this process as much as I do – I feel like an architect or engineer, but I’ll admit I got spooked when I was somewhere around this step and Tom Waits came on the radio, “What is he building in there?” in his scary horror movie voice. I’m building a top, Tom, knock it off!
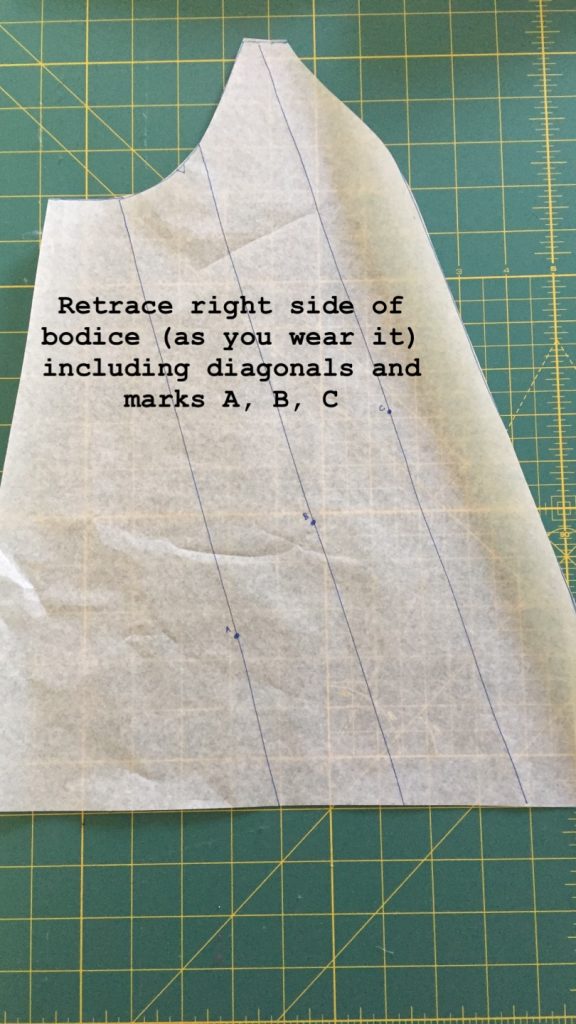
- 7: Retrace the right side of the bodice (as you wear it), include the diagonal lines and notice you’ll get rid of any part outside of the diagonal line near center. Mark dots A, B, C, so you can clearly see them on either side of the diagonal (you’ll be slashing these lines in a moment) and include notches and other markings.
- 8: Retrace the left side of the bodice, include the diagonal lines. Again, anything outside of the diagonal line closest to center will be trimmed off. Mark dots D, E, F, and other notches and markings from the pattern.
- 9: On the right bodice piece, slash the diagonal lines up to, but not through, the armhole/shoulder and spread out evenly. Tape this piece to the table to make the next steps easier.
- 10: Place tracing paper over the top and trace the side seam and armhole, the hem until the first slash, and the V-neckline all the way down. Then connect your A’s together with a straight line, repeat for B and C points. Transfer notches and markings.
- 11: Extend your “tentacles,” for lack of a better word. There is a guideline in the Pattern Magic book for how long these should be, but you could play with this too. Use your A/B/C lines as the top of the curve. I did this slowly by hand, but you could use a curved ruler too.
- 12: Run the grain line along the V-neck tentacle and cut out your pattern piece. This is the front right half of your bodice.
- 13: Repeat steps 9-12 for the opposite pattern piece with D, E, F markings. These tentacles will be different lengths than your first side. Consult the Pattern Magic book for suggested lengths here.
Alright! Now you have your front pattern pieces. Go ahead and use the original Ogden cami back, lining, and strap pieces. Get your fabric pre-washed and ready for cutting!
Preparing the Front Bodice
Step 14 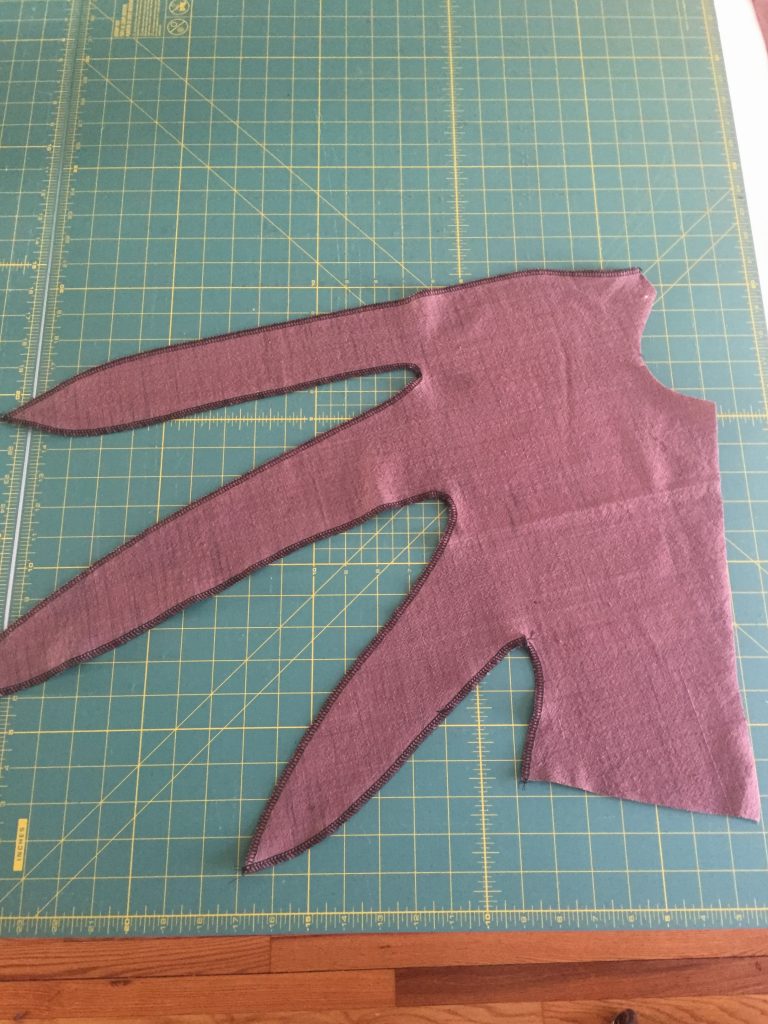
Step 15 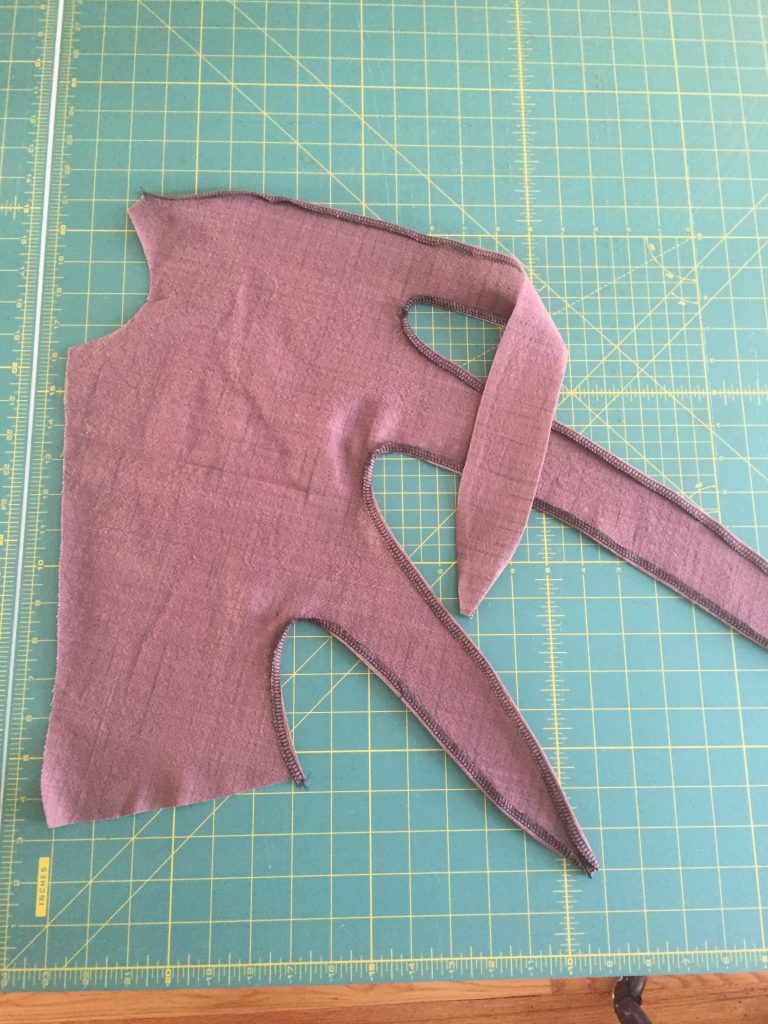
Step 16 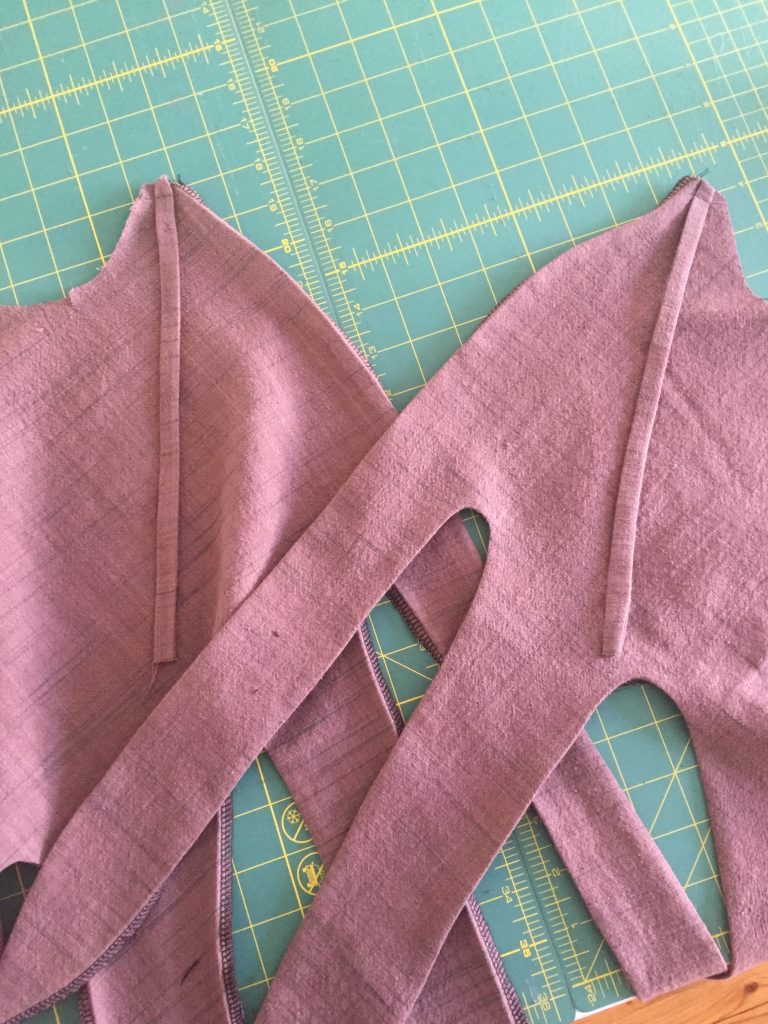
Step 17
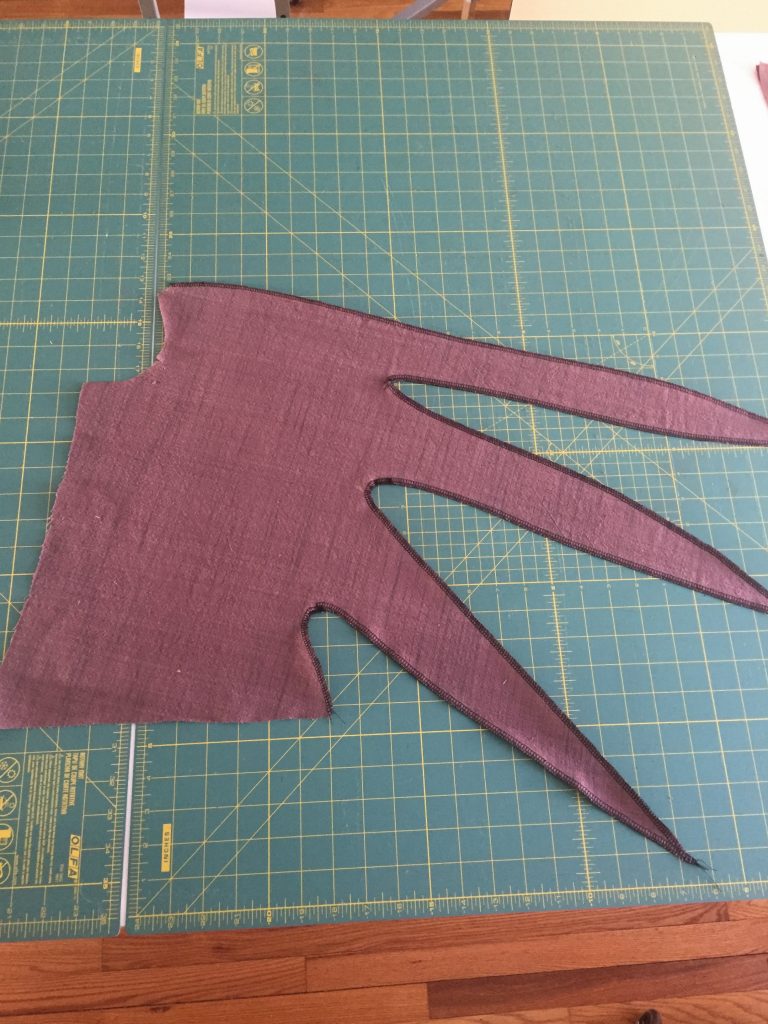
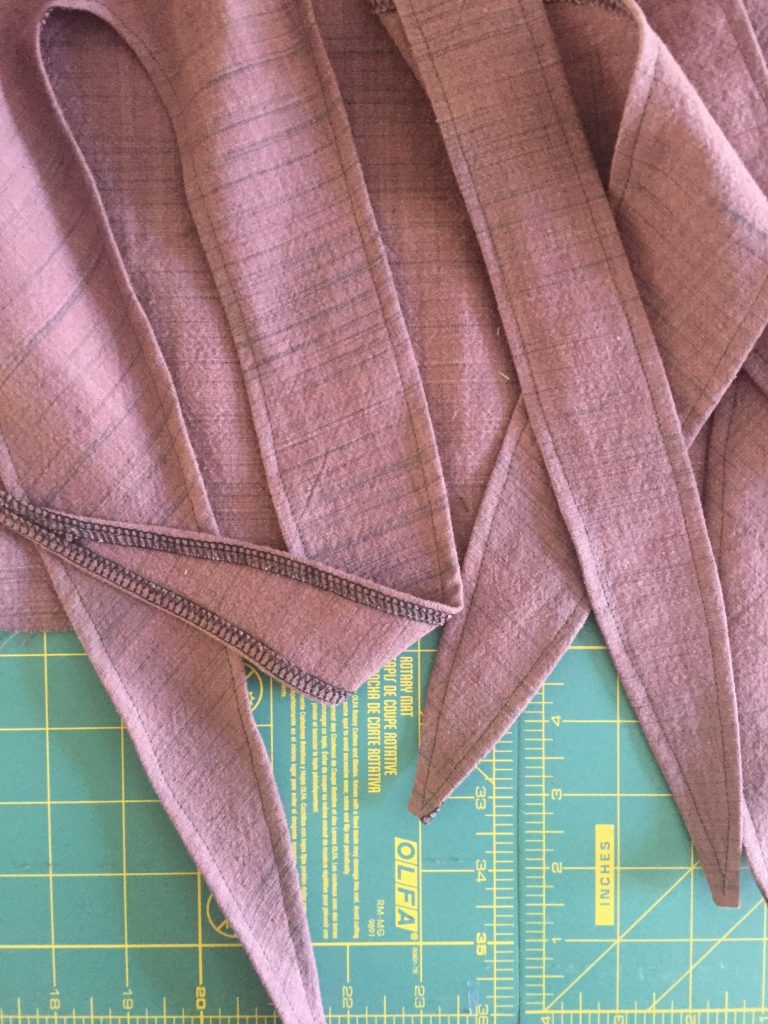
- 14: Cut out front bodice piece, and finish the edges of the tentacles with a serger. If you don’t have a serger, you can choose how you want to do this – pinking shears, narrow hem, single fold bias tape…. With the serger, I did NOT do this in one pass. I started from the inner curve and serged my way out to the tip, and repeat. A lot.
- 15: Repeat step 14 on the other half of the front bodice piece.
- 16: Press a narrow (1/4″-3/8″) seam allowance around all the tentacles, including the neckline. Repeat on opposite side.
- 17: Assemble and attach the straps as indicated by the Ogden Cami pattern.
Back Bodice and Lining
Step 18 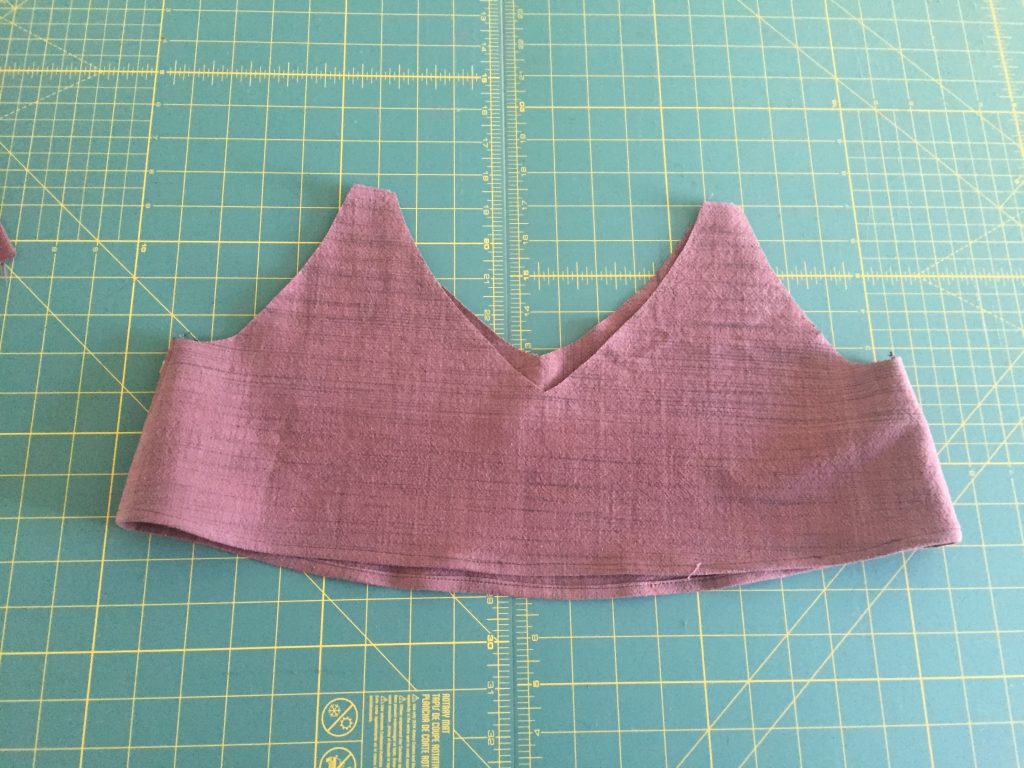
Step 19 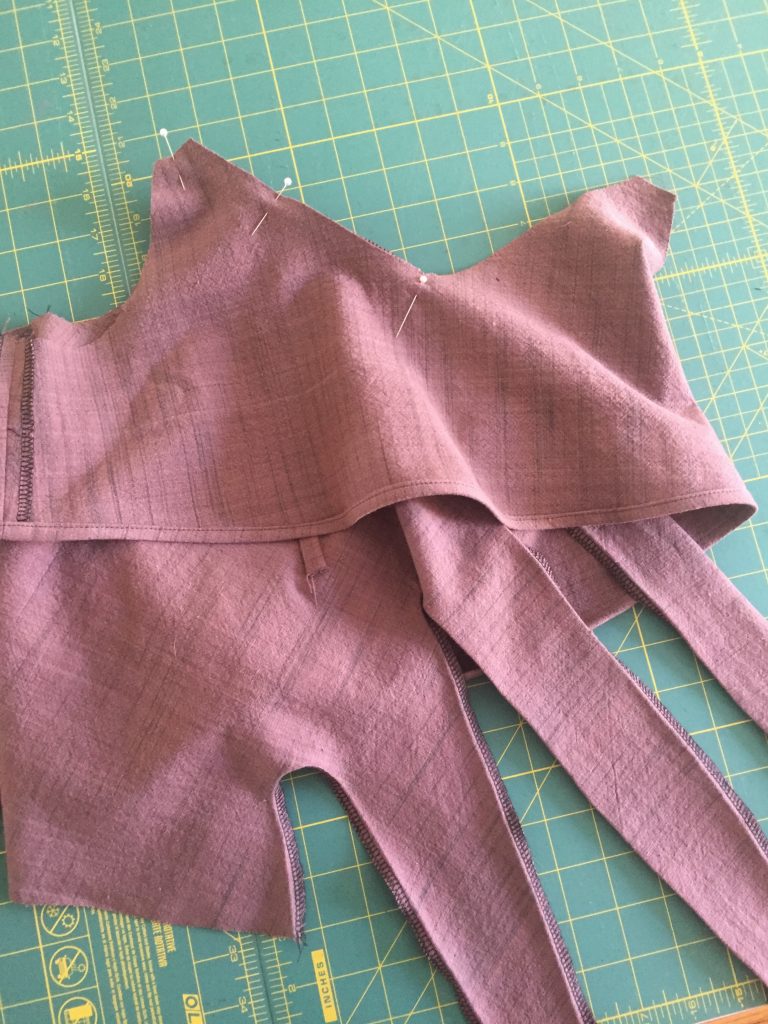
Step 20 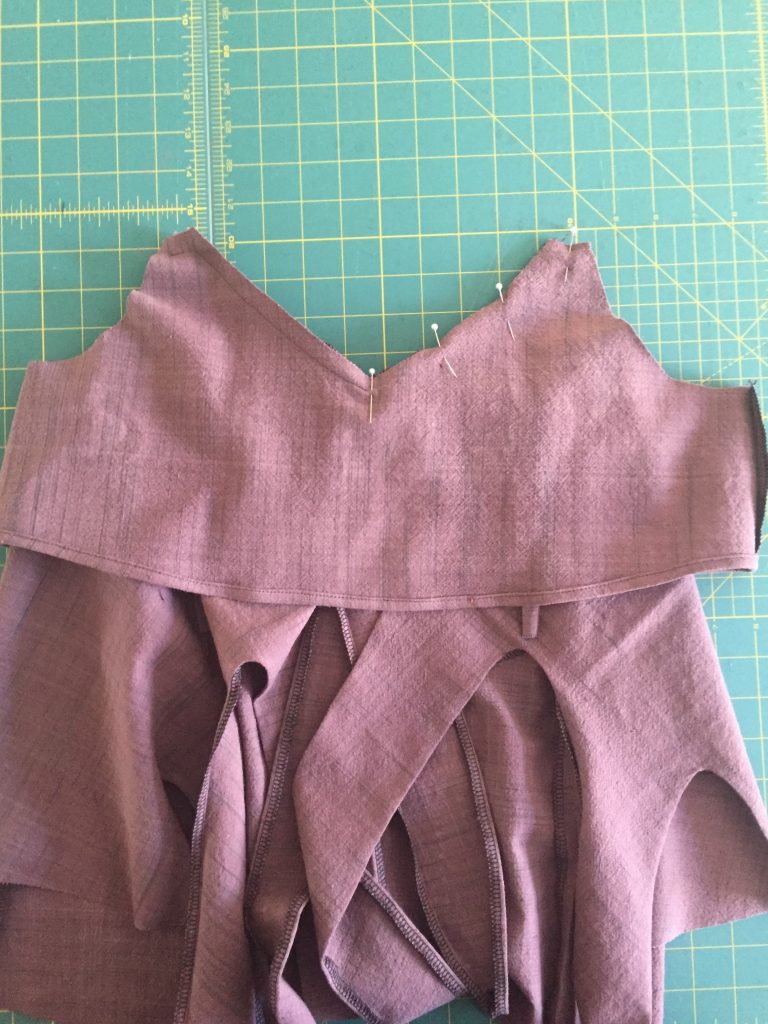
Step 21 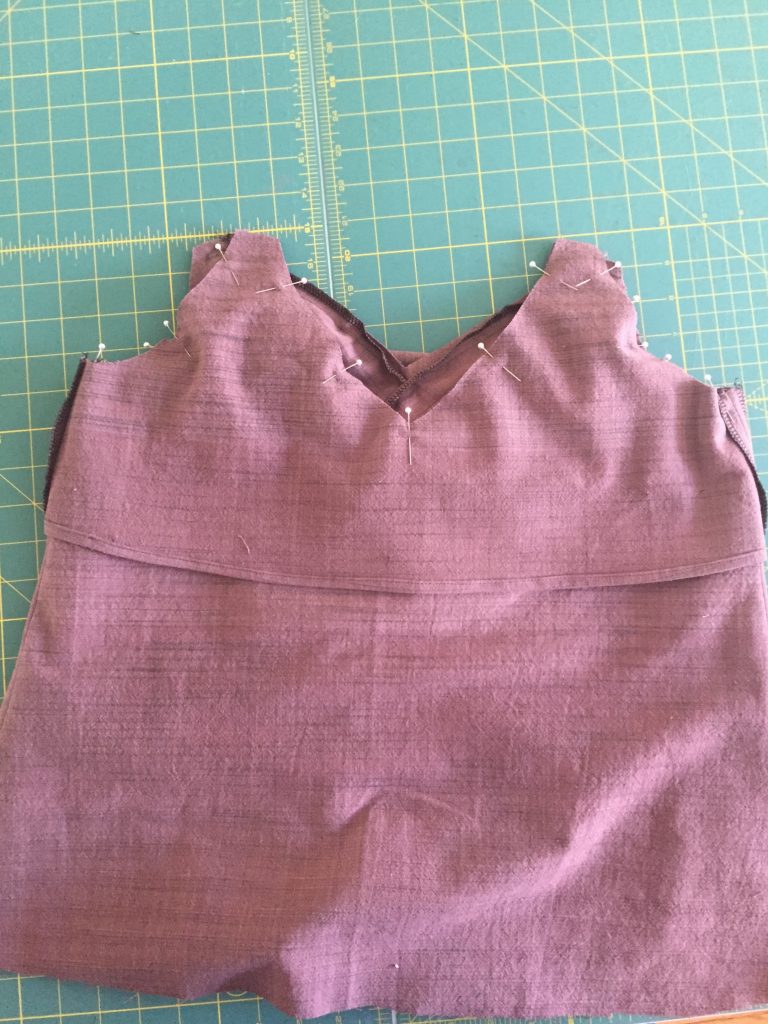
Step 22 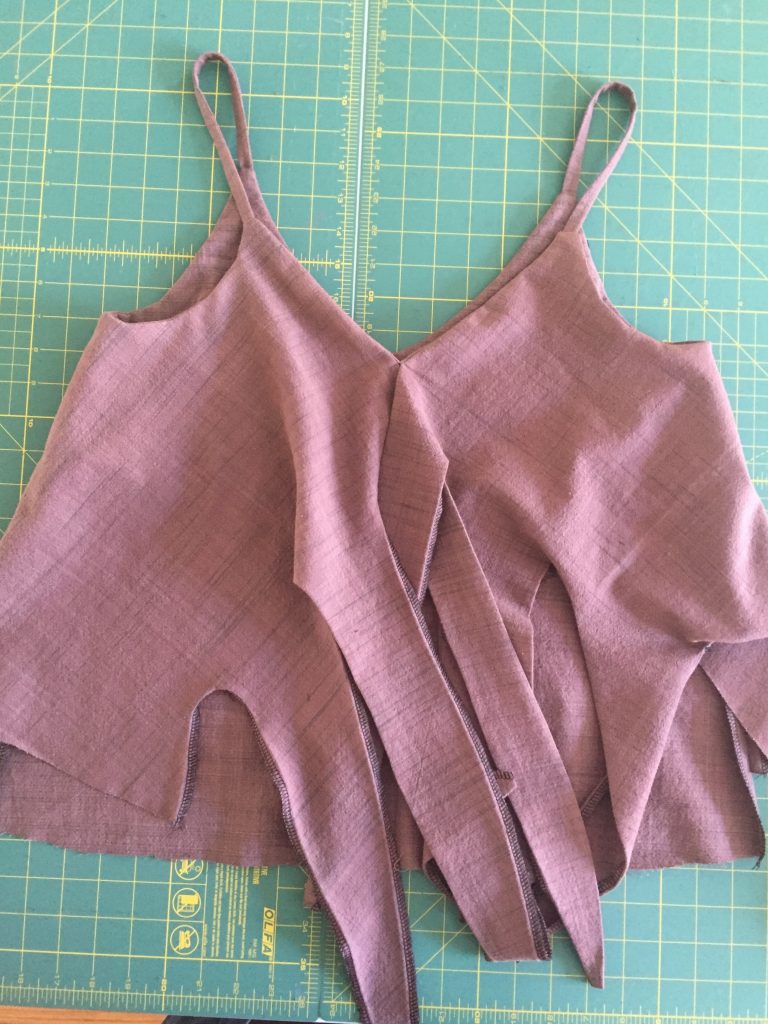
Step 23
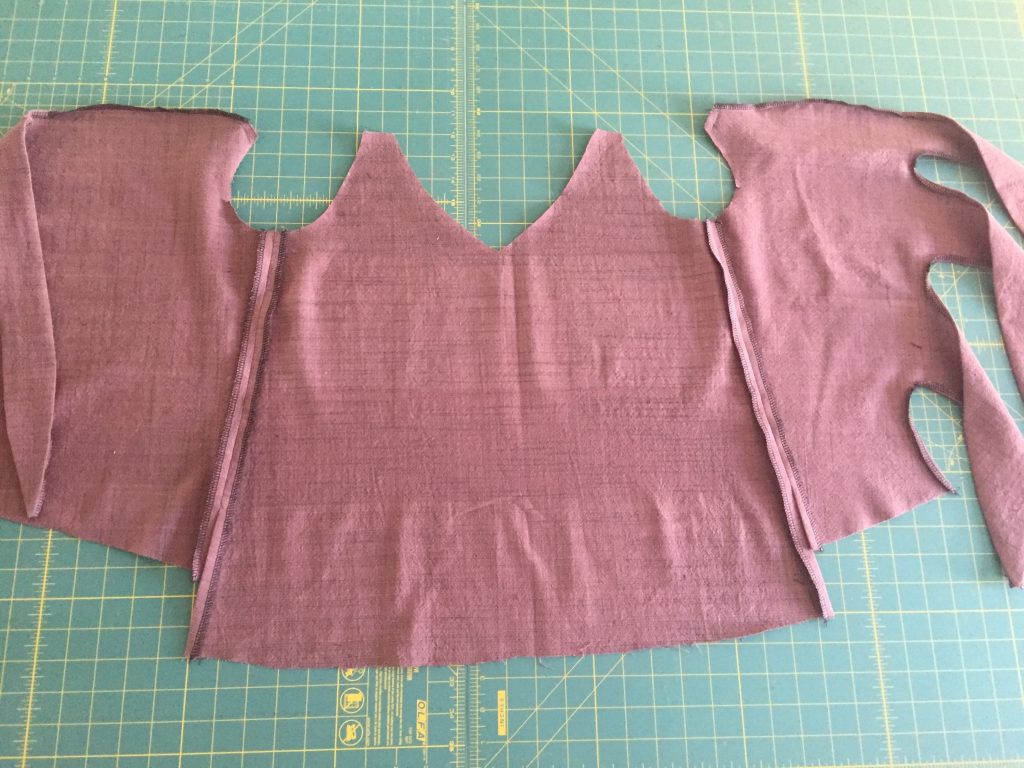
- 18: Sew the front bodice pieces to the back bodice piece, finishing the seams separately and pressing open.
- 19: Follow the Ogden Cami pattern steps for assembling the lining.
- 20: When you are ready to attach the lining to the bodice, these steps will be slightly different than the Ogden Cami instructions. Stitch the lining to the right bodice, right sides together, starting from the strap and stop at the bottom of the V. In the photo, you will see pins where the stitch line is about to happen.
- 21: Sew the lining to the left front bodice with right sides together. Again, start at the strap and stop at the bottom of the V, the exact same spot you stopped your previous stitch line.
- 22: Sew the lining to the underarms and back bodice. Follow the Ogden Cami instructions on attaching the straps. This photo shows the back bodice. Also, follow the Ogden Cami instructions on under-stitching the lining as well.
- 23: Turn your cami right side out. This photo shows the front of the bodice. We are getting close to the weaving fun now!
Weaving the Tentacles
Step 24 
Step 25 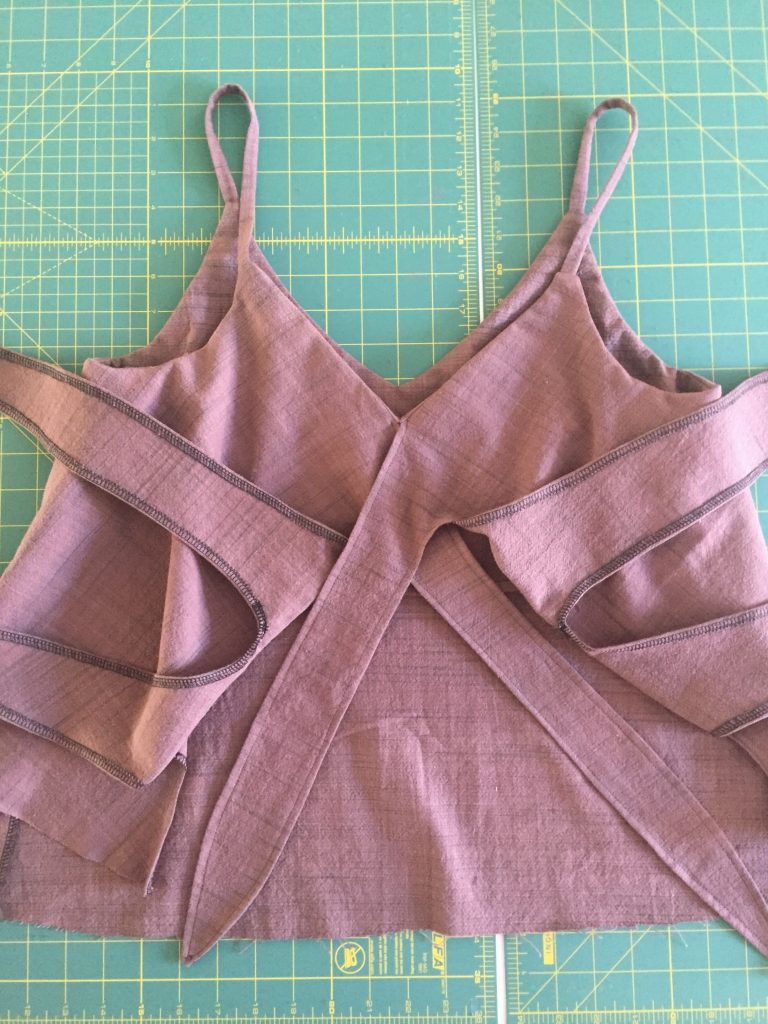
Step 26 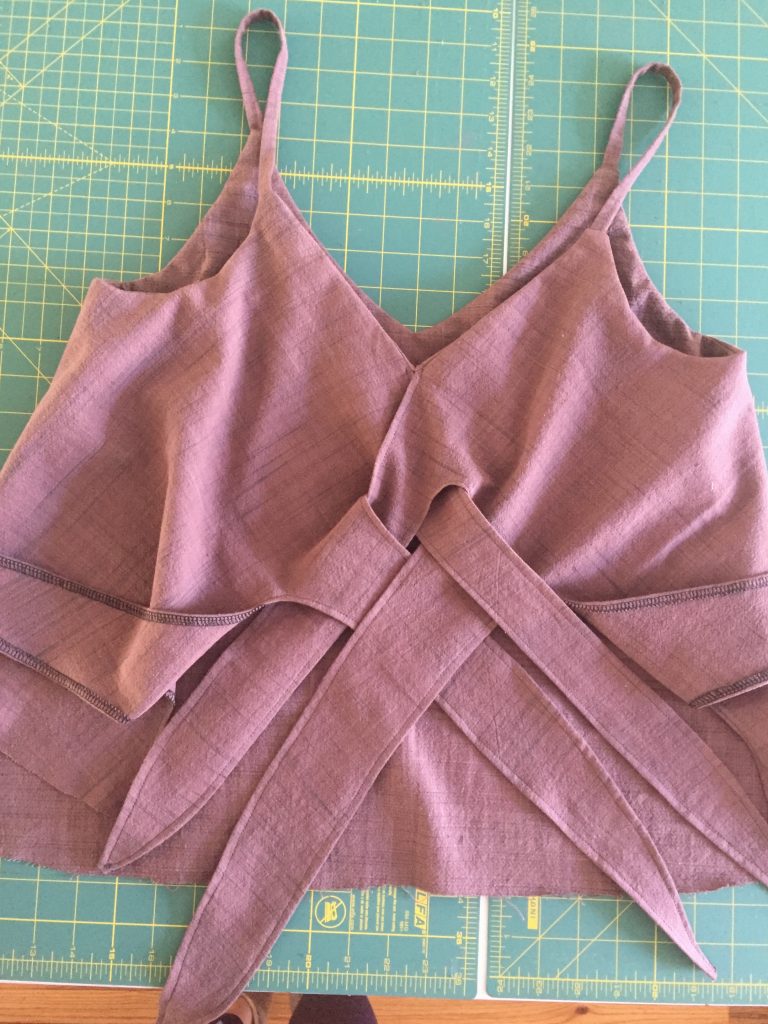
Step 27 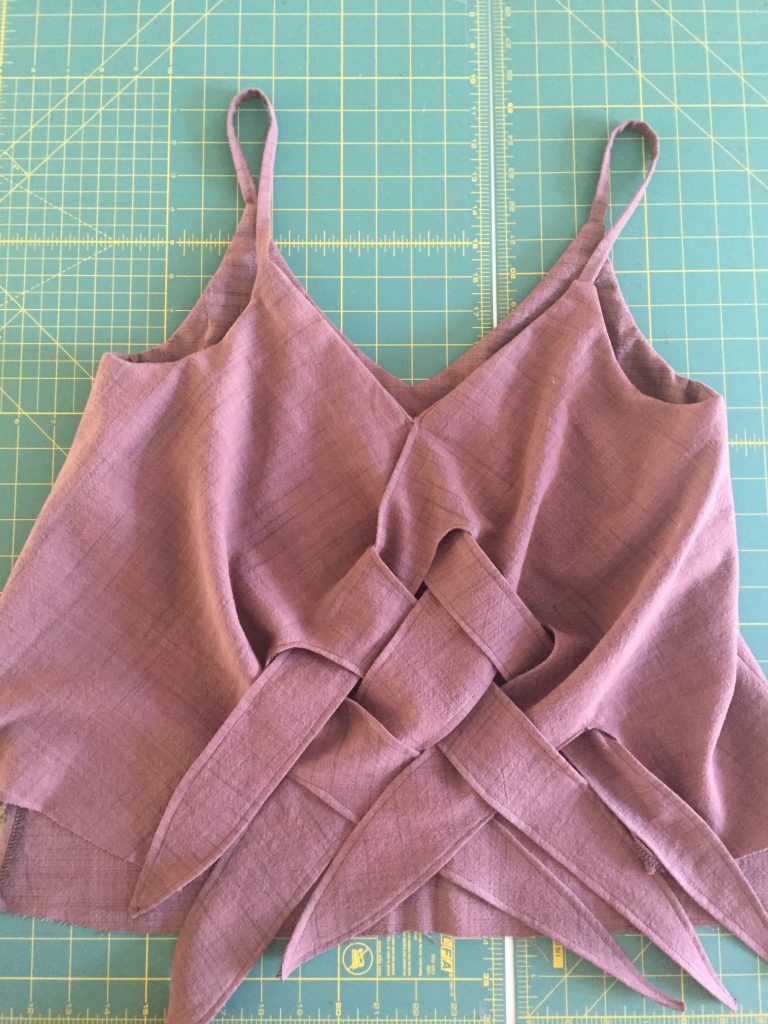
Step 28 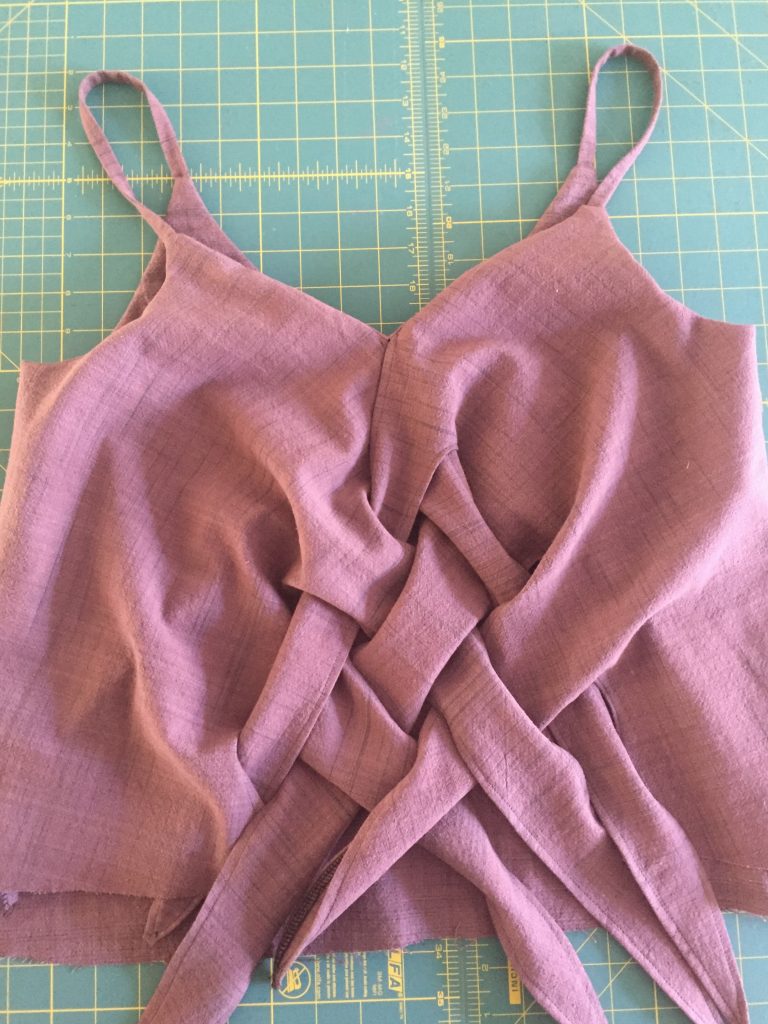
Step 29
- 24: Press the finished edges of your tentacles to the wrong side again, if needed. Hem all the way around. I ended up doing a drop hem where the back bodice is longer than the front. You can play with whatever works for you!
- 25: Lay your cami flat and spread the tentacles away from center.
- 26: Draw the tentacles nearest to the neckline down, placing one over the other (your choice which you want on top).
- 27: Draw the next two tentacles down, weaving them like a basket.
- 28: Do this again with your last set of tentacles. This part is fiddly but fun!
- 29: I spent a lot of time right around this step. I tried folding edges to create a little more volume, like in this photo. Then, I tried sewing little tacks to keep the tentacles together. I tried it on several times too. I encourage you to do the same!
What Didn’t Work for Me
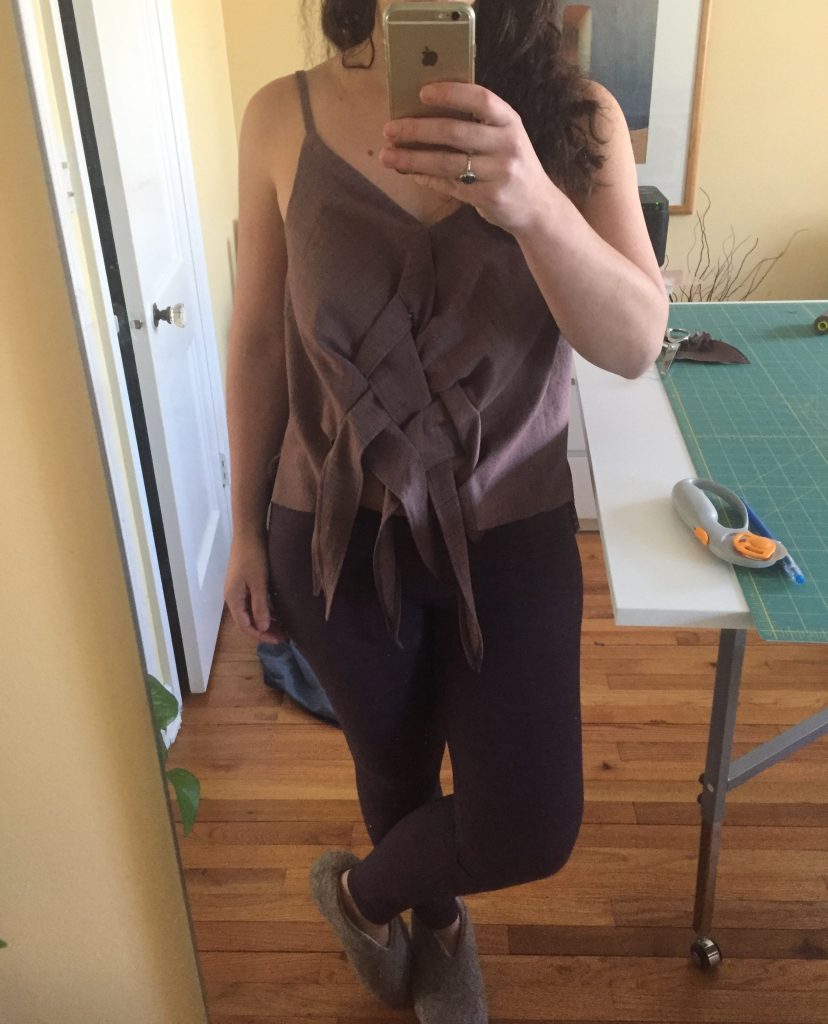
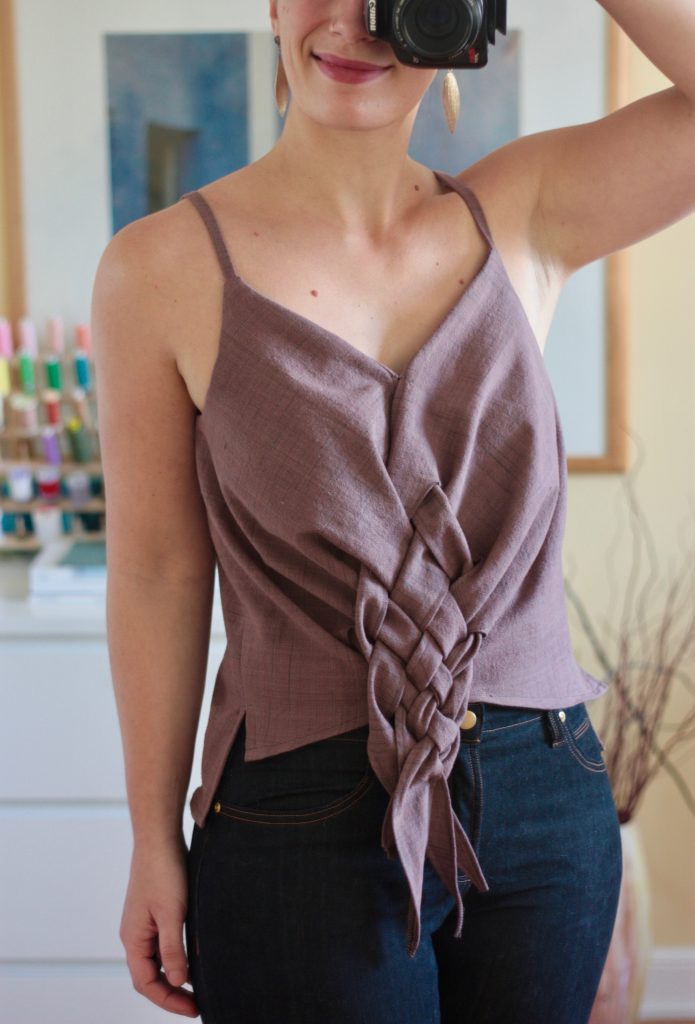
Tried on the bodice at this point, fiddling a lot with how I wanted this to look. I sewed little tacks in several places and snapped this mirror selfie above. I sent this pic to my husband with lots of choice emojis and I believe I used the phrase “washed up Peter Pan vibes.” Am I wrong, though? This is the crucial moment where I decided to take a healthy break and promise to come back to this when I was feeling inspired again.
Take #2 – Make It Work!
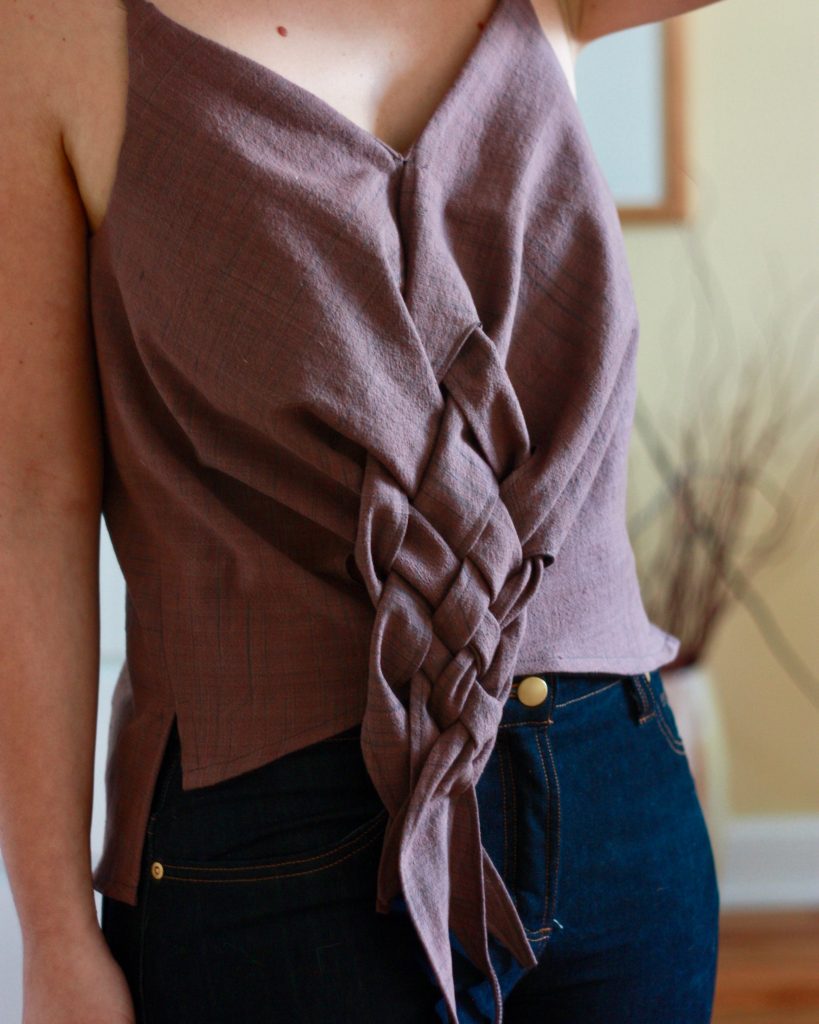
I made the important choice to let go of the idea of sewing little tacks all over the place. It made the ties look unnatural and forced. Instead I played around a bit more and found that I liked the shape better when I pulled the bottom edges of the right and left bodice pieces together, and let the braid fall in front of it.
I overlapped the bottom edges together by about a half an inch and sewed them together. There is still enough ease to put on and take off, and you can see my drop hem more clearly in the photo here.
A Little High Maintenance, Yes
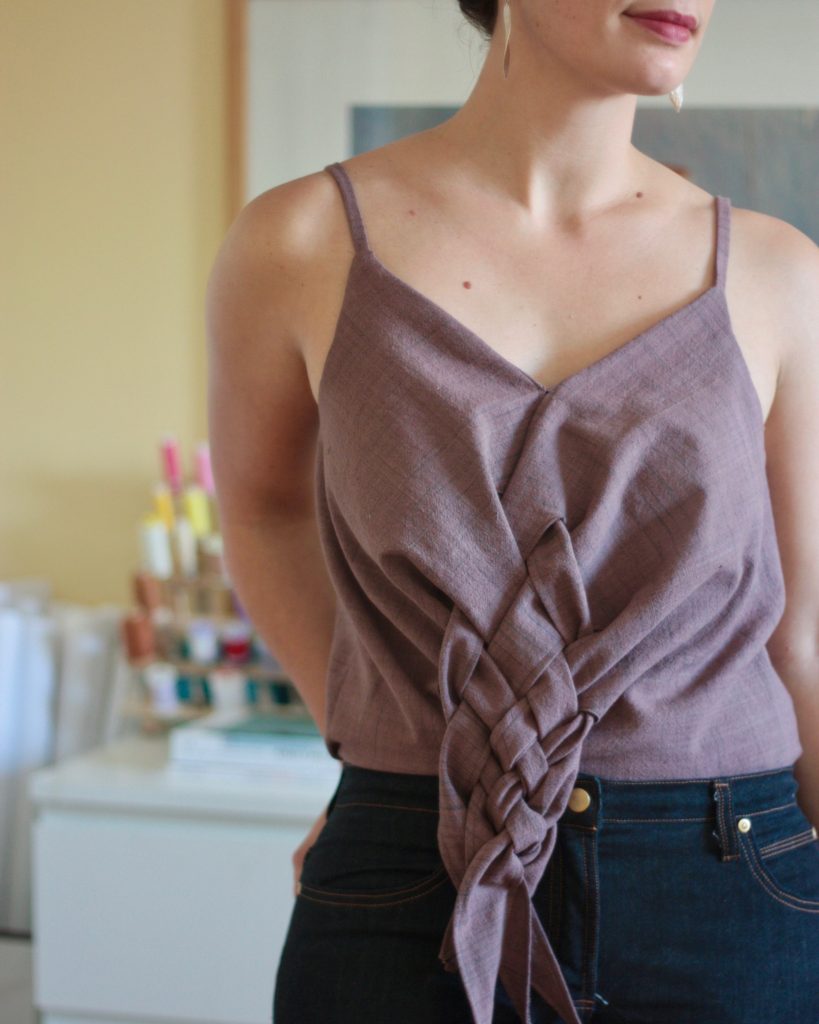
Once I got the braid looking even and falling where I wanted, I sewed one tiny little tack to keep it together. I know this isn’t the most convenient feature about this top, because I will unpick the tack in order to wash and press it, then I will tack it again to wear it. Oh well. If you have some ideas on how to improve this, please leave a comment and let me know!
If you made it this far, all the high fives to you! If you loved this project, check out my other hack using the Pattern Magic book: I put some pretty pleats into an Inari Tee. And if you attempted this woven hack, pretty please let me know about it, would you?! In the meantime, I’ll be practicing braiding my hair to match this top.
Very cool and Avant garde! I’m such a slow sewer it would take me months to do this – if I could figure it out! Looks great on you!
Thanks so much! It was a wild project!
It’s very helpful for me because I am planning my YouTube channel…and I am going to use this top in my video…
Thank you