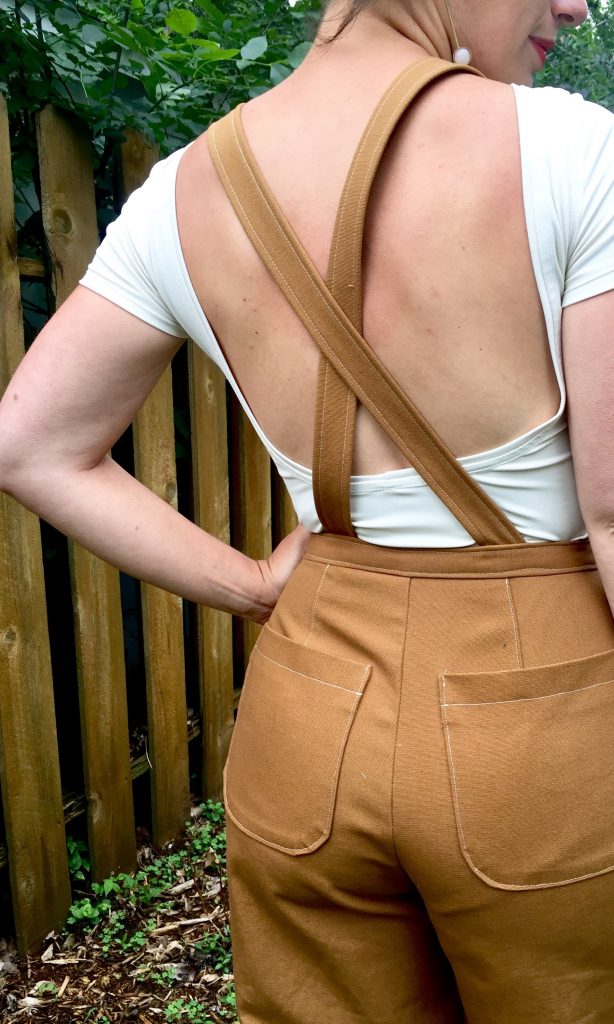
Is there any greater compliment than Heather Lou of Closet Case Patterns putting my detachable bib hack on blast saying it was one of the greatest she’s ever seen? I quietly freaked the eff out when that popped up on my phone while I was out having beers with my friends. This removable Jenny Overalls bib hack honest to goodness came to me in the middle of the night and I was obsessing over it for weeks before I started to work on it.
First Version of the Jenny Overalls in Carhartt Canvas
I made the Jenny Overalls pattern as written in a Carhartt heavy canvas as written so I could familiarize myself with the pattern before trying out the hack.
Side button option 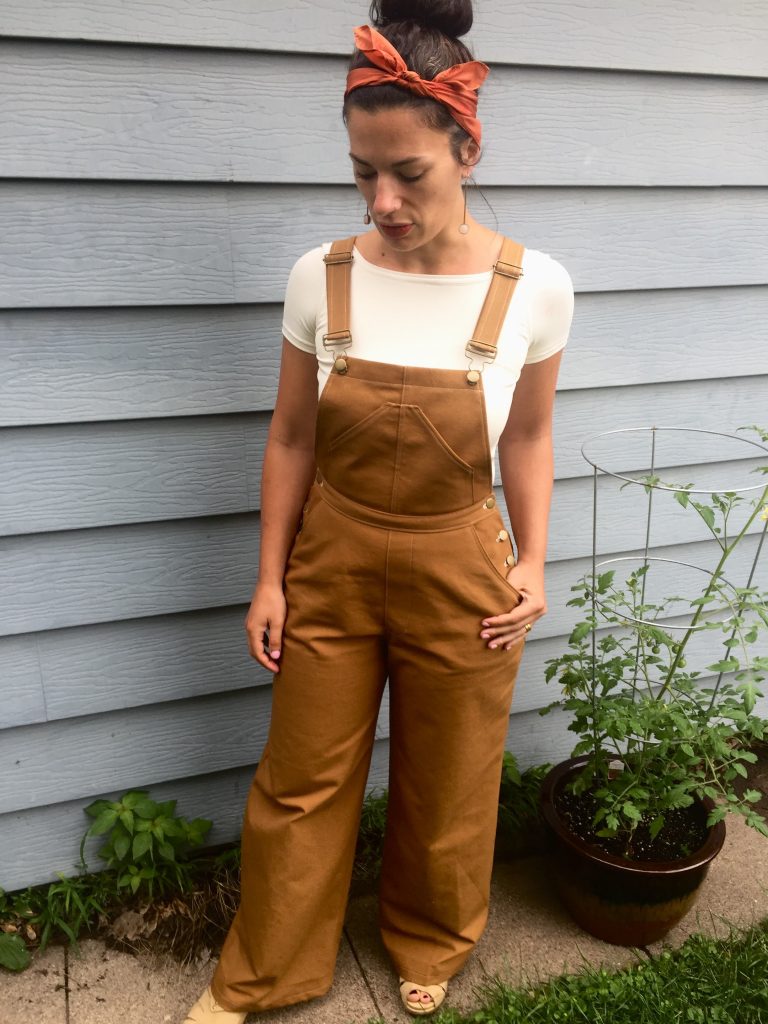
Paired with Nettie bodysuit 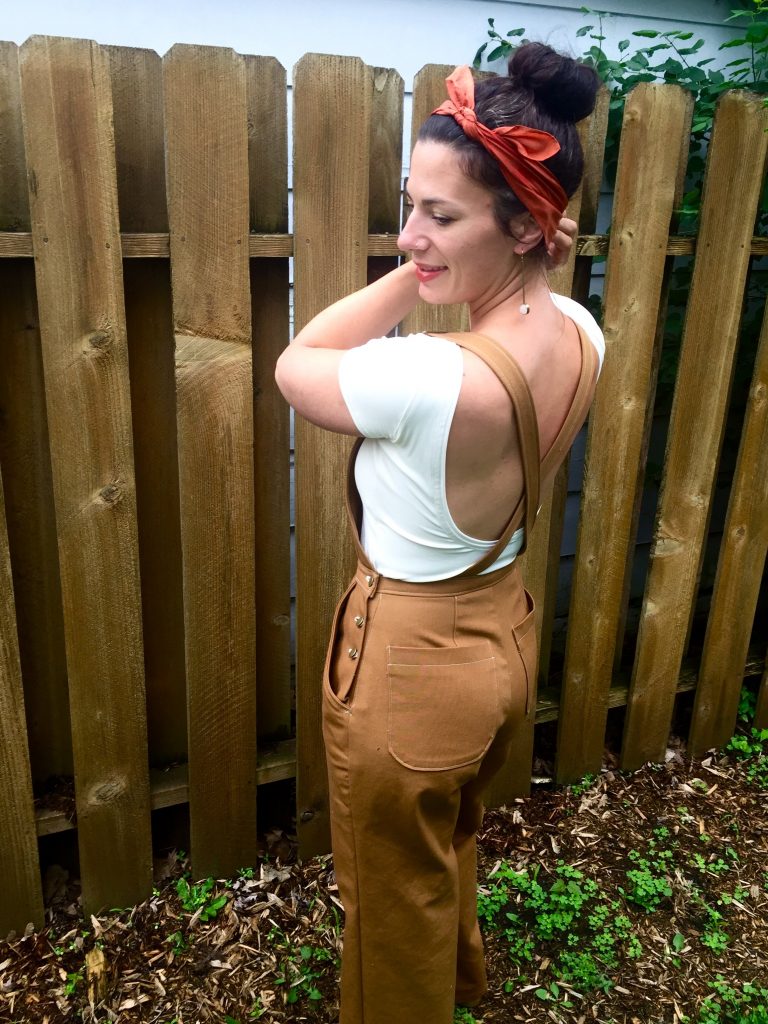
The first, unhacked pair of Jenny Overalls
The Details:
- Pattern is Jenny Overalls by Closet Case Patterns
- Size 8 in the bib and waist, grading to 16 in the hips and leg
- Button closures on both sides, using the tutorial from Closet Case Patterns
- Buckle and Button kit in antique brass from Closet Case
- Flat felled seams on the bib
- Carhartt brown canvas with white topstitching
- Paired with Nettie bodysuit, pattern also from Closet Case
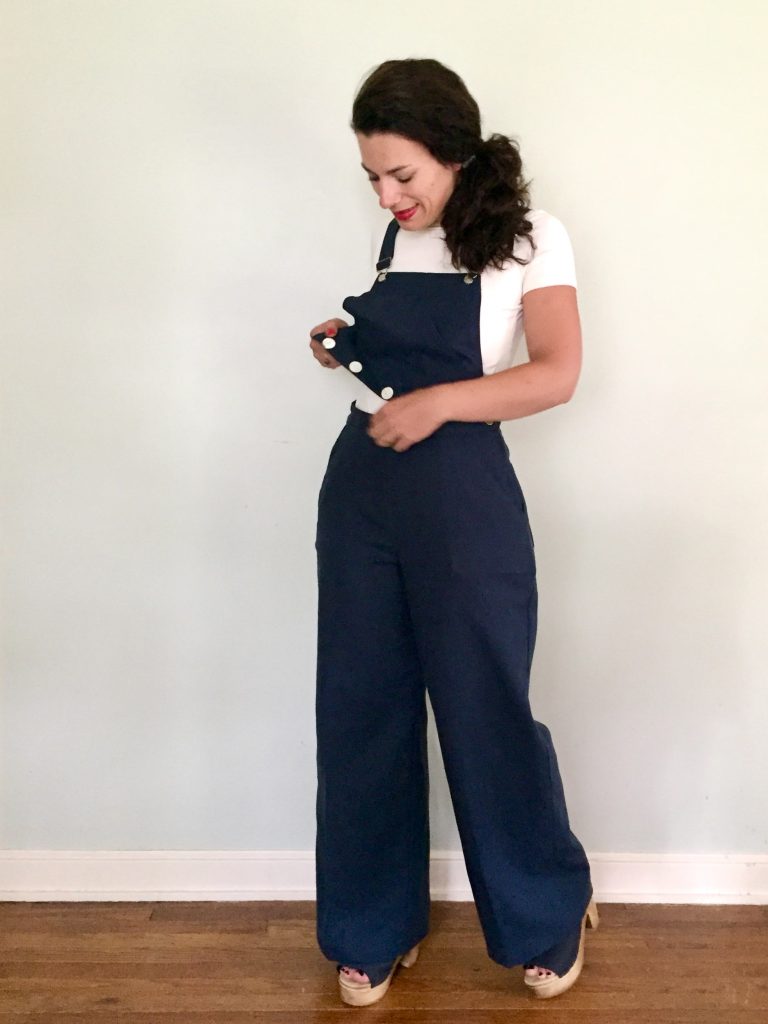
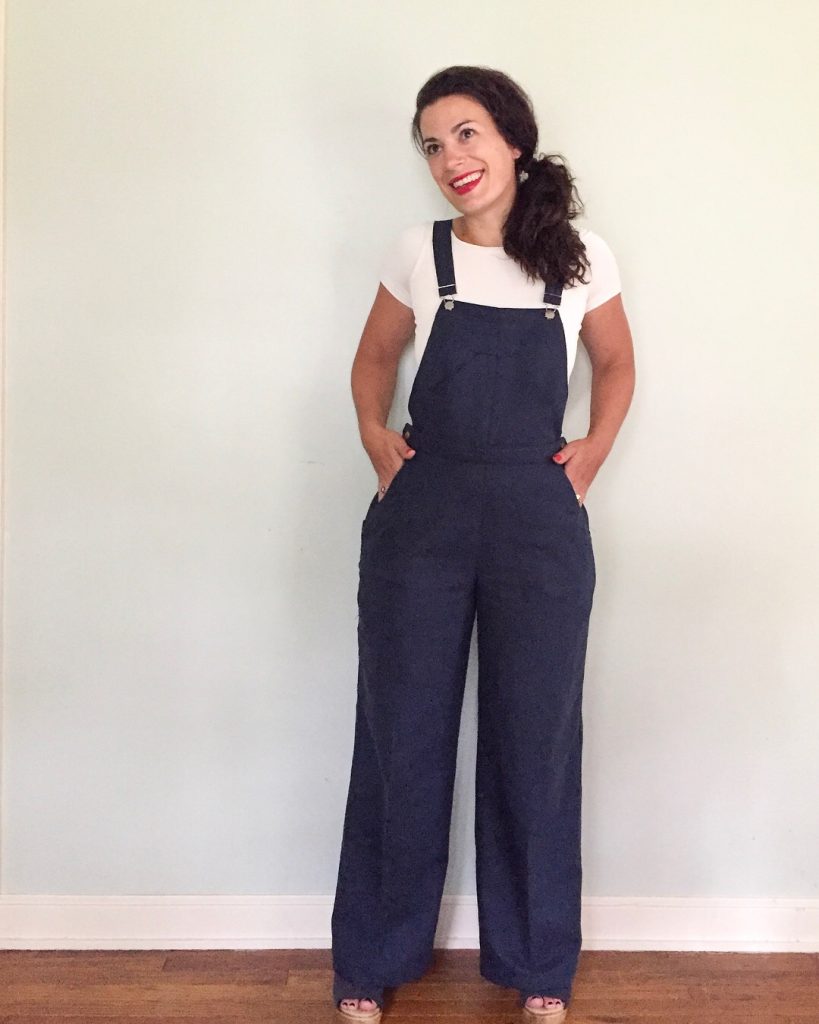
After a successful run through, which I always recommend before attempting a big hack, I was ready to try this out in a navy linen. If you’re wanting to try this, you can choose a couple of ways:
The Shortcut Hack (Easy)
The quick and dirty way is to simply add a couple of inches to the bottom of your bib piece, finish the bottom, and sew buttonholes across the lowest edge. You can finish the ends of the strap that are opposite to the buckles and put buttonholes there too. Then make the Jenny trousers following the pattern and hand sew buttons on the waistband facing in the front, matching the bib, and the back, matching the strap placement.
The Scenic Route (Worth the Extra Time)
The longer, cleaner way, at least in my opinion, is to follow my tutorial below. The buttons will be inserted in the waistband, not touching your belly, and invisible from the outside. Please note this is for the pant option with zippers on both sizes. You can certainly do the single zipper option with this hack, but the pattern piece “Qa” will be replaced with “Qb.”
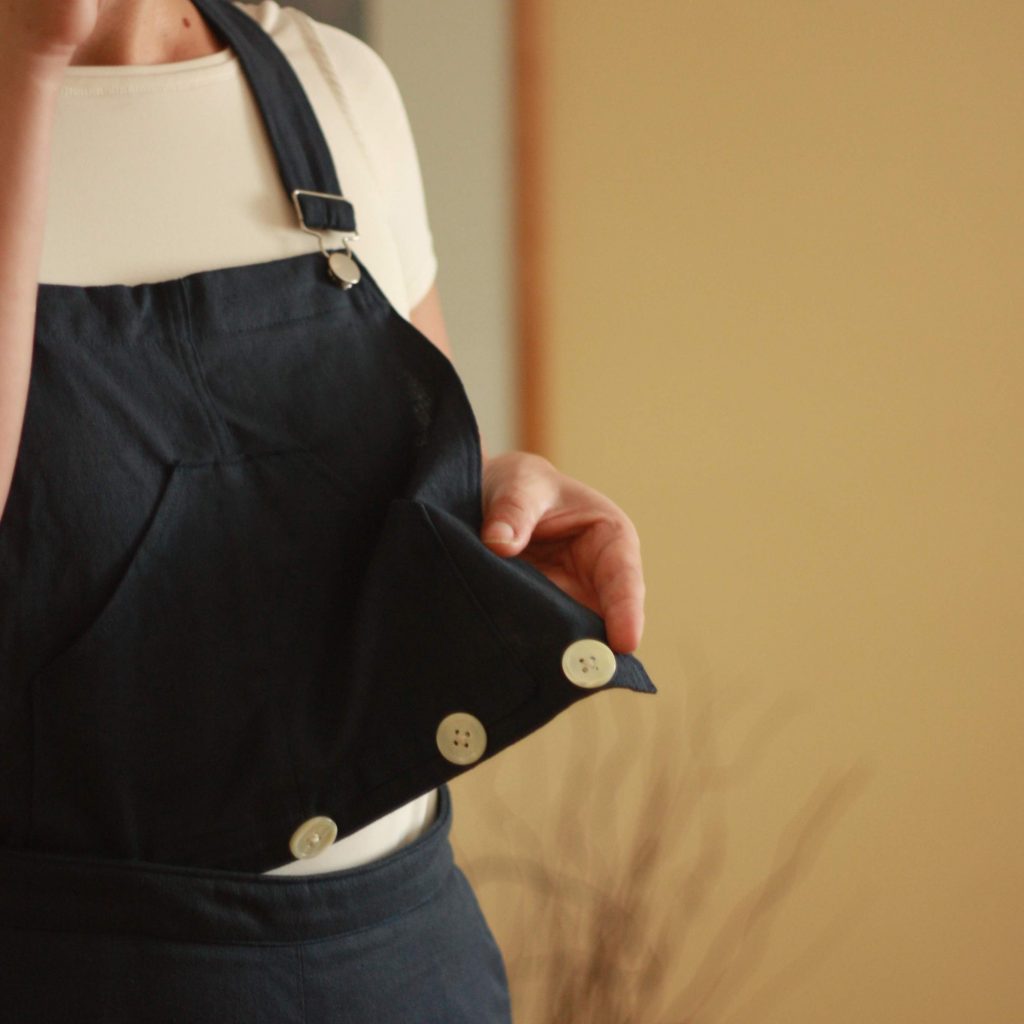
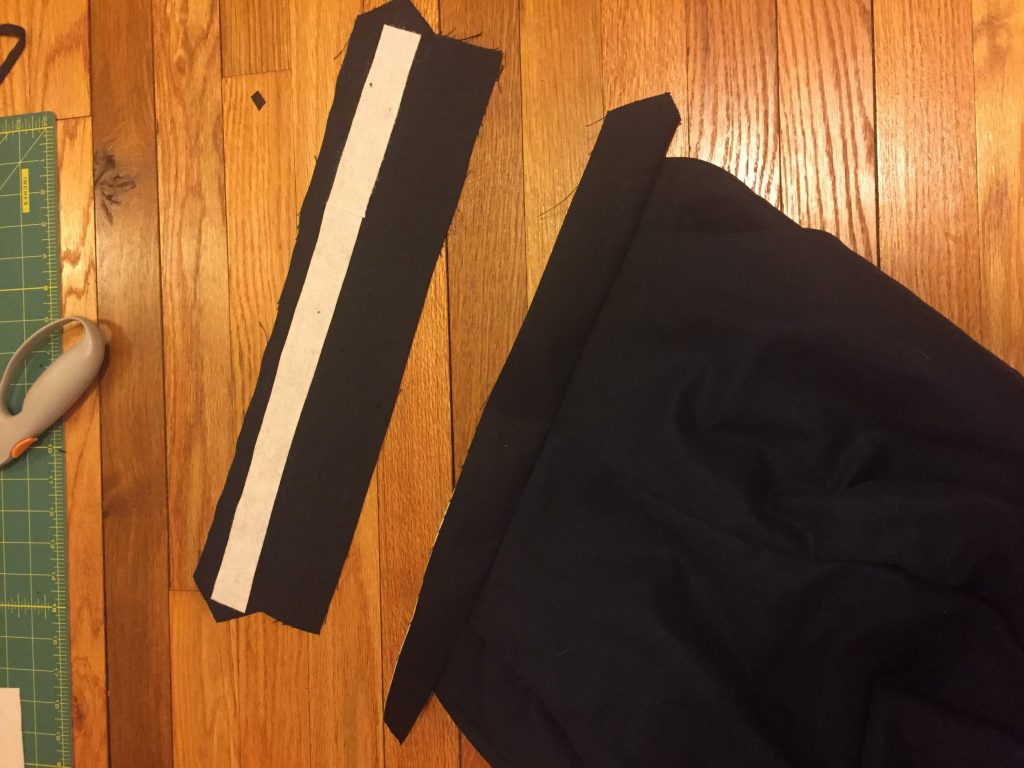
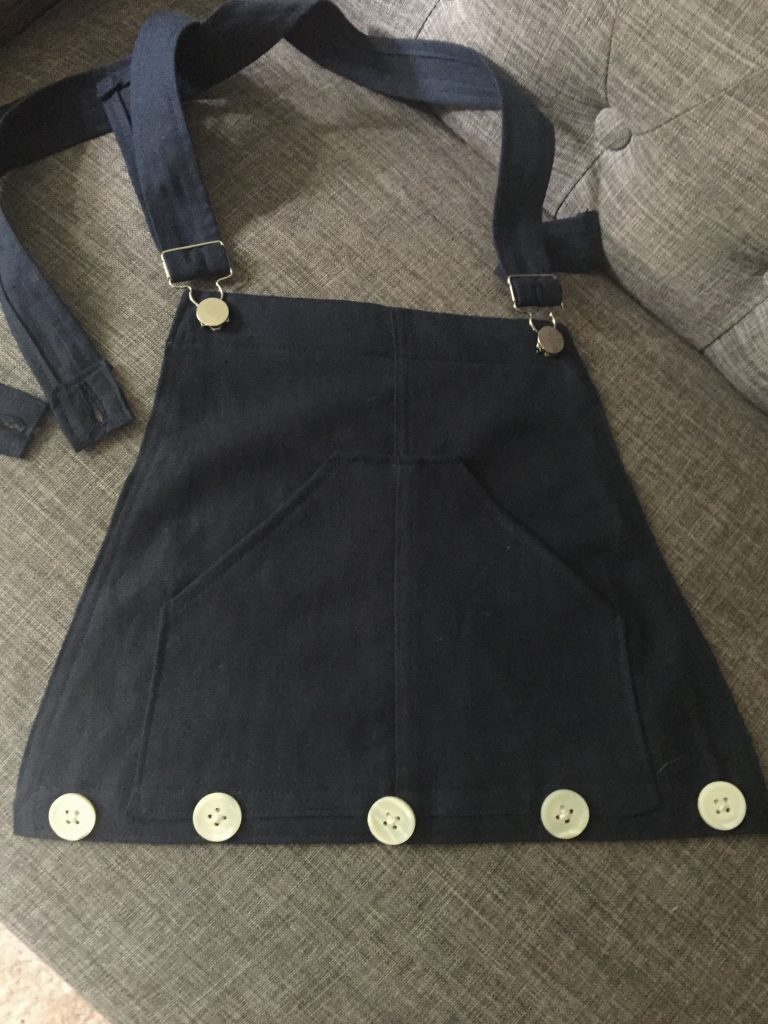
Cutting the new bib pattern piece
When you trace the bib pattern pieces (J), add 2” to the bottom of the bib. Follow instructions for the bib and bib pockets as directed. Apply a strip of interfacing to the wrong side of your fabirc along that 2” strip at the bottom. This stabilizes where the buttons will go, which is essential if you’re using a mid-weight fabric. Fold the lower edge up ¼” wrong sides touching and press.
Fold up the lower edge again about 1” and press. Edgestitch around the perimeter of that strip to secure.
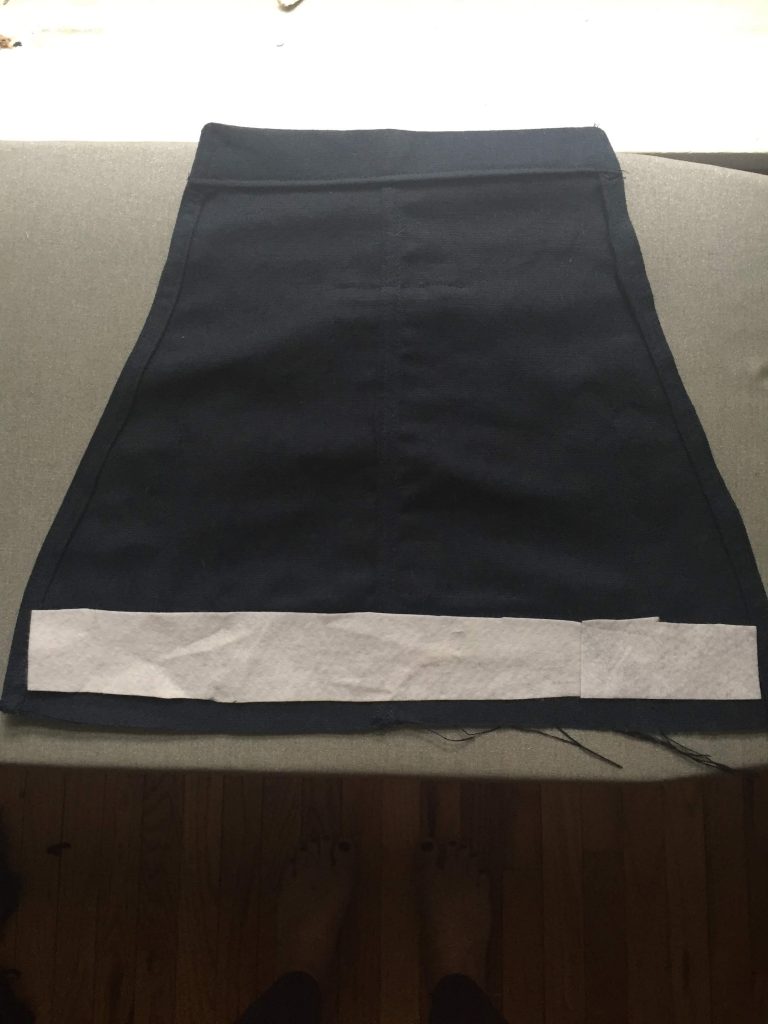
Wrong side of bib with extra 2″ and interfacing 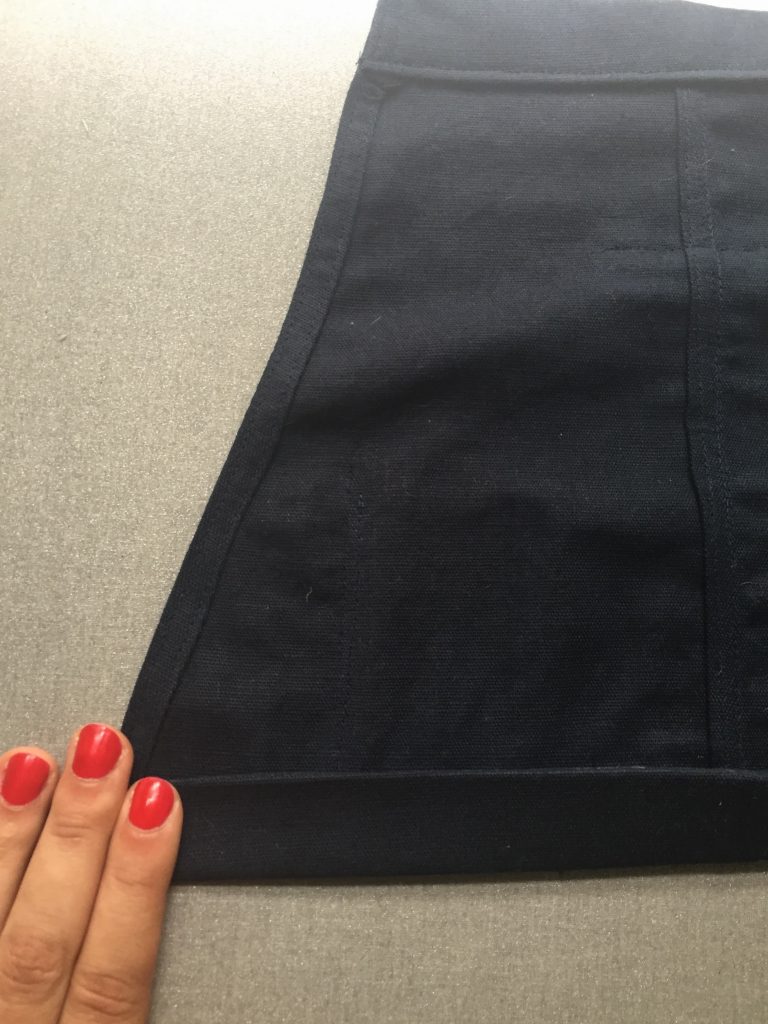
Fold up 1/4″, and again 1″ 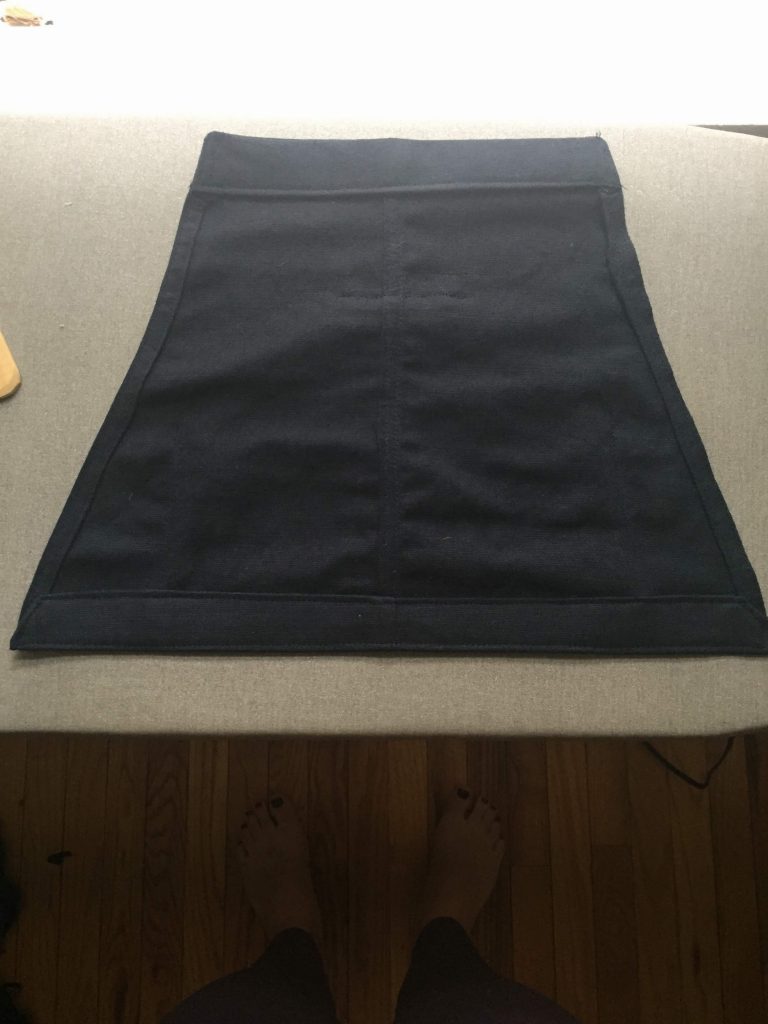
Press and edgestitch
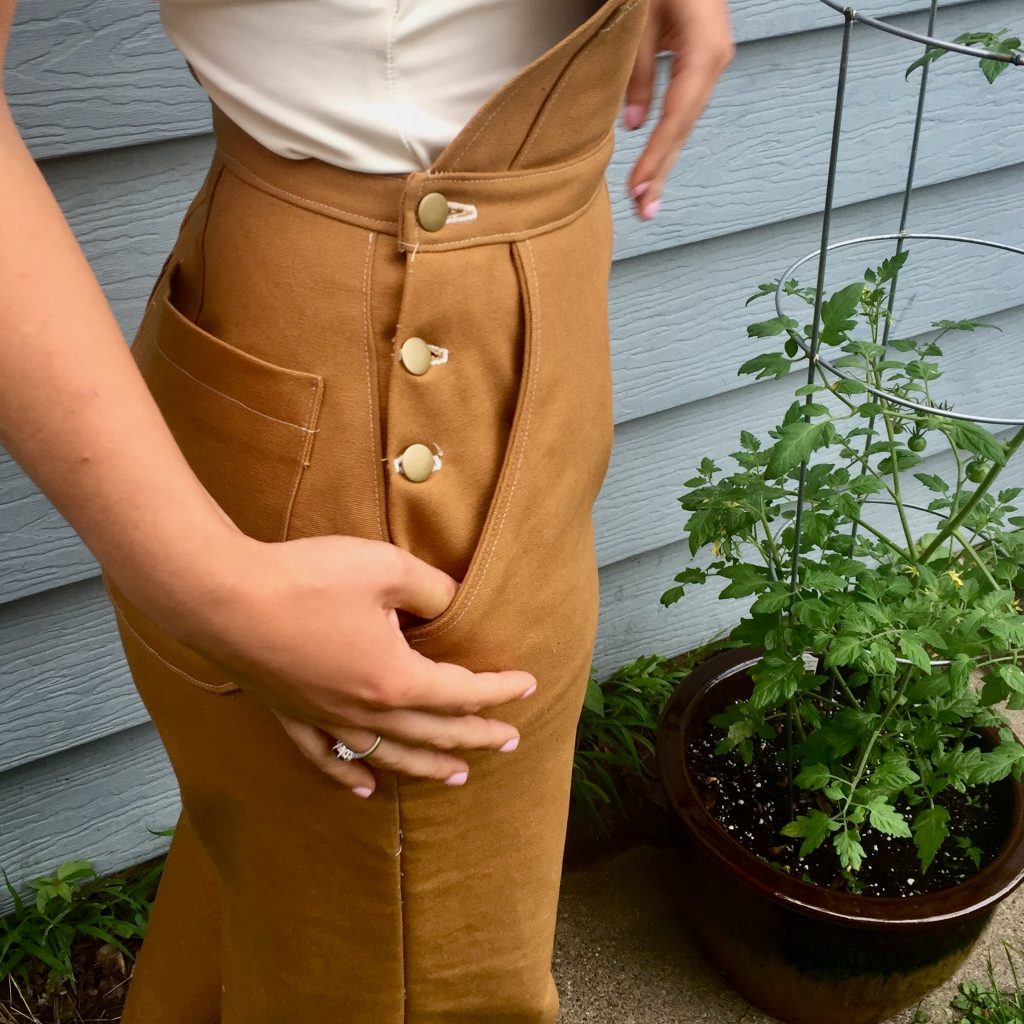
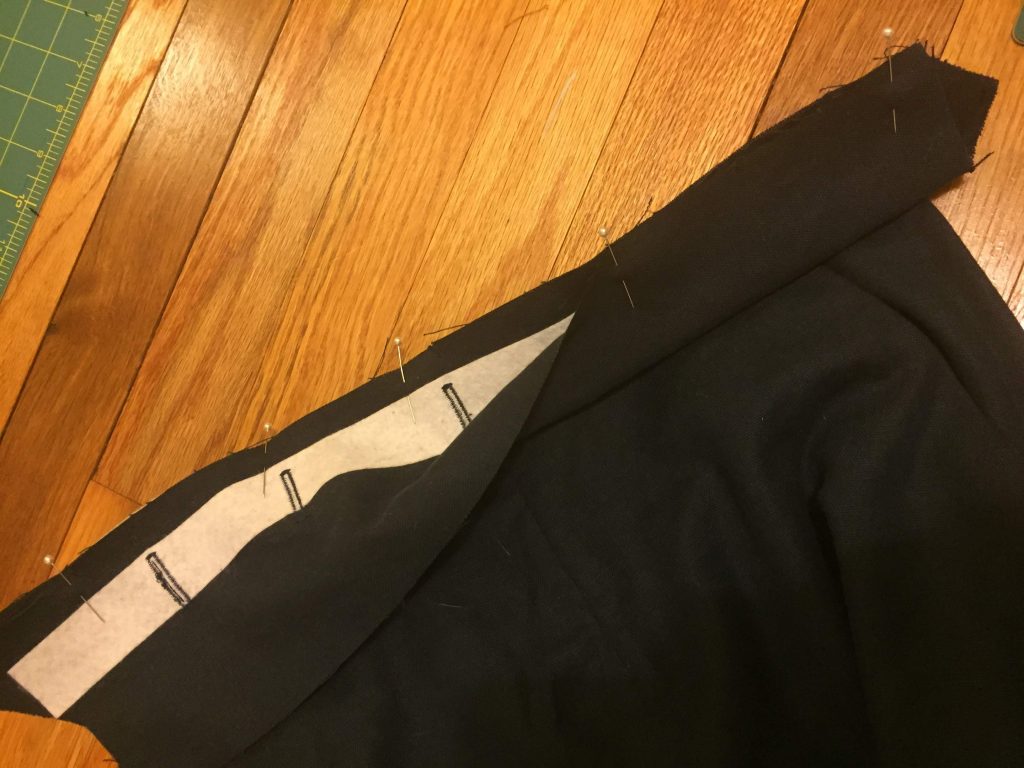
Cutting the new waistband facing piece
When you trace front waistband pieces (Qa, this is double zip version), one of those pieces will be cut as the pattern directs. For the other piece (facing), add a 2” strip to the long edge
Interface original part of the Qa piece. This is where the buttonholes will go. Mark where you want the buttonholes to be; I did 5 across the front. Sew the buttonholes and chisel or cut them open before you attach the facing to the trousers.
Modified and interfaced Qa pattern piece 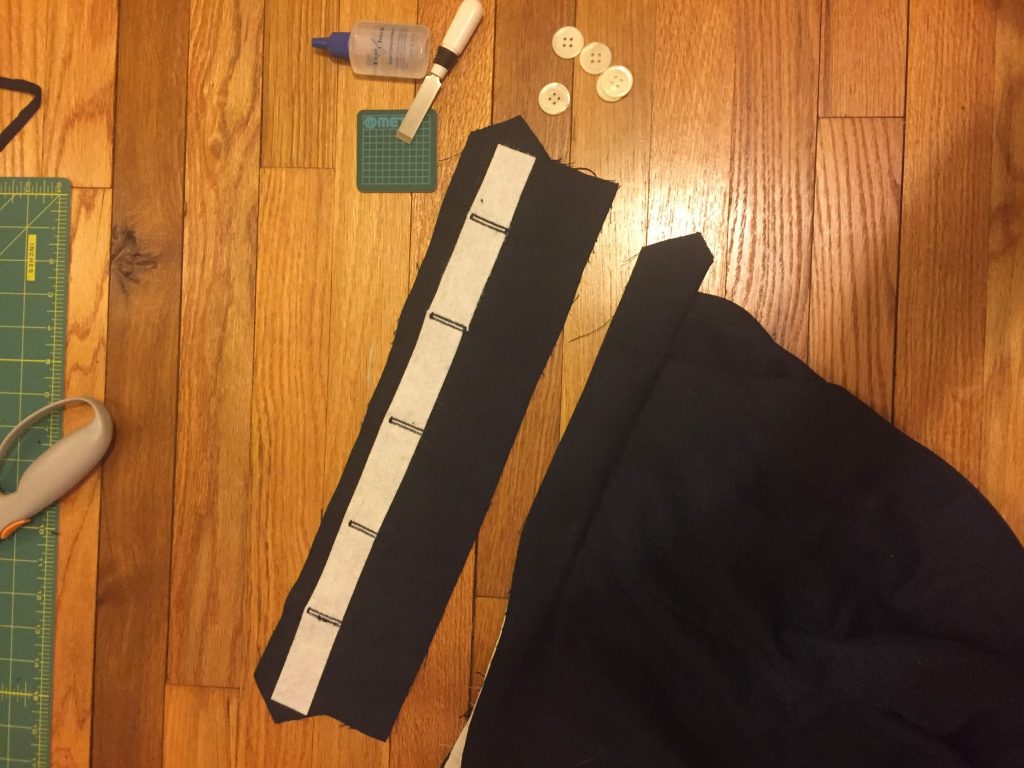
5 buttonholes installed and chiseled open
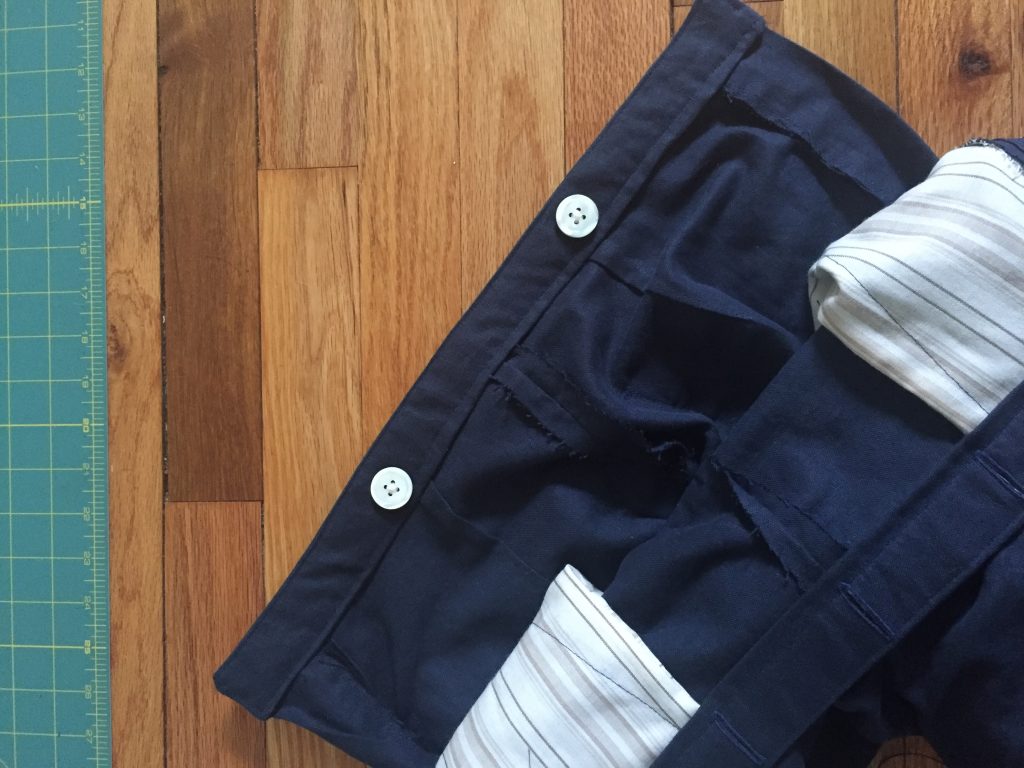
The Waistband
Sew the trousers up until the point where you have sewn the waistband (the part that faces the world) to the trousers, and you’ve pressed the waistband and seam allowance away from the pant.
Pin your facing piece to the waistband, right sides together, matching the pointed edges. The extra flap will be pointing down towards the pant. You can baste the top edge if you wish.
Fold the flap up to meet the top edge of the pinned or basted edge. Pin into place and press. This flap of fabric will ultimately act as a wall, protecting the buttons from the guts and seam allowances inside the waistband. Baste into place if you wish, otherwise, sew the waistband as directed in the pattern instructions. Turn out the waistband and topstitch around the edge and catch the facing.
Buttonhole facing pinned to waistband 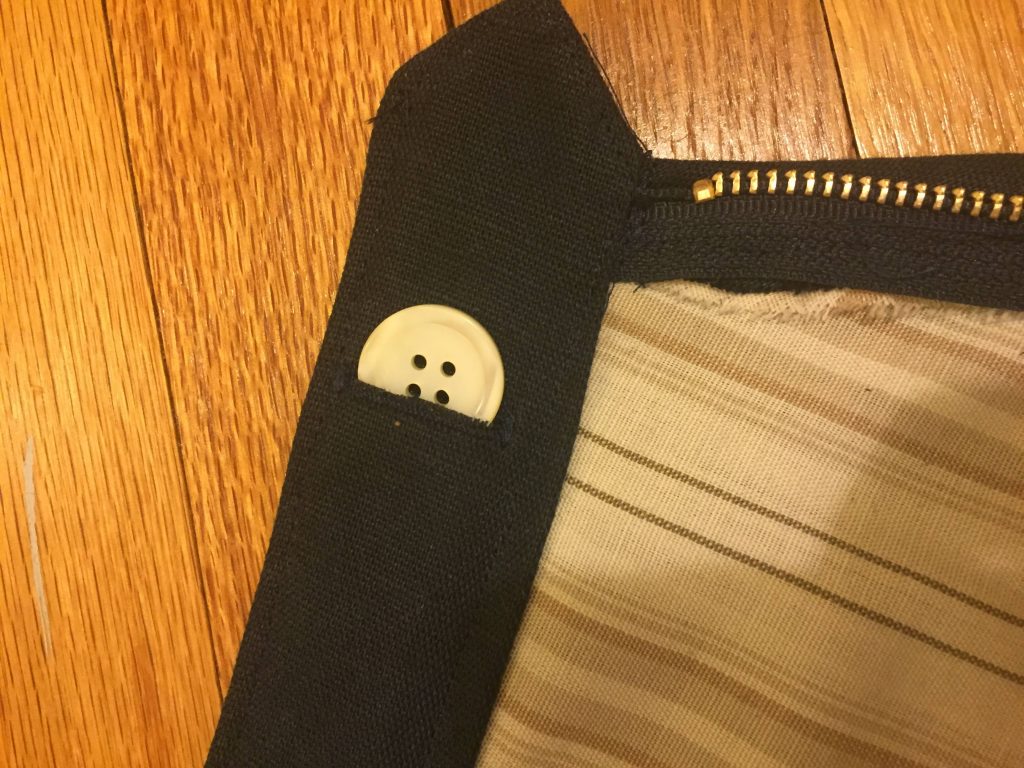
Wrong side of trousers 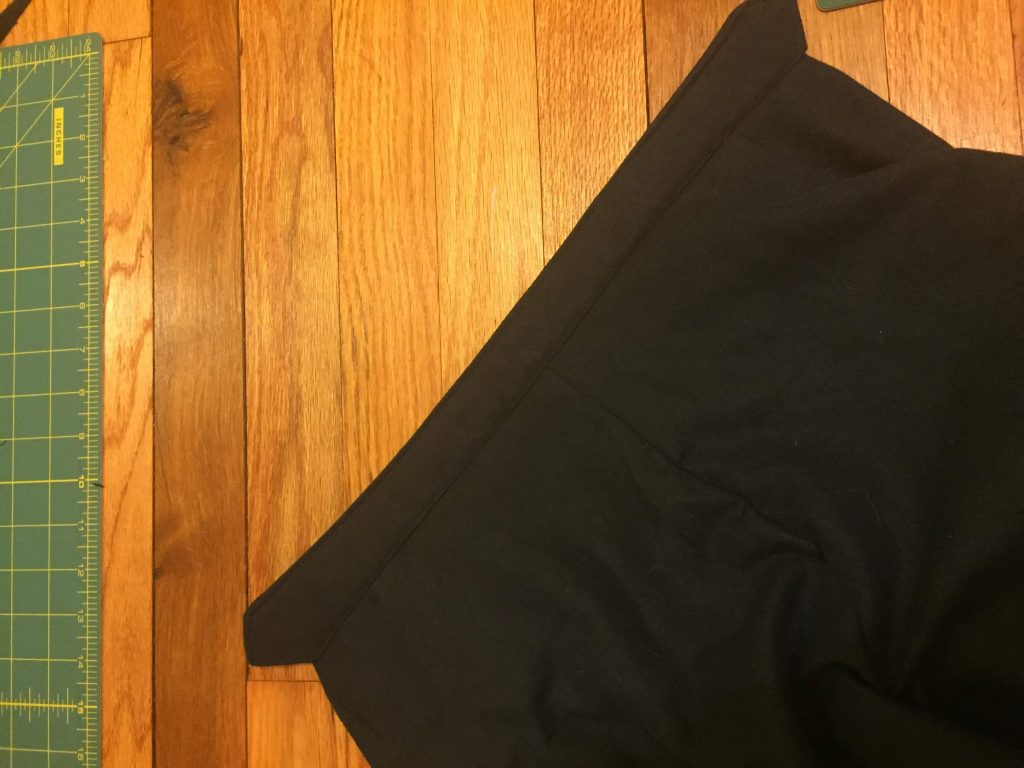
Right side with waistband and facing complete
The straps
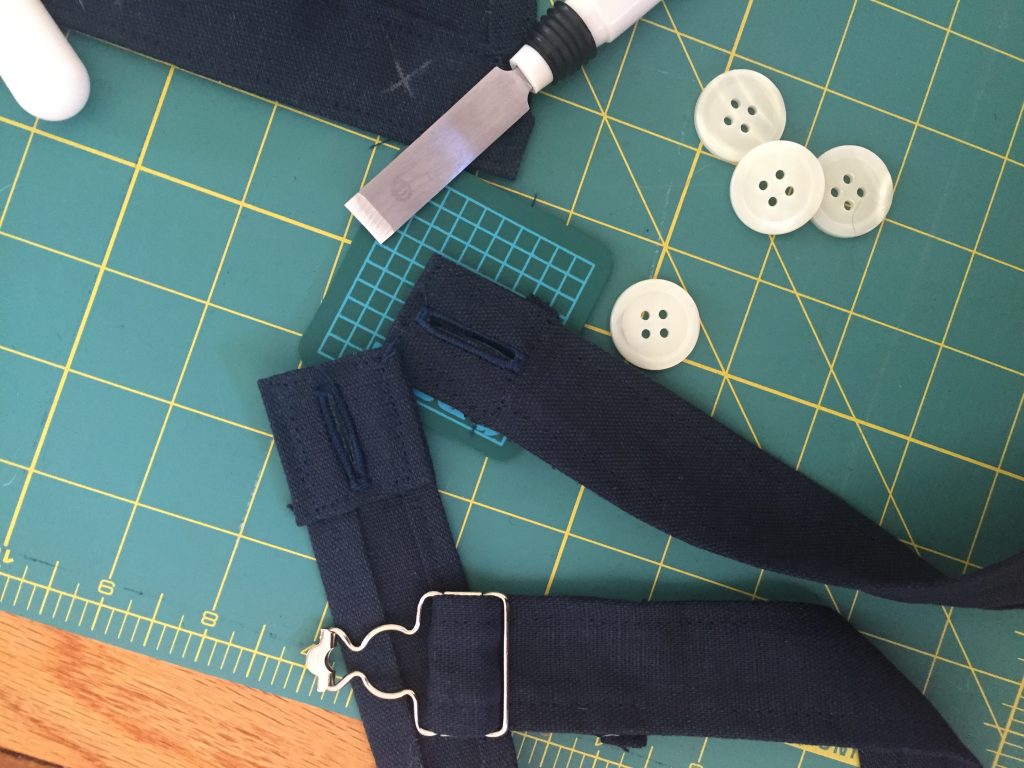
Finish the ends opposite the buckles of your straps and sew a buttonhole at the end of each strap. I put a 1”x1” square of interfacing here too. I found the strap pattern pieces had enough length already so I didn’t add any extra.
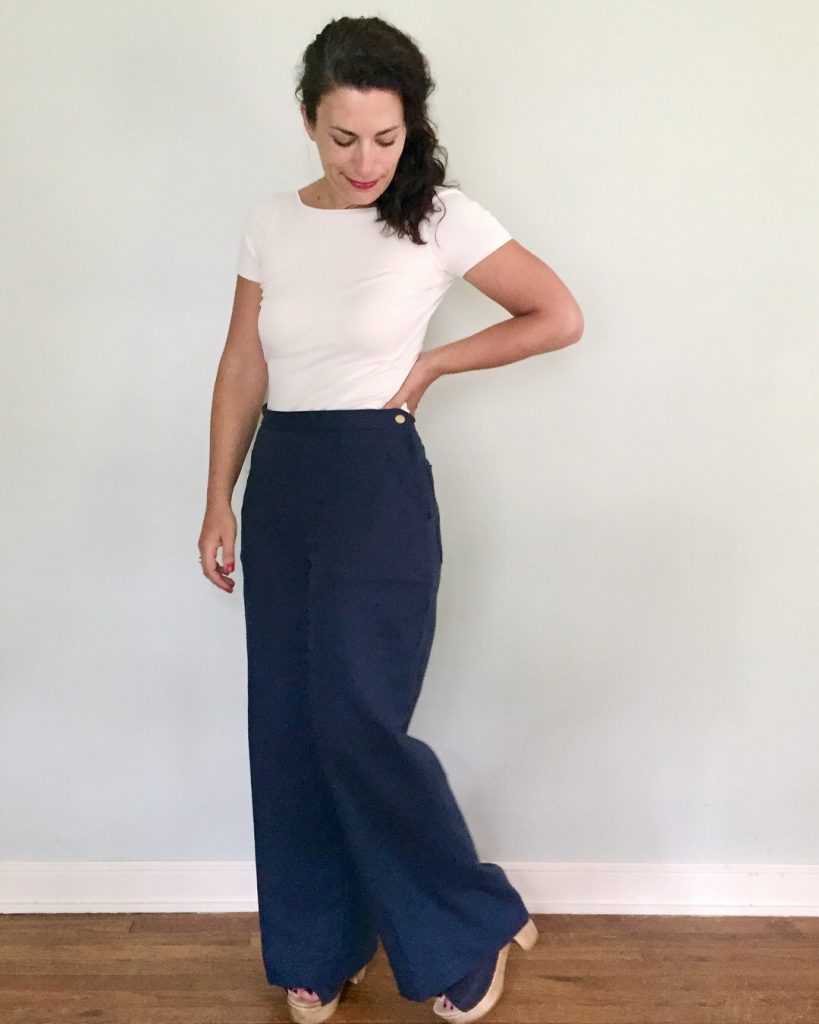
Now, you might be saying, “hey, lazy…you did all that work to keep the buttons inside the waistband, why the heck did you not do it to the back strap buttons too?” You have a valid point, and maybe I am lazy, but I don’t care. I picked my battles on this, and I honestly don’t care that the buttons touch my back. I don’t notice them, and my concern about the front was when I am sitting. I’m not doing any backbends wearing these overalls. If you want to go the same route on those back buttons, more power to you!
The Buttons

Line up your bib and mark where your buttons will go. Sew the buttons to the right side your bib, and also at the back waistband where the straps will go. I like wide, flat buttons for this.

If you want to see a little extra detail in video, check out my permanent highlights on Instagram. Just go to my profile and look for the “Jenny Hack” bubble under my name. It was the first time I talked to the camera on IG, aw!
This is such a rad party trick. Spill your drink? No problem, just whip that bib off and watch your friends go “whaaa?” Need to nurse your baby? Hey, do your thing! Going back for seconds from the supermarket free sample and don’t want to be recognized? Yeah that probably won’t work, sorry.
Big thanks to the Closet Case Pattern team for such an awesome pattern. Please let me know if you give this one a try too!
This is brilliant and I am sooooo excited to try it on my current pair of Jenny’s!
Brittani, yours are SO good. I love them!!!
“Thanks for every other informative site. Where else could I
am getting that kind of info written in such an ideal method?
I have a mission that I am just now operating on, and I’ve been on the glance out for
such information.”