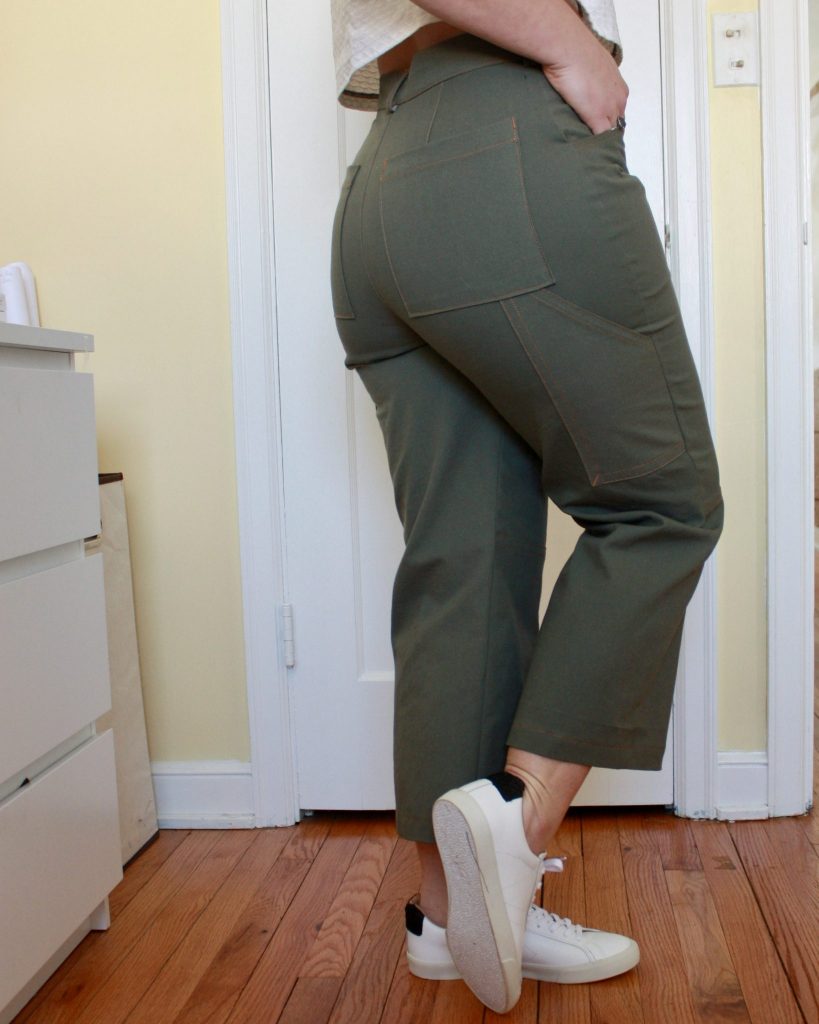
90’s revival continues! Carpenter pants are back. If you want to give your pants a re-vamp with some sweet cargo pockets and a hammer loop, read on! I’ve drafted some pattern pieces that you can download too. This handy DIY carpenter pants add-on is a quick and easy way to help your “normal” pants hold all the things.
The Inspo
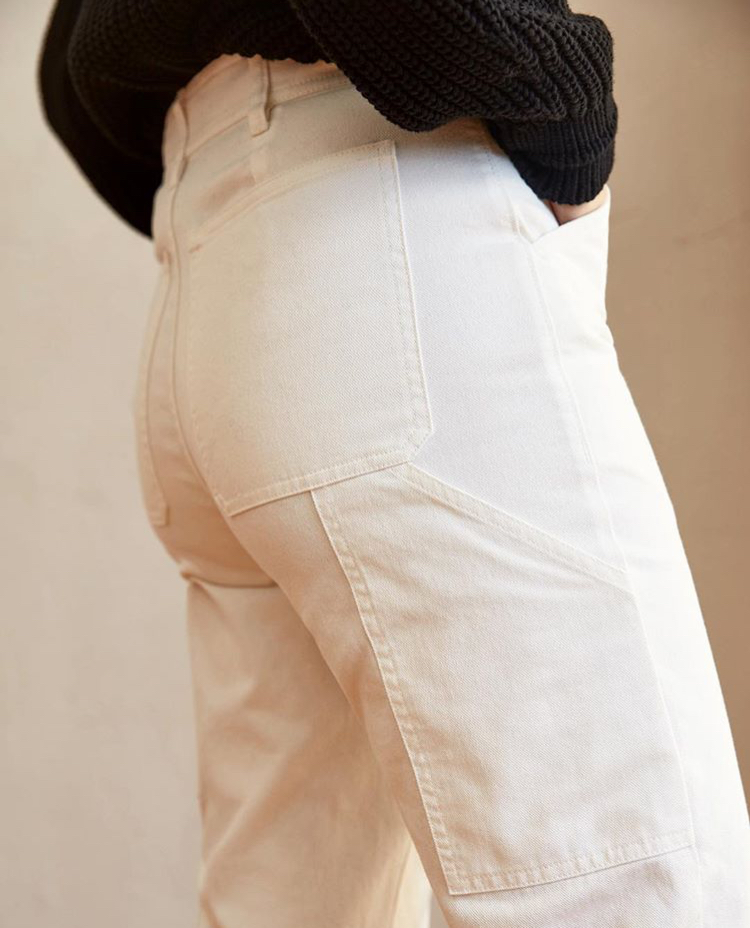
There is a freaky superpower feeling that comes from seeing something in ready-to-wear and saying, “Yeah I can make that.” I love Everlane, and I love their transparency in ethical fashion. If I were to buy RTW, I’d start there. However, their size chart doesn’t match my waist-hip ratio. I found their carpenter pants on Instagram and I knew I could hack it. I wanted all the pockets, but I wanted a good fit too.
The Details
- Inspired by the Everlane Carpenter Pants
- Pattern is the Lander Pants by True Bias
- Zipper Expansion, also by True Bias
- Size 6 waist, 14 hip, 12 leg (I’m 29waist/44hip”)
- Modifications for my shape: full seat adjustment, low seat adjustment, round pubis adjustment, slash and spread over the top of the thigh
- Fabric is a mid-weight cotton canvas from SR Harris (my local outlet)
- Add-Ons: left leg square cargo pocket, right leg slant pocket, hammer loop
- Additional modification: internal pockets instead of the Lander’s patch pockets, and a flat fell seam above the knee
Cargo Pockets
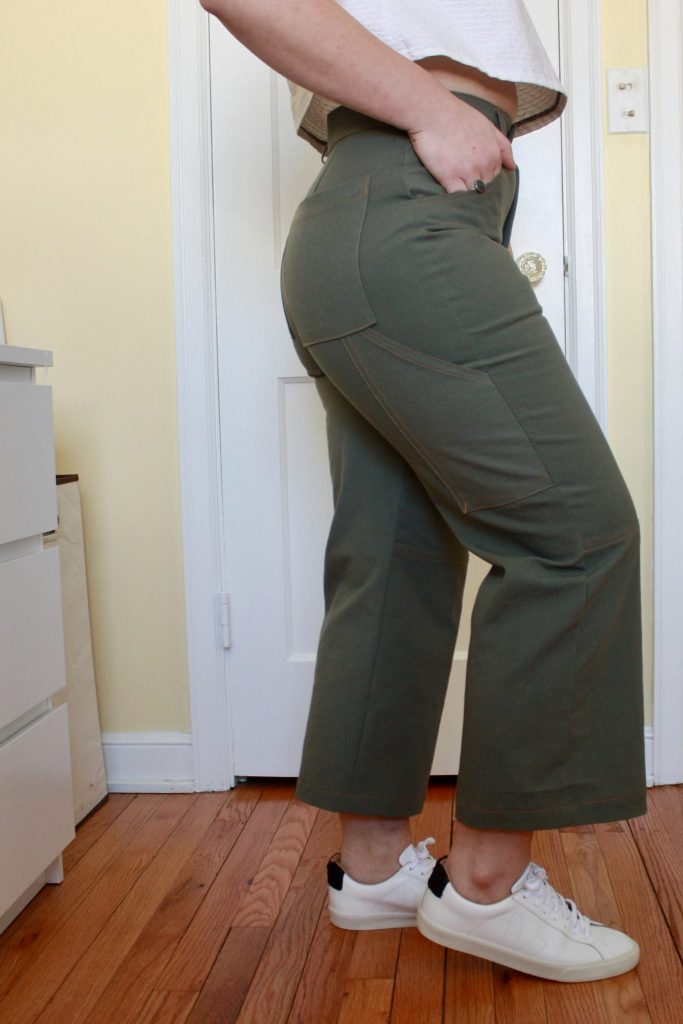
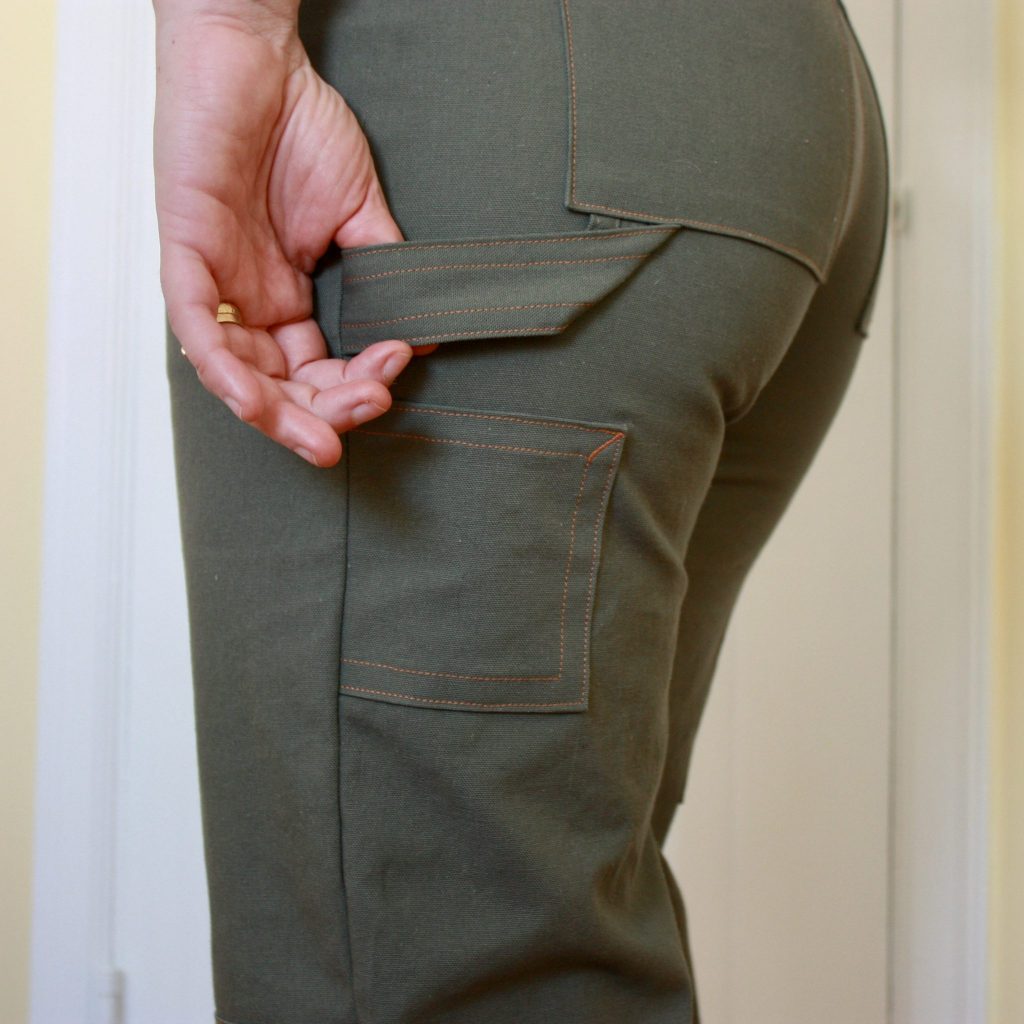
Cargo pockets have a stigma around them, and we’ve all seen some bad ones. The ones I made, however, are a shameless copy from the Everlane pockets. I’ve got two shapes, a smaller square pocket for the left leg and a larger slant pocket on the right. I’ve been wearing these pants and the real benefit of the slant pocket: MY PHONE LIVES THERE. Not in the front or back pocket where it’s uncomfortable when sitting! No bulging, and no bending over to reach for it either. Perfection!
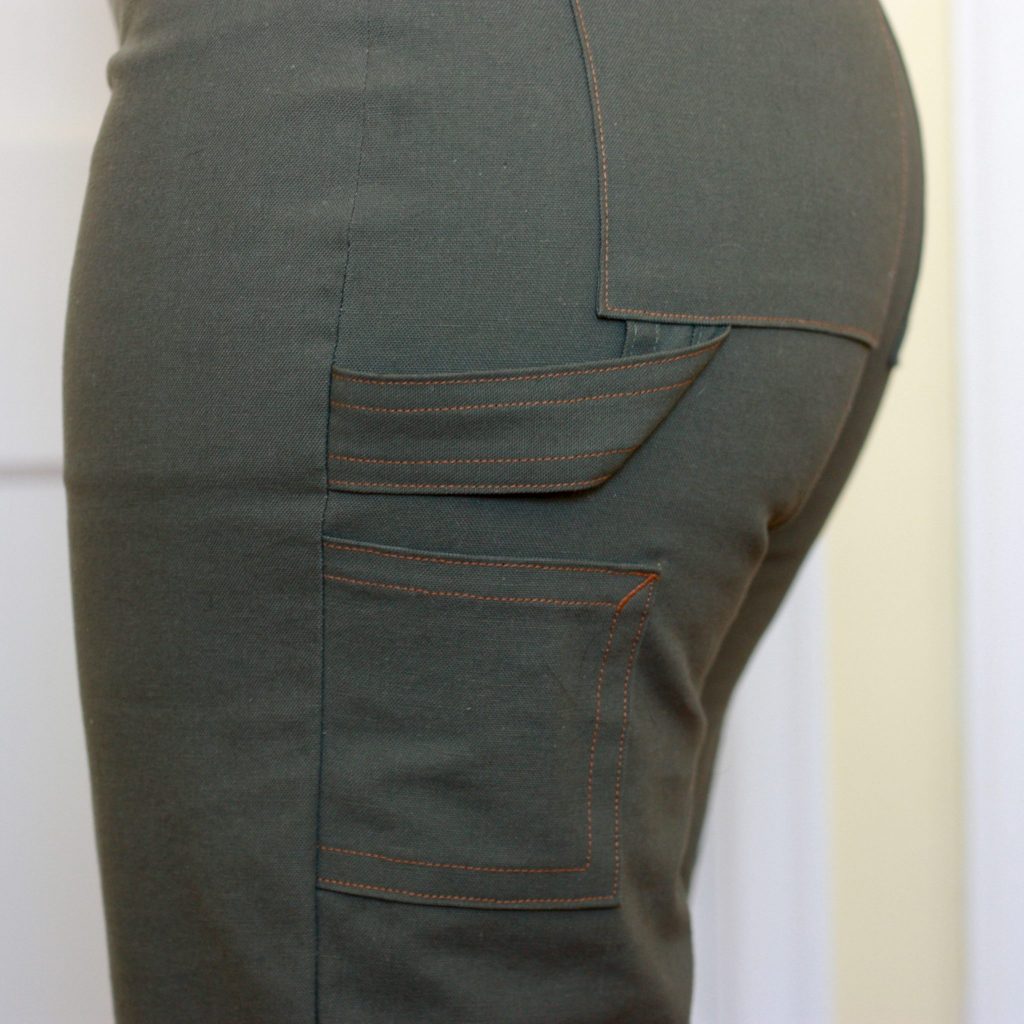
Square Cargo Pocket 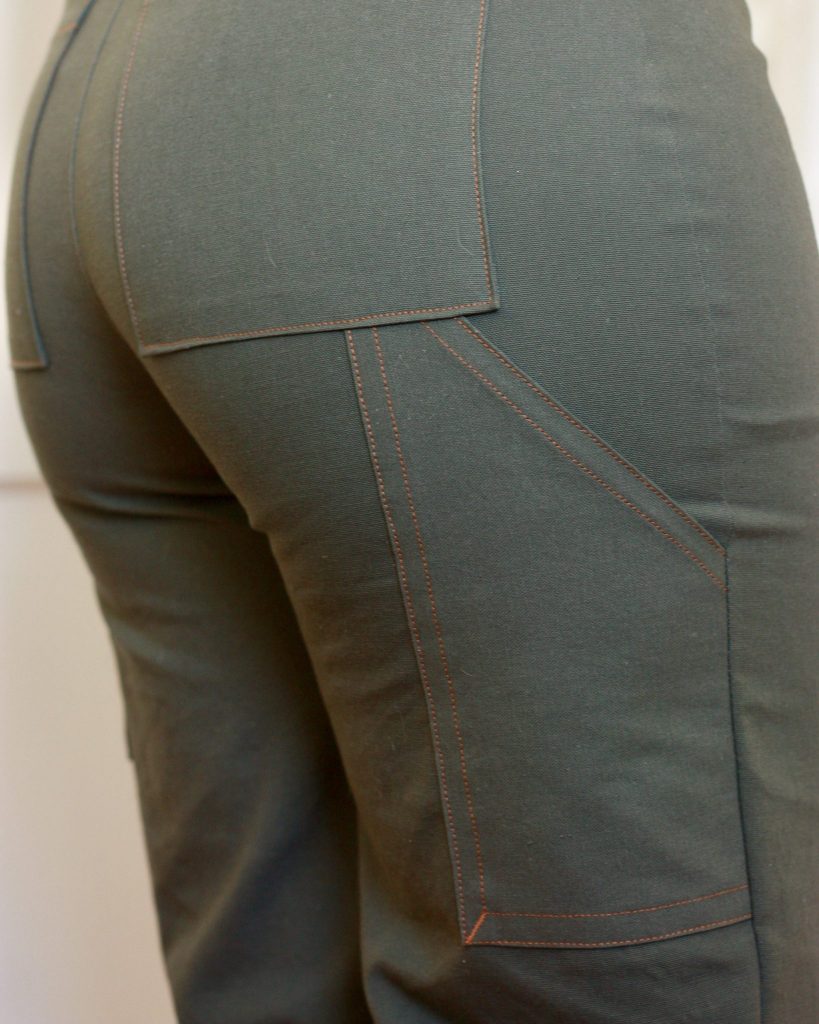
Slant Cargo Pocket
Hmm, I’ve never imagined how my butt would look mirrored to my butt, but now I don’t have to. Interesting.
If You’re Ready to Give This a Go…
Read through the entire post before cutting your fabric! There are three key elements that will affect your pattern pieces:
- 1) The internal pockets
- 2) The added seam below the knee
- 3) The cargo pocket and hammer loop add-on
Internal Pockets
1. “Corner thang” 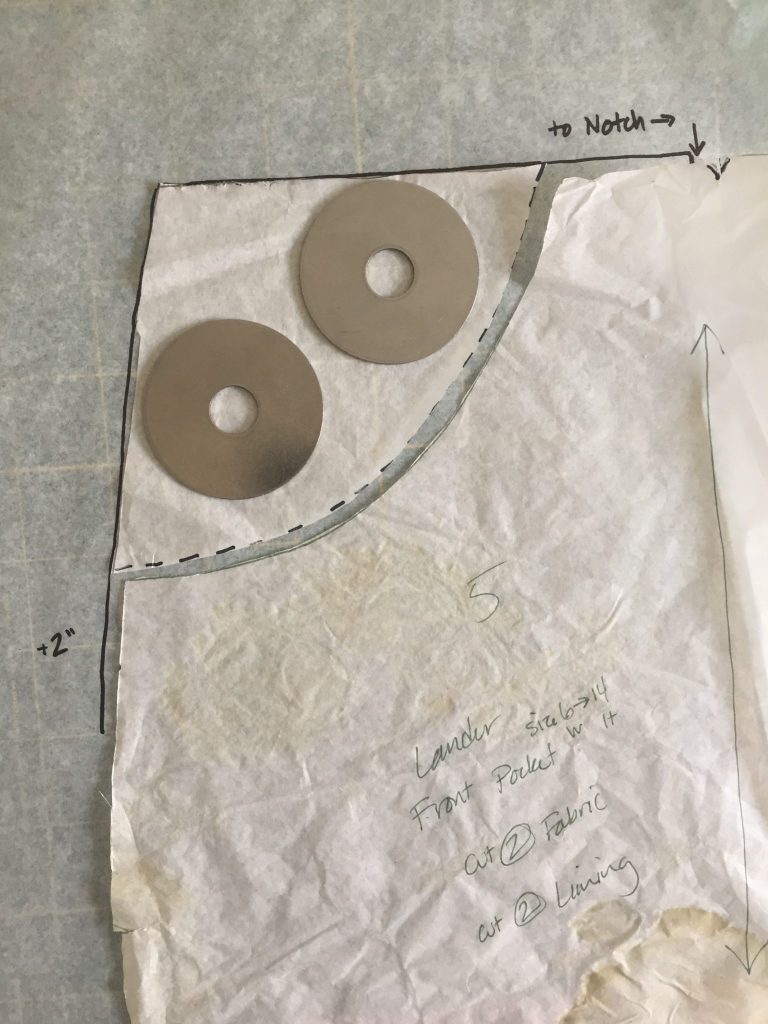
2. Extend edges of corner thang 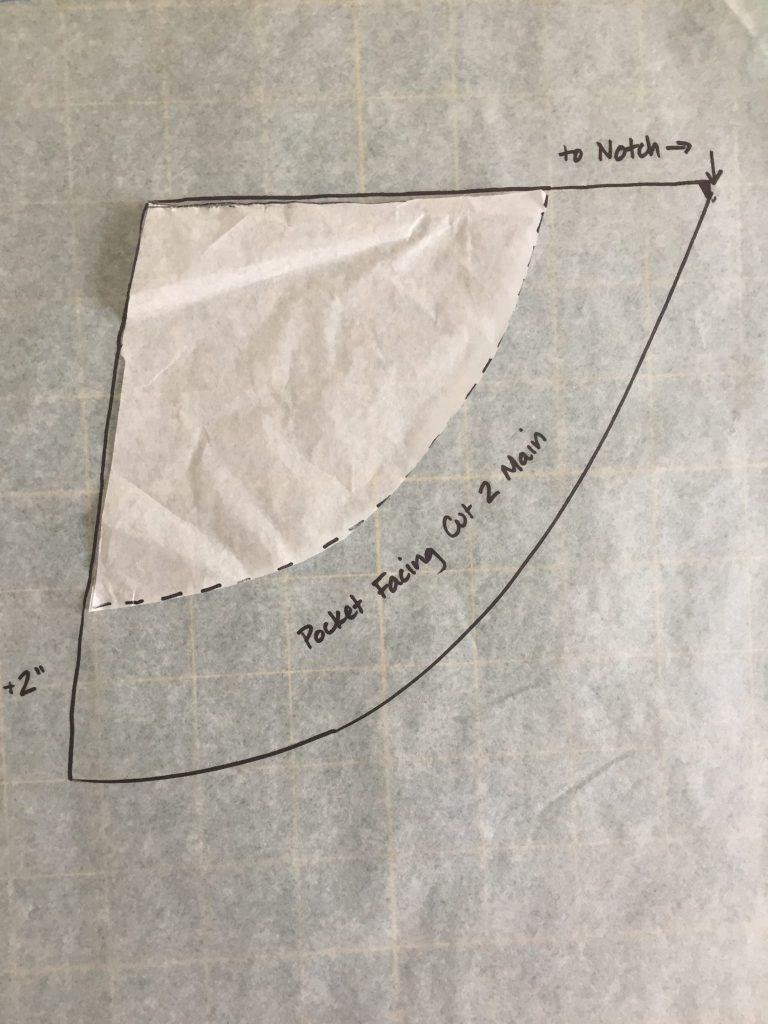
3. New pocket facing piece 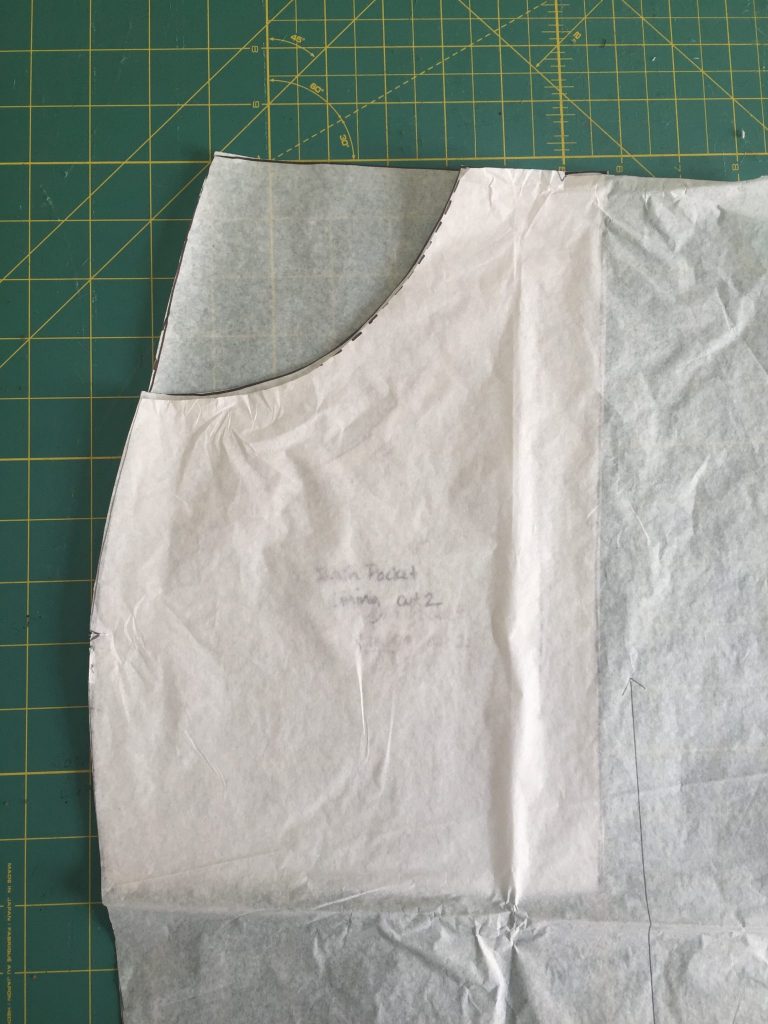
4. Make sure everything lines up 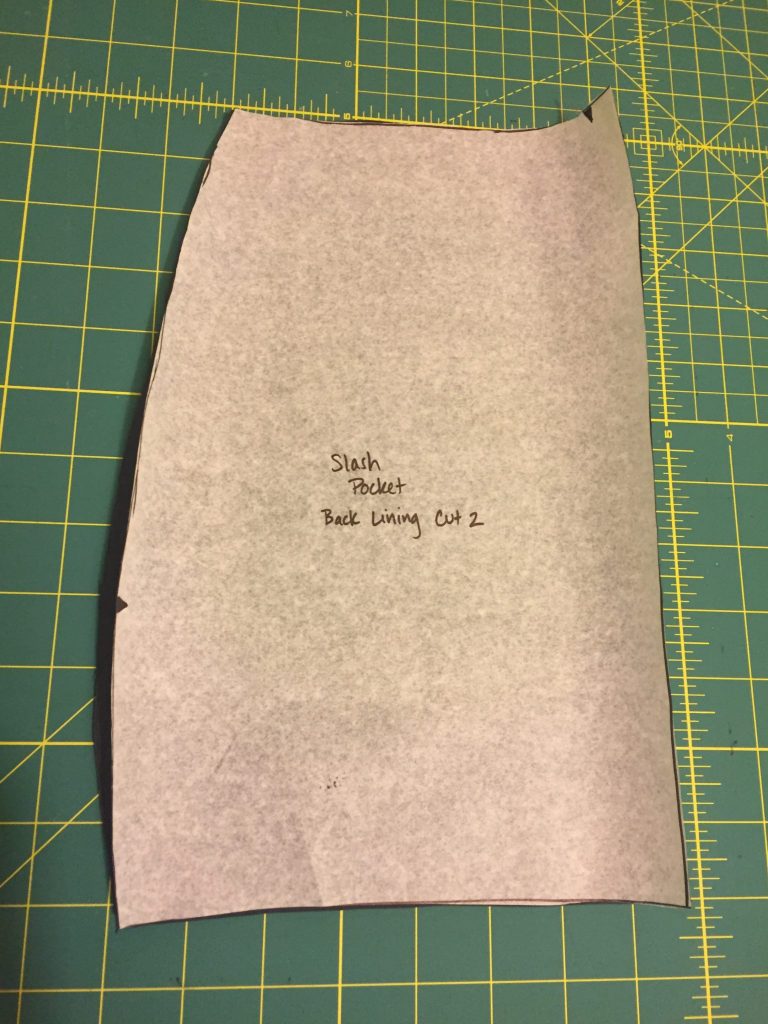
5. Pocket lining piece 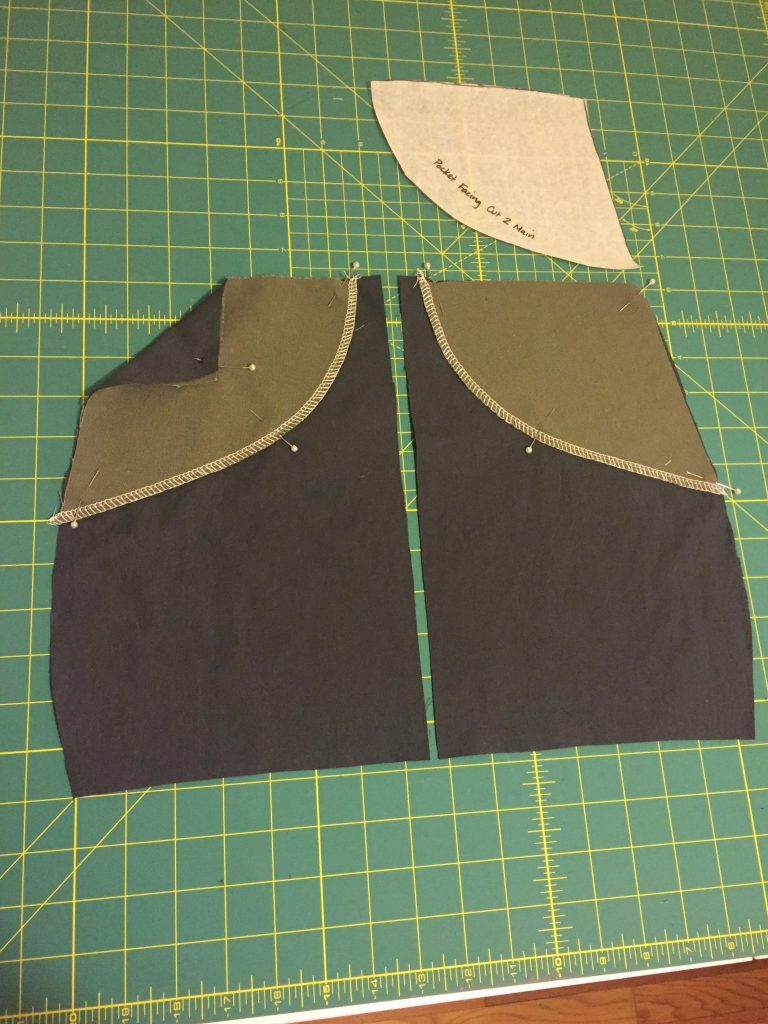
6. Green main fabric + navy lining
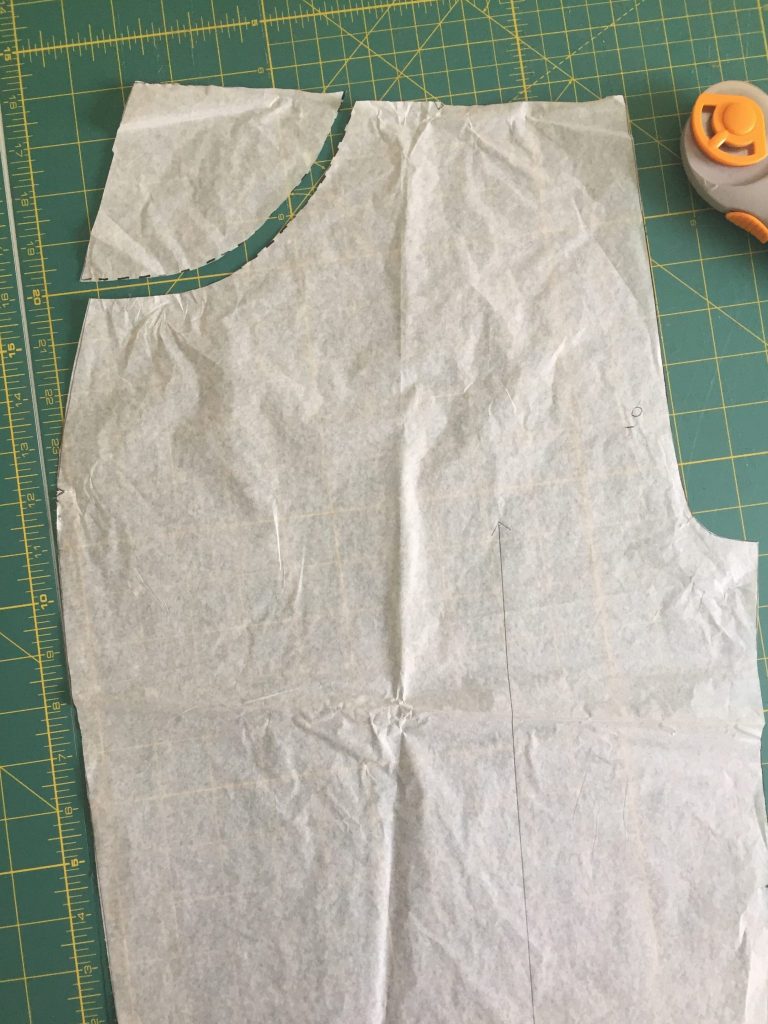
- 1. Put the original Lander front pocket piece over the front pant pattern piece, matching notches. That corner triangle with the curved edges will be the starting point for the pocket facing. Trace and cut that off. Let’s call that piece “corner-thang”. The front pant with the corner thang chopped off is your updated pattern piece now.
- 2. Put the corner thang on a fresh piece of tracing paper, and line up your original patch pocket piece next to it. Mark the notch from the pattern onto the tracing paper, as well as a mark 2″ down from the edge of your corner thang.
- 3. Connect those two points with a curve, making a larger version of your corner thang. This is your pocket facing pattern piece. The extra size will ensure you wont get any pocket bag fabric peeking out.
- 4. Lay the pocket facing piece on the bottom, then your original patch pocket piece in the middle, and the front pant piece on top. Match notches and make sure everything lines up nicely.
- 5. Trace your pocket lining piece. This shape comes from placing your patch pocket over the original front pant piece and tracing along the waist, hip, and lower corner of the pocket.
- 6. Cut your pocket facing out from your main fabric (cut 2), cut your original Lander pocket out of your lining (cut 2), and cut your larger pocket bag piece from step 5 out of your lining fabric (cut 2). Finish the curved edge of your pocket facing (main) in your preferred method (I serged in white thread in the photo above). Pin the pocket facing (main) to the pocket lining piece from step 5 together, wrong sides touching. The original patch pocket piece is not shown in this photo.
Sew Internal Pockets to Front Pants
7. Stitch pocket facing to large pocket lining piece 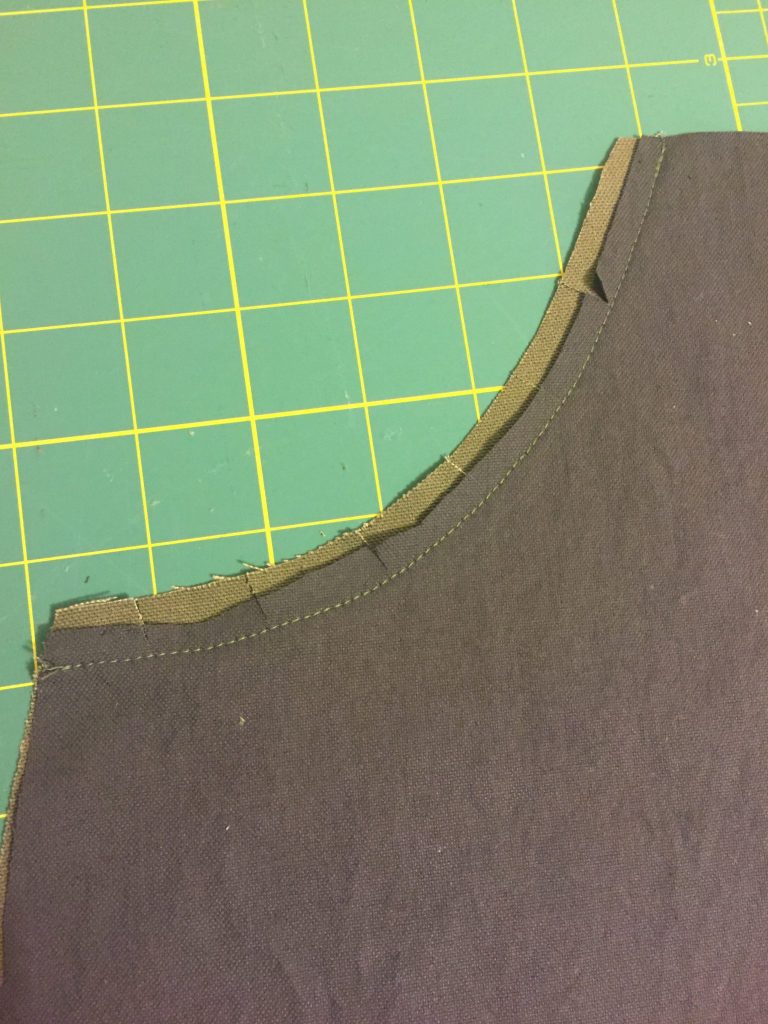
8. Stitch original patch pocket lining to front pant, right sides together. Grade and clip the seam. 
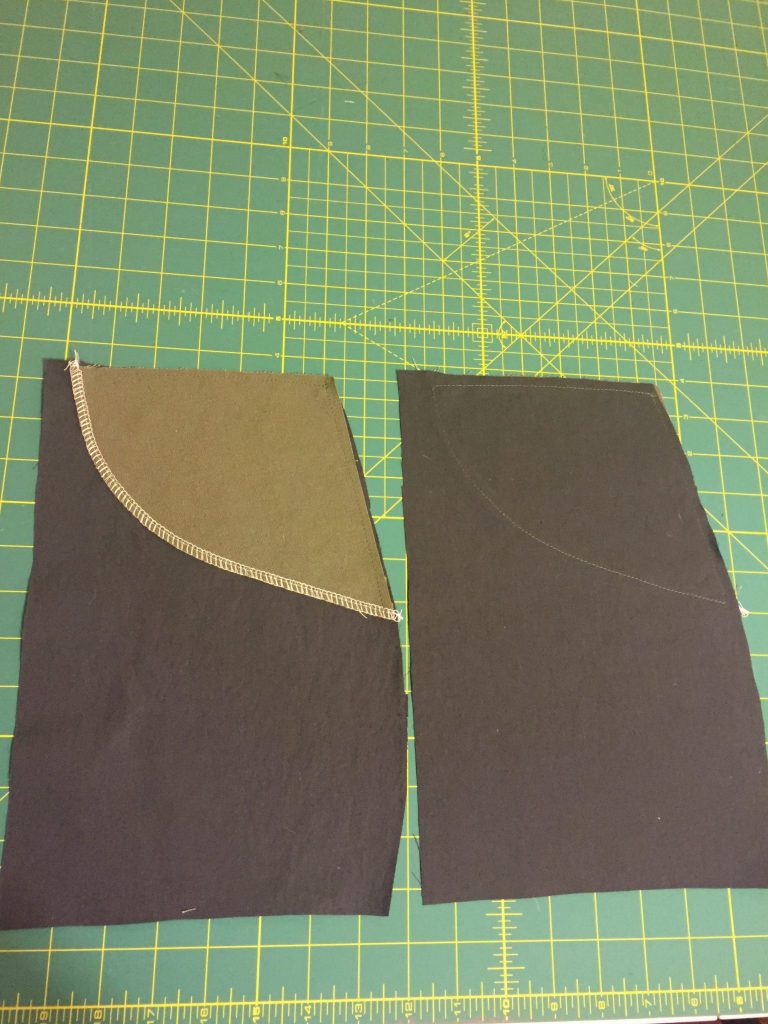
9. Flip the original pocket lining piece to the inside of the pant. Press and topstitch. 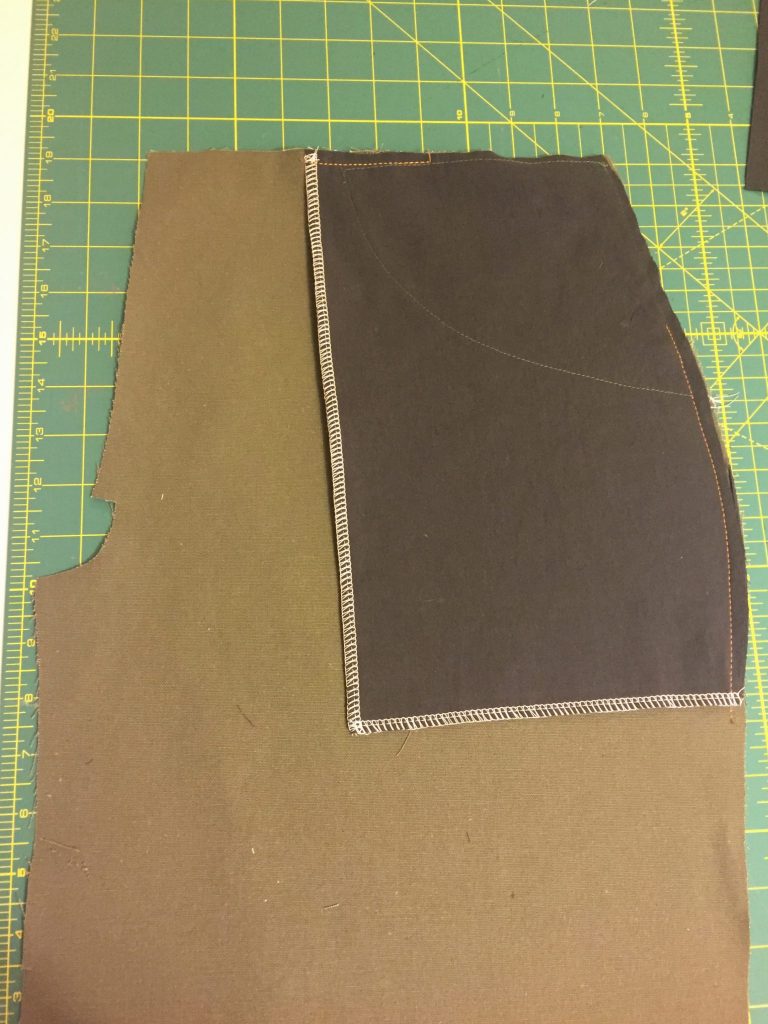
10. Shown: wrong side of front pant, right side of large pocket lining piece which has been serged to the other half of the pocket bag and basted along waist and side.
- 7. This photo above shows both sides of the pocket facing stitched to the large pocket lining piece.
- 8. Stitch the original patch pocket piece to the front pants piece along the curve, right sides together. Grade the seam by trimming the pocket lining piece and clip along the curve.
- 9. Flip the pocket lining to the inside of the pant and press well. Top stitch along the curve. If you don’t want visible top stitching, you could also under-stitch to keep the lining from peeking out of the pocket.
- 10. Flip your pants piece right side down, and align the large pocket lining piece on top of the patch pocket piece so that the L-shaped edges are lined up. Pin, stitch, and finish the seams. You can see above I’ve serged them together. Then baste along the waistband and side seam to keep the pocket in place.
Flat Fell Seam Below the Knee
Slashed front pant piece above the knee, added seam allowance 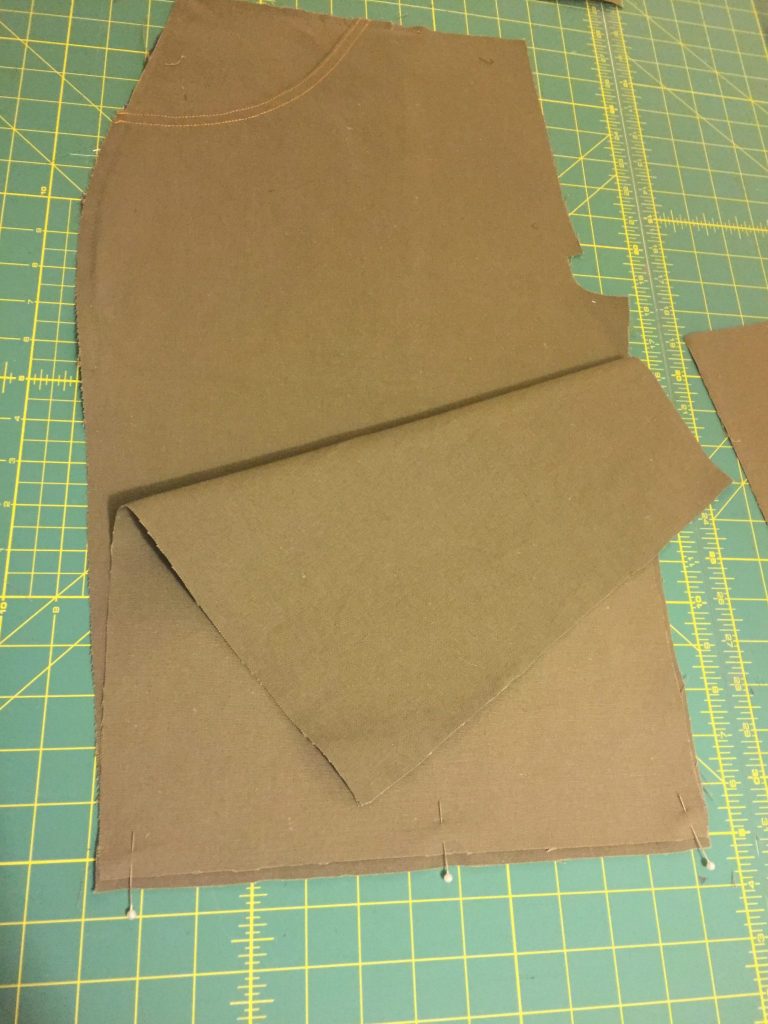
Pin and stitch right sides together 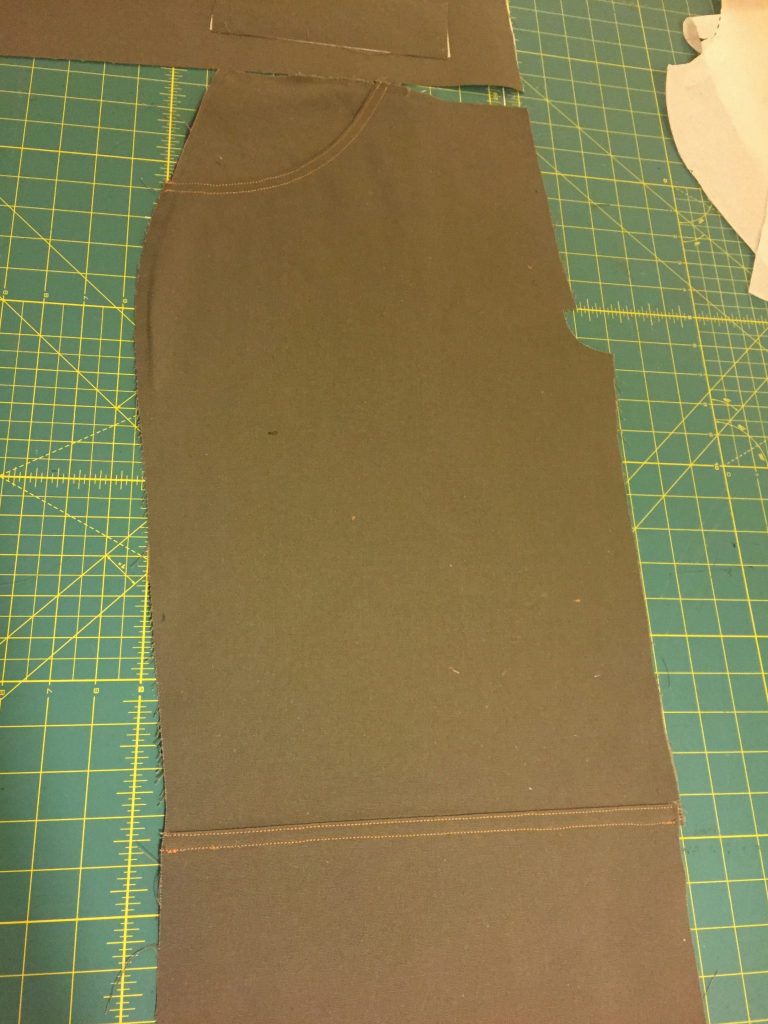
Trim, press flat fell, and two lines of top stitching.
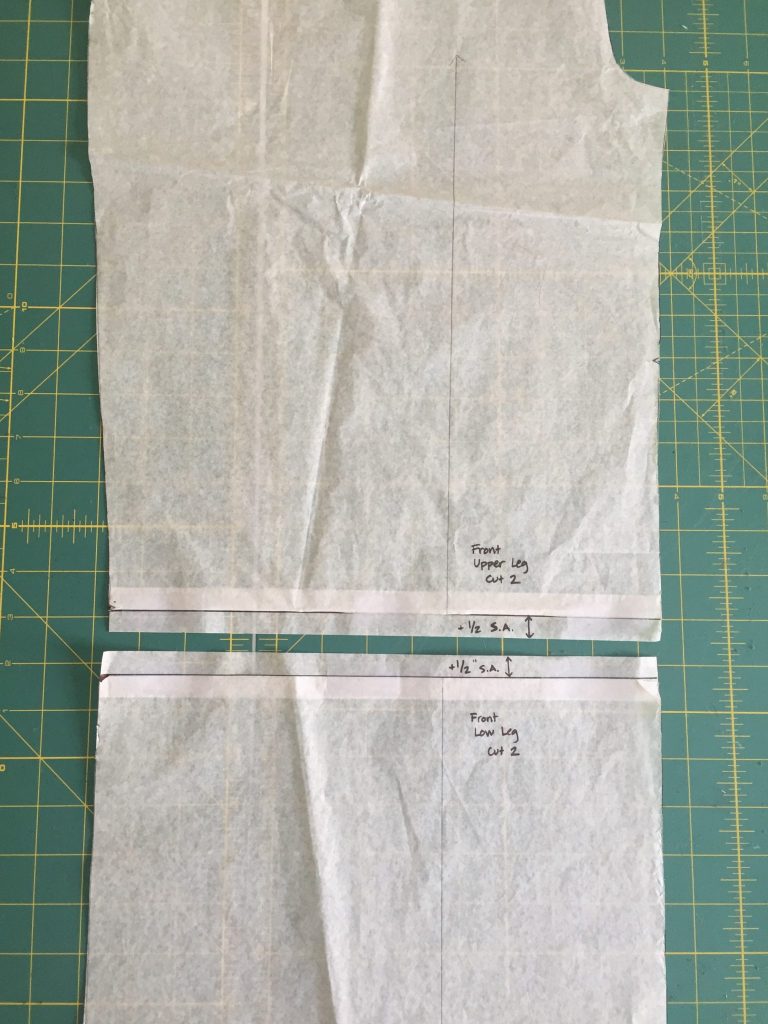
Adding a seam at the knee is fairly simple, but you need to prep your pattern piece before you cut. Decide where you want the seam to be along the leg. I put the seam only on the front of the pants. Slash your pattern piece and then add seam allowance on the upper and lower pieces.
Once your fabric is cut, sew the upper and lower pants pieces right sides together. For a flat fell seam, trim the seam allowance of the lower leg piece, press the seam allowances down toward the bottom of the leg, and fold under the raw edge again and press. Then carefully stitch two rows of top stitching on the front of the pants. Alternatively, you could to a faux flat fell seam by serging the seam allowances together, press them down and then top stitch.
Cargo Pockets and Hammer Loop Add-On
If you want to use the same pattern pieces I used for these pockets and hammer loop, you can download the PDF and print at home. Click on the image below, or this link:
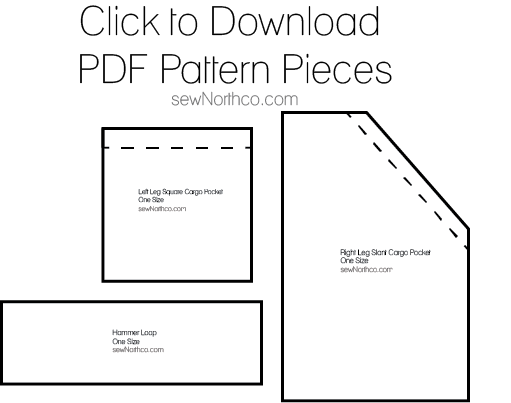
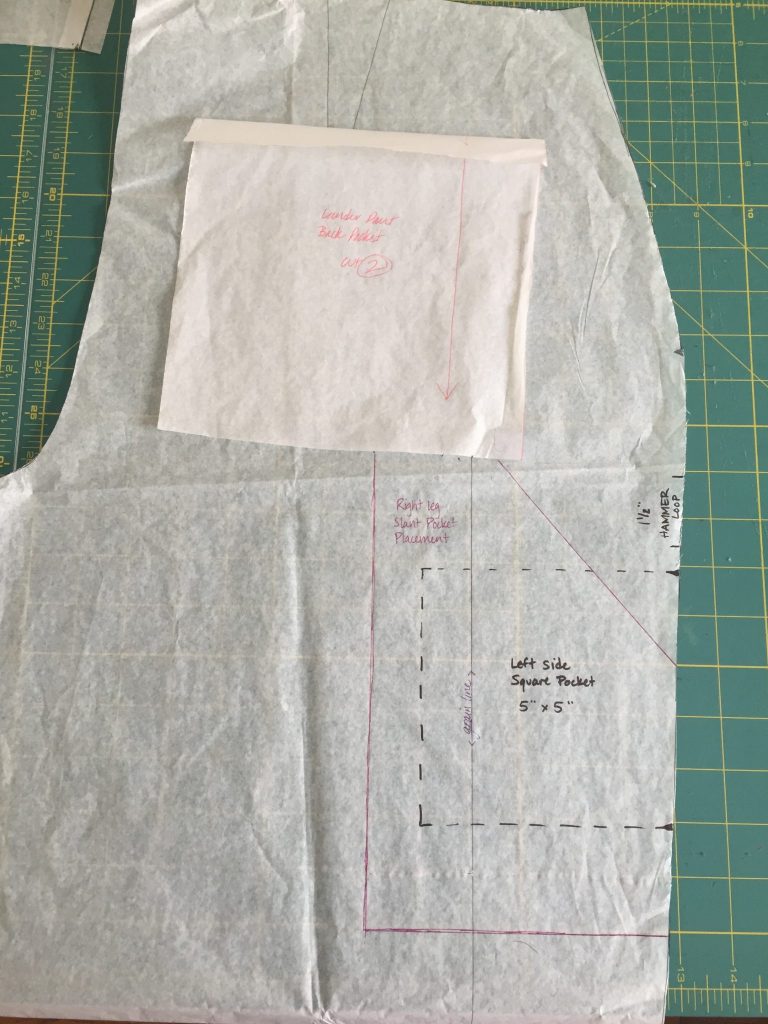
Lander Pattern with pocket placement 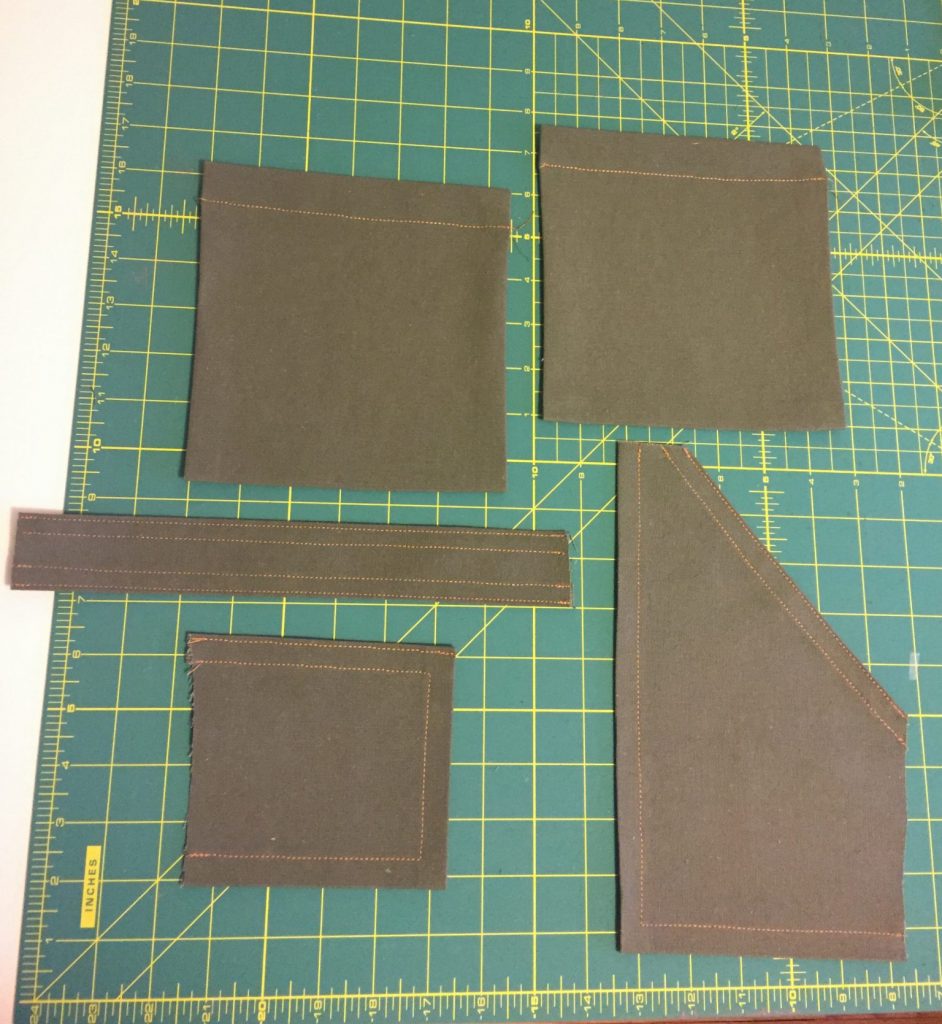
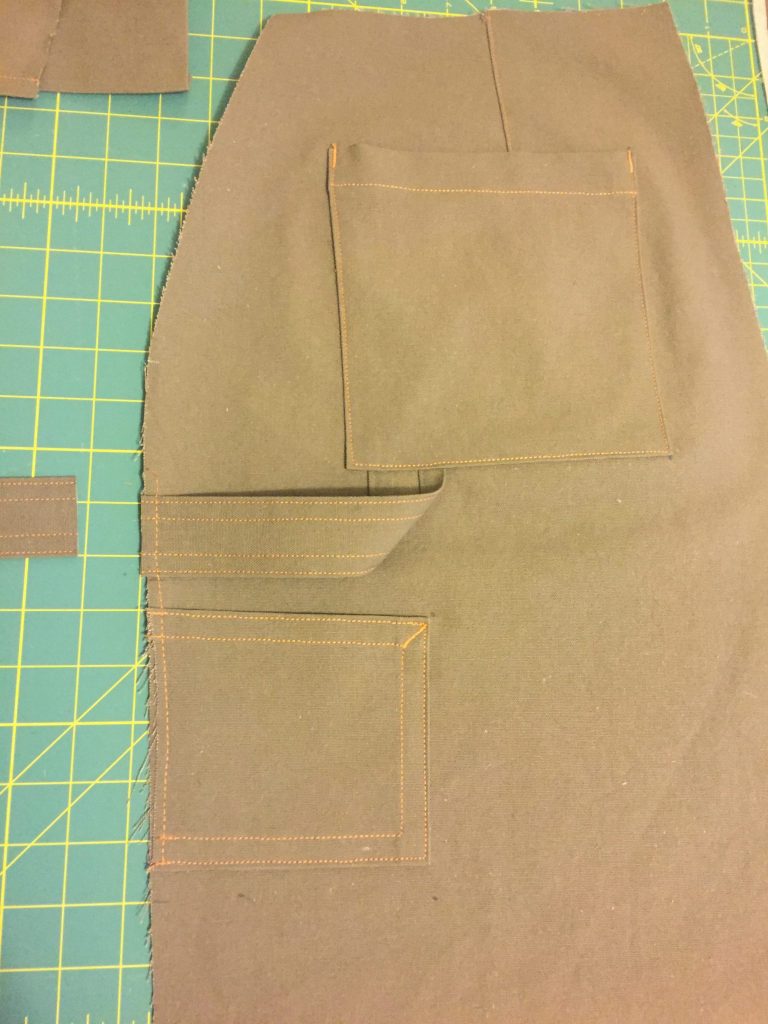
Back Lander pockets above self-drafted hammer loop and cargo pockets
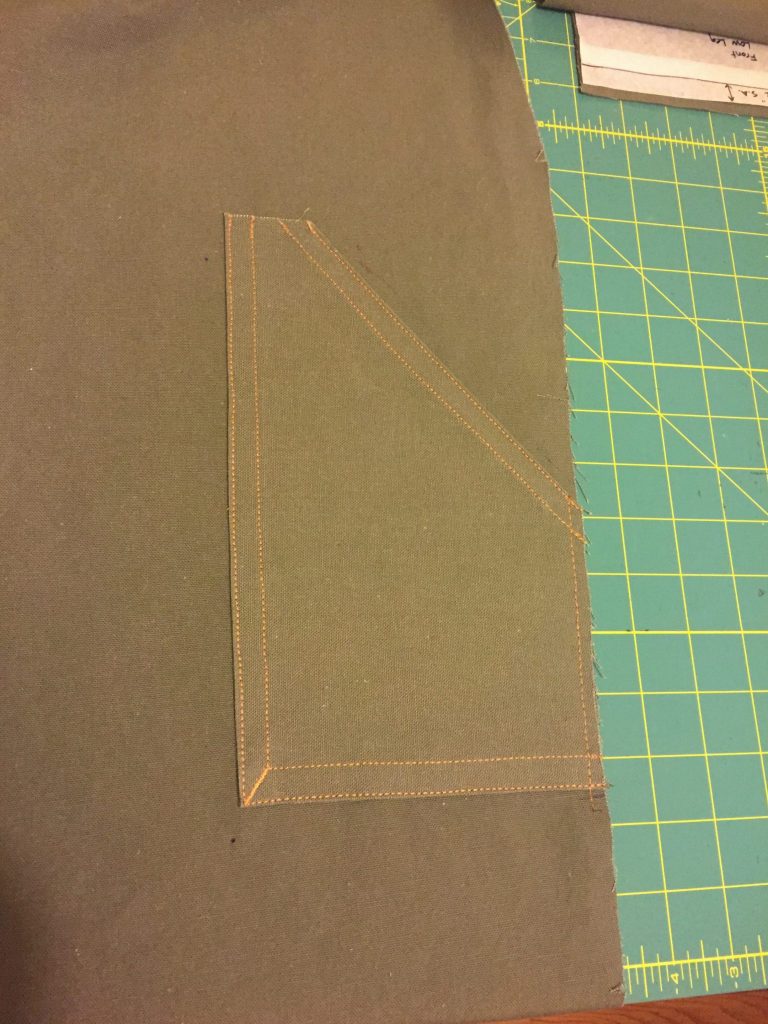
You can obviously use the Lander pattern (or the pants pattern of your choice) for the back pockets. I’ve included a free download above to my drafted pocket pieces. Cut one of each pattern piece from your main fabric. Press the raw edges under and top stitch as shown in the image above. Notice the double lines of top stitching only at the pocket opening. Do not stitch double lines of top stitching all the way around. You’ll top stitch around the edge of the pocket when you secure it to the pant leg. You can leave the side seam edges raw as those will be encased when you sew the front and back legs together. Also, you can leave the short top edge of the slant pocket raw because that will be sewn under the back pocket.
Mark on your pattern piece (back leg) where you want your pockets to be. You can see in the image above that I’ve marked the left leg square pocket in black dashed lines, and the right leg slant pocket in red pen. Use the placement of the Lander’s back pocket to ensure the top edge of the slant pocket will tuck underneath. You can also take the time now to mark where your hammer loop will be (above the square cargo pocket but below the back pocket on the left leg).
Pin and Sew Add-On Pieces into Place
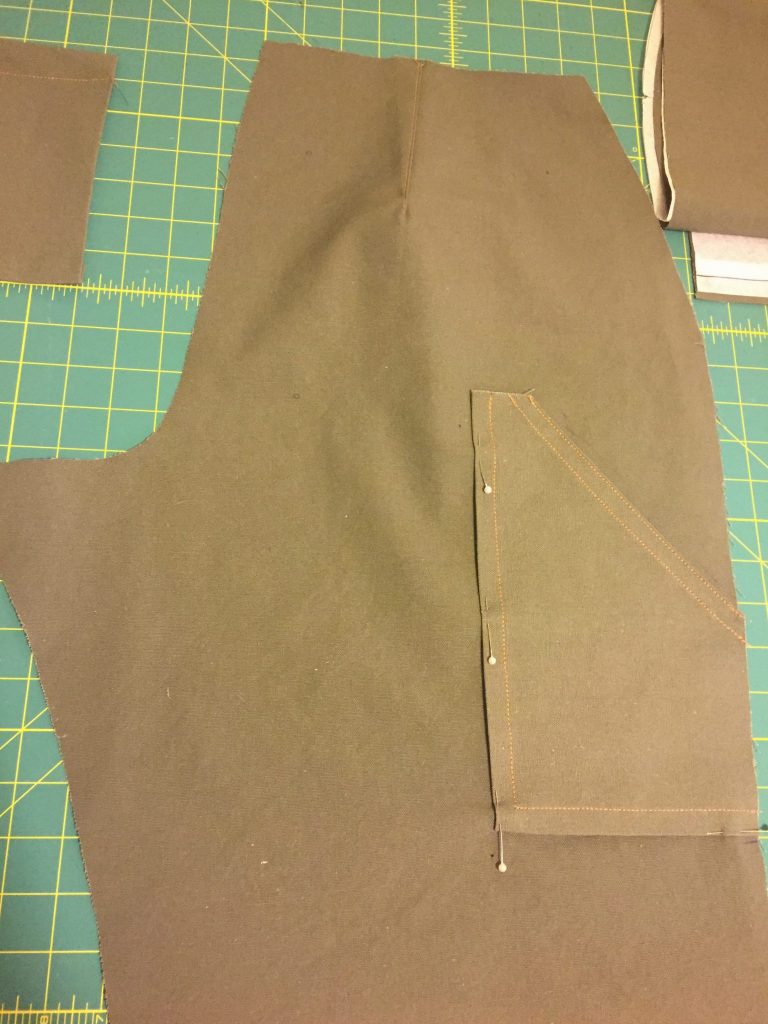
Back right leg with slant cargo pocket (back pocket not pinned yet). 
Back left leg with back pocket, hammer loop, and square cargo pocket pinned in place.
Pin the pockets in place. In the image above with the slant cargo pocket, the Lander back pocket hasn’t been pinned yet. You can attach the slant pocket first, but just ensure that the top edge will hide under the back pocket.
Slide the hammer loop under the bottom edge of the back pocket, right side of the hammer loop facing down. Fold the hammer loop back towards the side seam and pin facing up. You’ll have excess length you can trim later, but decide now how much slack you want in your loop. Pin the pockets in place.
Top stitch your pockets in place. I included bar tacks in some of the cargo pocket corners as a decorative tough. Baste the pockets down at the side seams, within the seam allowance. Trim the excess hammer loop. Not pictured, but stitch the right back pocket into place above the slant cargo pocket.
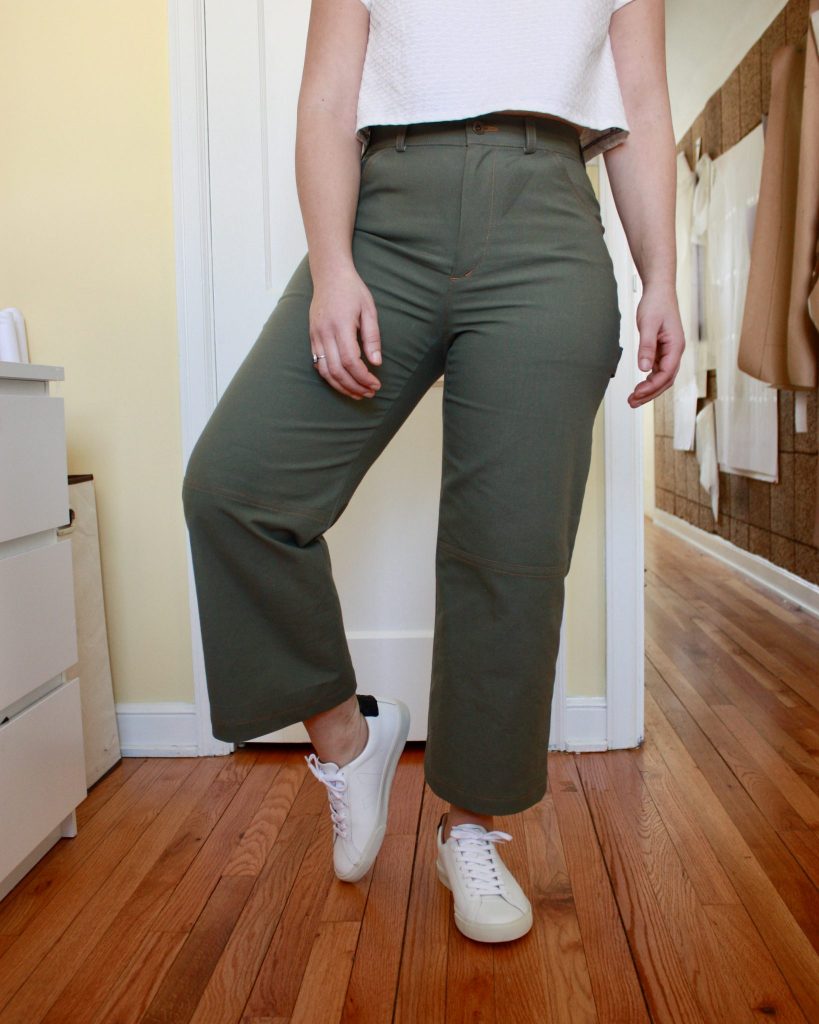
Finish Sewing As Directed
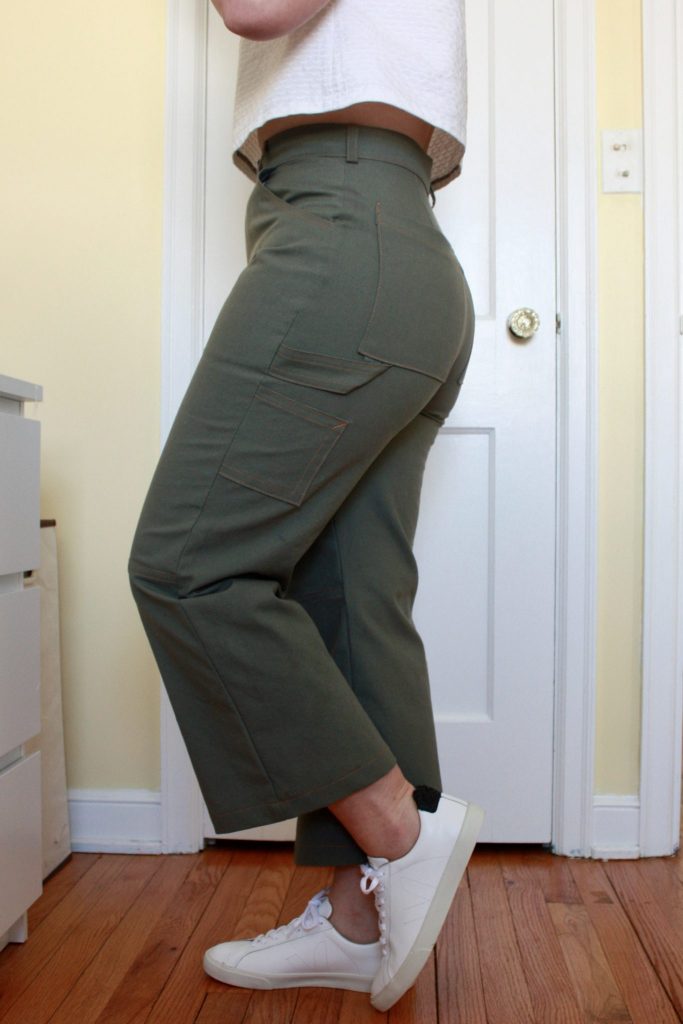
That’s it! Once you get all those special pieces put into place, you can finish up your carpenter pants following the pattern’s instructions. One more thing to note: I cut the cropped length of the Lander Pants, but I only took up 1.5″ of hem instead of the suggested 3″. I am 5’7″ and the pattern was drafted for someone who is around 5’5″, so that makes sense. Otherwise they would be shorter than my liking.
I really love these pants and I think I could use these Carpenter Add-On pieces to other pants patterns too. They work fabulously with the Landers, but I could see these add-ons used with the Philippa Pants (Anna Allen) or the Morgan Jeans (Closet Case Patterns) too. Please let me know if you end up using these add-ons for one of your projects. I would love, love, love to see what you do with them!
Thank you for the in-depth tutorial! It’s really inspiring me to look at RTW again and start taking some elements I like to incorporate into my handmades.
Thanks Bettina – there’s a massive amount of inspiration out there and it’s definitely freeing to be able to DIY!
This is amazing! I love these!!
And my measurements are about an inch away from yours (30″ waist, 43″ hips), so it is neat to see how these fit you!
Thanks Amie! Yes to our waist to hip ratios! It’s one of the biggest reasons why we sew our own, right?!
Thank you so much. That cargo pocket is just what wanted to put on the last pair of jeans I made to store the phone.
I’m so glad to hear this! Rock those pockets!
Love these cargo/carpenter pants!
Thanks, Kirsten! I do toooo!